Showing posts with label Dress. Show all posts

Feb 12, 2016

Valentine Dress

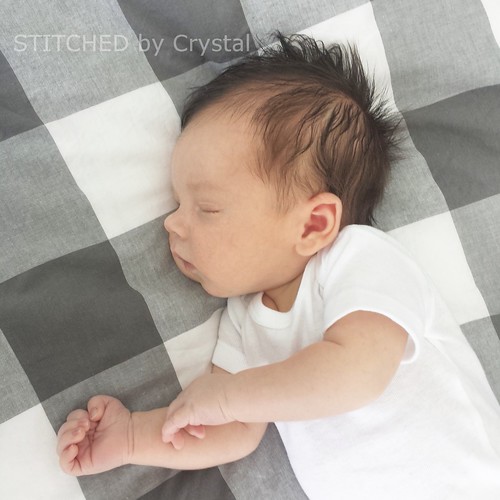
There is a new little guy around here and he is pretty cute!


Baby J was born three weeks ago and we are all totally in love with him! At 7 pounds 12 ounces, he is the smallest (and hairiest) of all my babies and he is so snuggly!

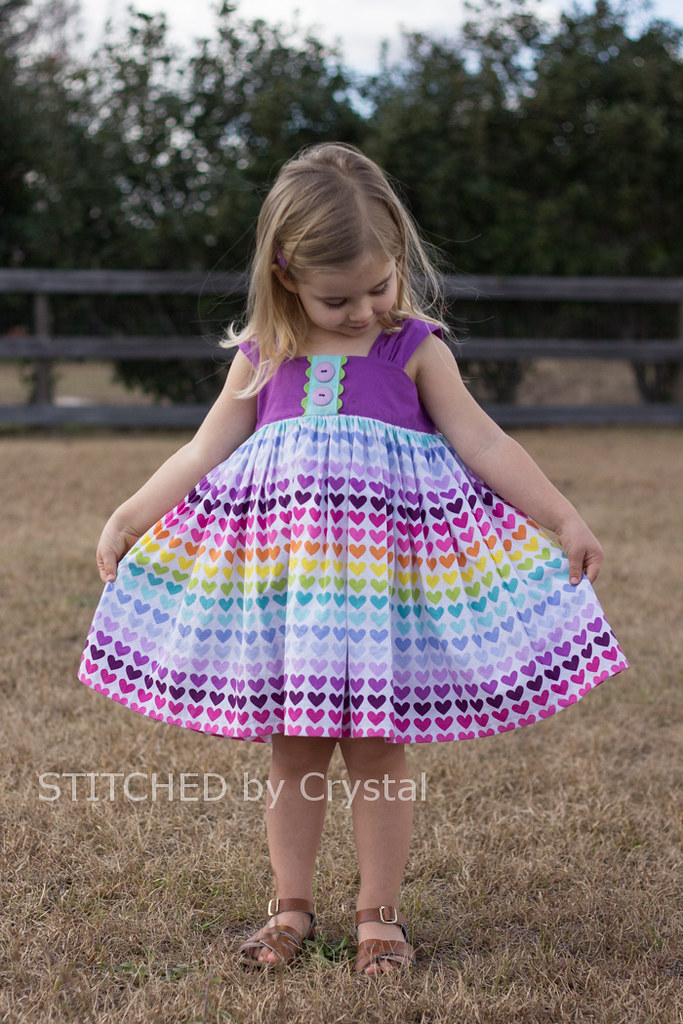
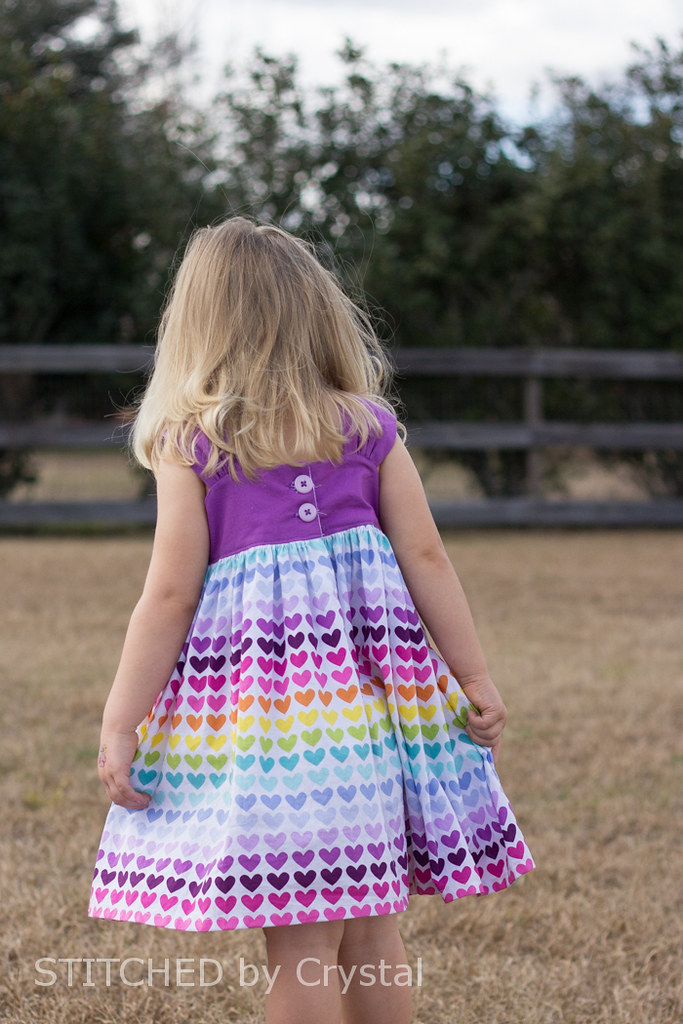
He has been taking up most of my time lately, but I did manage to squeeze in some sewing at the request of this sweet girl who needed a new dress for valentines day!


We have some springy weather around here and I can't wait to sew up some more dresses for this girl.  Now if only the grass would hurry up and turn a springy green too!


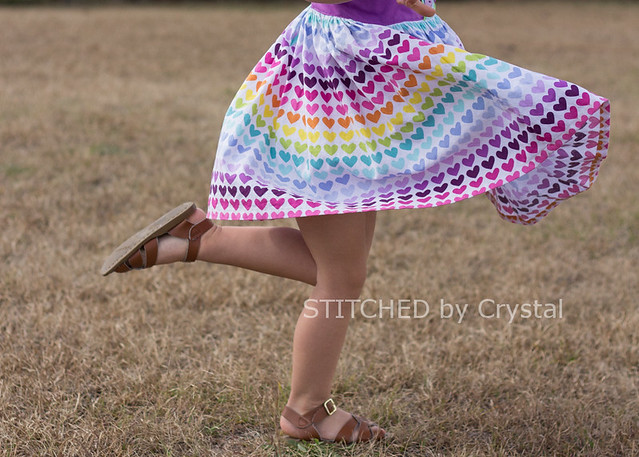
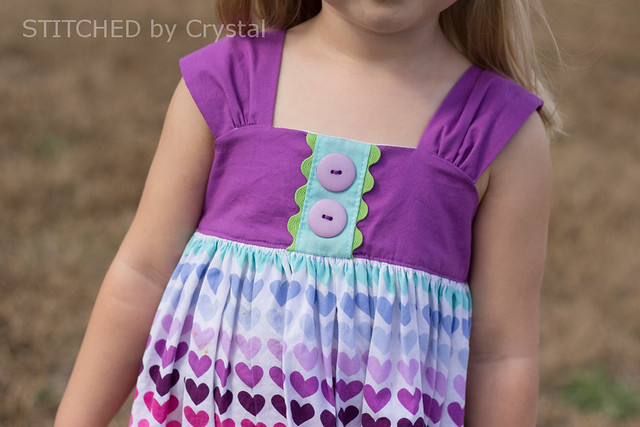
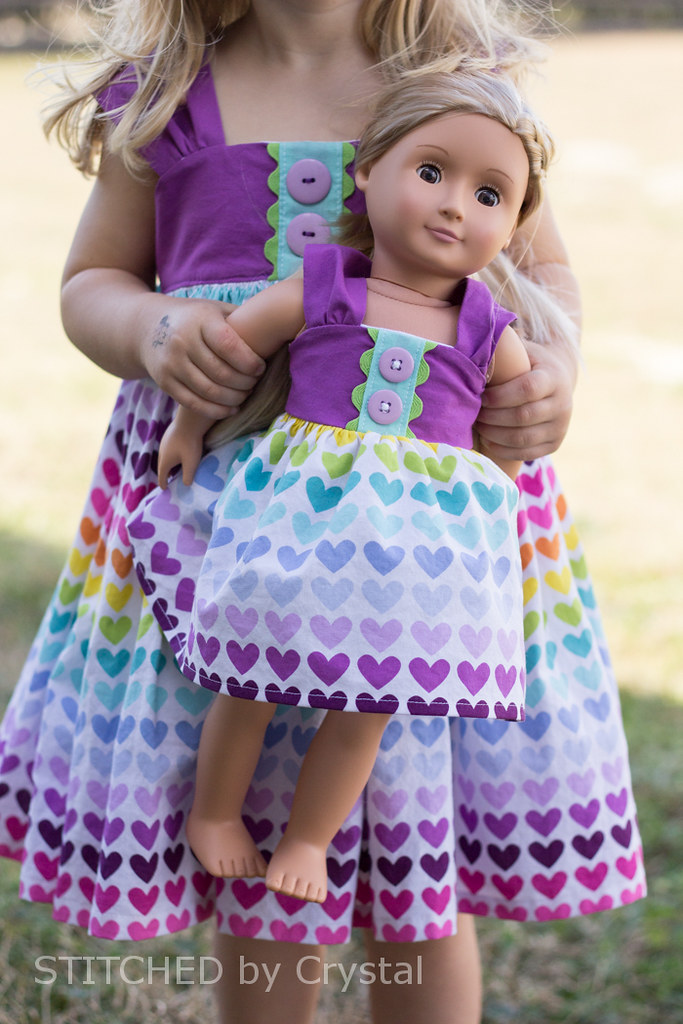
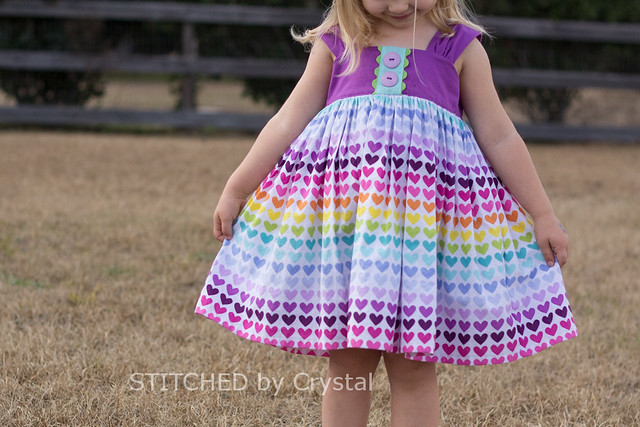
Em asked to go to the fabric store and she chose the fabrics and buttons for this dress, I love her choices!  I used the Emory Dress pattern by Izzy and Ivy, the same pattern I used for her sun dress last year with is still one of her favorites, just a bit too short now!


The pattern has button loops on the back, but I am not a big fan of button loops.  I find them tedious to sew and they never look quite right when I am done.  So I switched them out for regular button holes.


I drafted a pattern to make a matching dress for her dolly too, she got this doll for Christmas and loves when they can match!


My sewing time is a bit sparse while I figure out our new normal with three kiddos...and most of my free time is spent snuggle my new little guy!  But hopefully you will see me around here a bit more soon!


Oct 22, 2015

Sweet Lily Chambray Dress

Have you ever had a sewing project that looked AH-mazing in your head...but not so great in reality.  This was almost one of those projects for me!  As soon as I saw the Sweet Lilly dress pattern by Bella Sunshine Designs, I knew I wanted to make one in chambray.  I sewed up the bodice with some cute little yellow buttons (and oh man it looked great!) then I added the skirt and....hated it!  So I threw it aside and went to bed, I don't know, but maybe I had just been staring at it too long.  The next day I switched out the yellow buttons for some wooden ones, gave the dress a good press, put it on my little one with the boots from her Halloween costume, and I LOVE it!


The Sweet Lilly dress features a pintucked bodice, I am a sucker for any pattern with pintucks!  It's got elbow length sleeves and some sweet ruffles on the sleeves, bodice, and hemline.


I had bought some chambray months ago with plans to make something for myself, but had not gotten around to it yet.  It is this chambray (affiliate link), and I really love it, I think I will be ordering some more to make that something for myself!  It is lightweight and has a really pretty drape to it.


I will warn you, this pattern is not a quick sew.  There are lots of pieces to cut, both fabric and interfacing, plus all that ruffling (and I really hate ruffling!)  It has some really nice finishing techniques, but they take extra time too.  All the seams on the sleeve cuffs and ruffles are encased and the bodice is lined and hand finished at the waist and sleeves.


This little dress will be perfect for fall!  It looks so cute with her boots and will be cute layered with tights or leggings as the weather cools off...if it ever cools off!


Aug 4, 2015

T-shirt dress tutorial

I love simple, comfortable dresses for my girl for summertime.  T-shirt dresses are great...knit on top, woven on the bottom, she can easily dress her self and be comfortable for hot summer play all day long!  

Today I am sharing a tutorial for sewing a T-shirt dress over on Pattern Revolution.  I used the Fiddlehead pattern by Lilygiggle of my t-shirt, it is a really cute flutter sleeved to that can be made sleeveless or with sleeves (so it would be great in the fall/winter too).  But you can use this same technique with any knit shirt pattern, or even a store bought tee.


The dress is so simple, make a shirt and attach a skirt!  I even provide a chart with some length measurements to take out all the guess work.  


You can check out the full tutorial for making a t-shirt dress over at Pattern Revolution today!


Jul 10, 2015

A Minnie Mouse Dress

On Monday of this week my baby turned THREE!  I guess that means she isn't really a baby anymore, can I still call her a toddler? Or is she officially a preschooler?  It seems crazy that she has turned three already.  Before I became a mom, I remember hearing parents talk about how fast kids grow up...they would say "you blink and they are grown". And now living it I realize how true that is!  I seems like I was just bringing that tiny, dark haired baby home, and now she is a KID!...who has blonde hair, ha!  But at the same time, it feels like she has always been a part of the family.

This Minnie Mouse inspired dress was one of her birthday presents.  This girl is a serious Minnie fan!  Making her a Minnie dress has been on my mind for a while now...ever since she picked out those yellow shoes sometime last year.  And I am so glad I finally did it because she LOVES this dress (and she will probably outgrow those shoes any day now!)


For the dress I used the Alyss dress pattern from issue 7 of One Thimble with just one little modification.  I think it turned out perfectly, it is exactly what I had envisioned in my head!


The dress pattern has some pretty, flared sleeves, but they didn't fit my Minnie vision.  So I gathered the bottom of the sleeve too and added a bias trim to the hem.  Now they are a perfect match to her Minnie doll!  (there is a really great article on adding bias trim in issue 7 of One Thimble too!)


I sized up and made the dress in a size 3 so my petite girl has plenty of growing room, I anticipate lots of Minnie dress up in our house!  There are 2 options in the dress pattern, one has working buttons on the front and a side zip, the other has decorative buttons and a back zip.  I chose the back zip.


The dress sews up great!  But with the zipper, lined bodice, and sleeves, I would say it is best for intermediate seamstresses.


I made a huge bow and hot glued it to a head band so Em and Minnie can match from head to toe!


I think you can tell from the photos how much she loves the dress!  She told me "this is my favorite thing I never had before!"  I think I will call that a win!  Happy birthday, sweet girl!!

Jun 21, 2015

Simple Summer Sundress - 30 Days of Sundresses

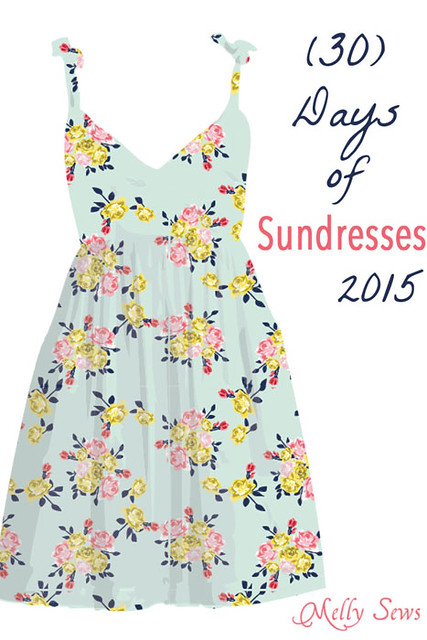
I am so excited to participate in Melly Sews 30 Days of Sundresses!  For the series, I decided to sew a girls sundress and came up with a really simple little dress.  And I have a free pattern in sizes 2-6 to share with you!
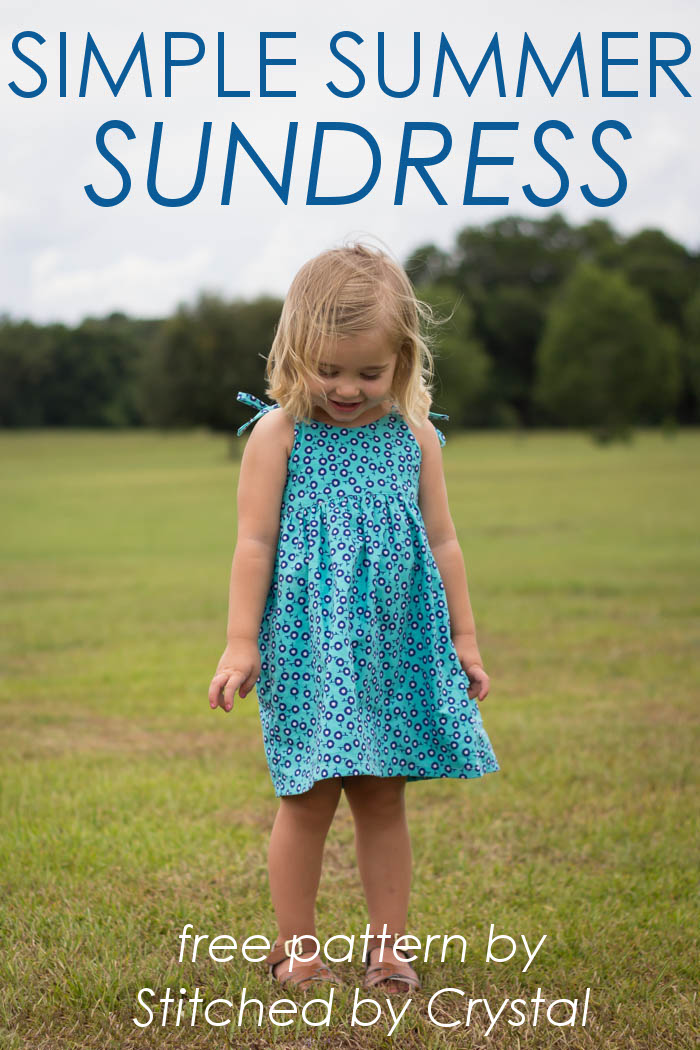


Curious about the 30 days of Sundresses?  Every year, Melissa, of Melly Sews, hosts this incredible series for the entire month of June.  It is 30 days of free sundress patterns and tutorials for both girls and women, 30 DAYS!  She also has some great giveaways going on all month, this week she has a mystery box full of sewing goodies up for grabs, make sure you go enter!


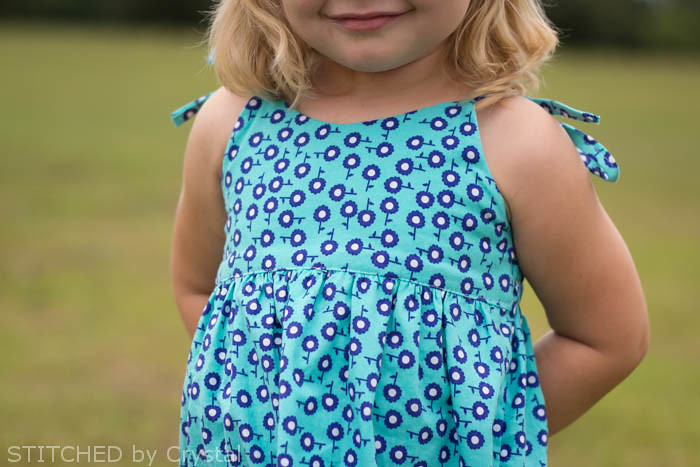
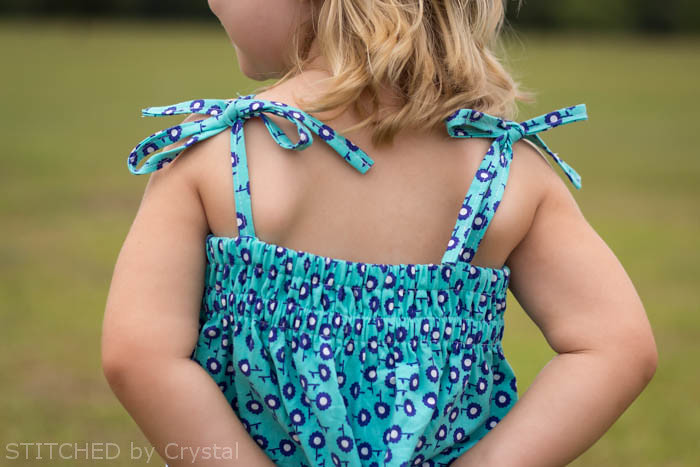
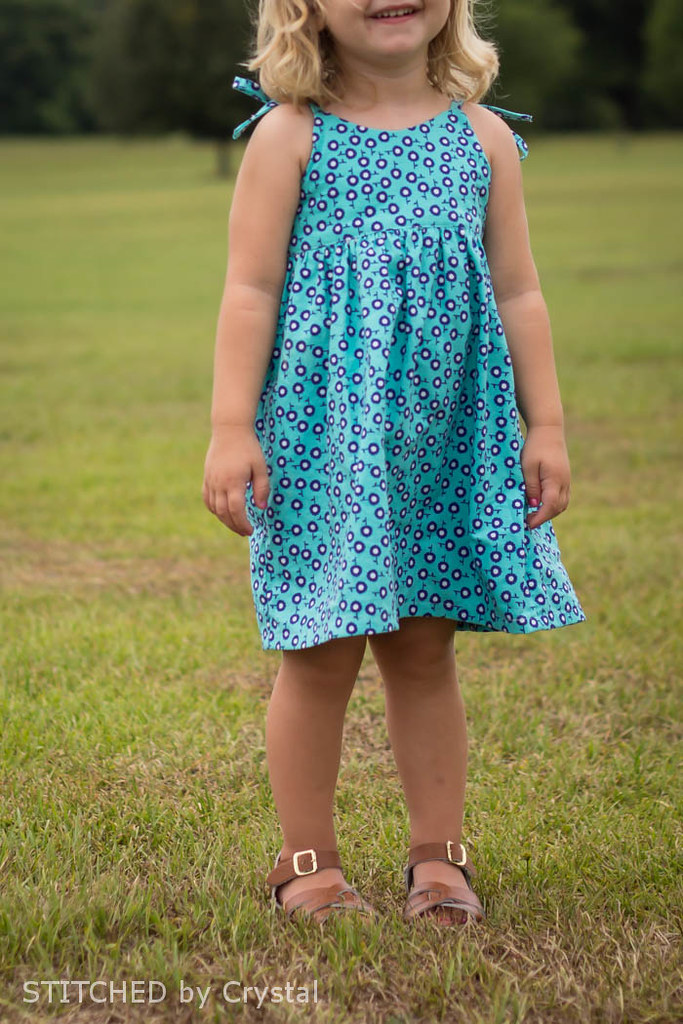
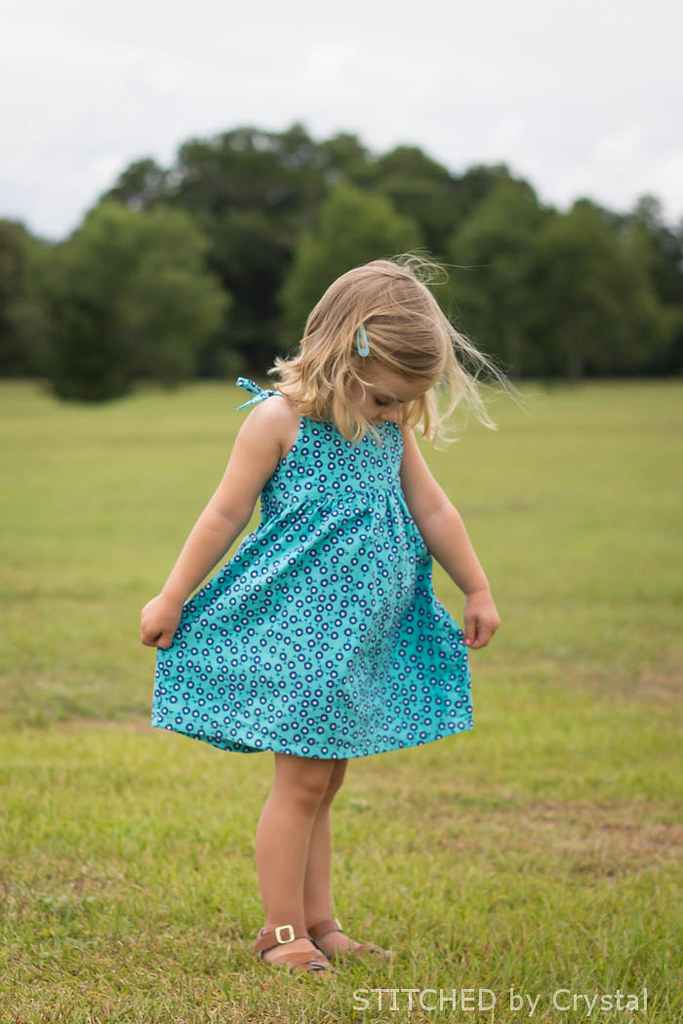
This little dress I am sharing is a really quick, easy sew.  It features a slightly curved V neckline in the front, and an elastic back with straps that tie at the shoulders.


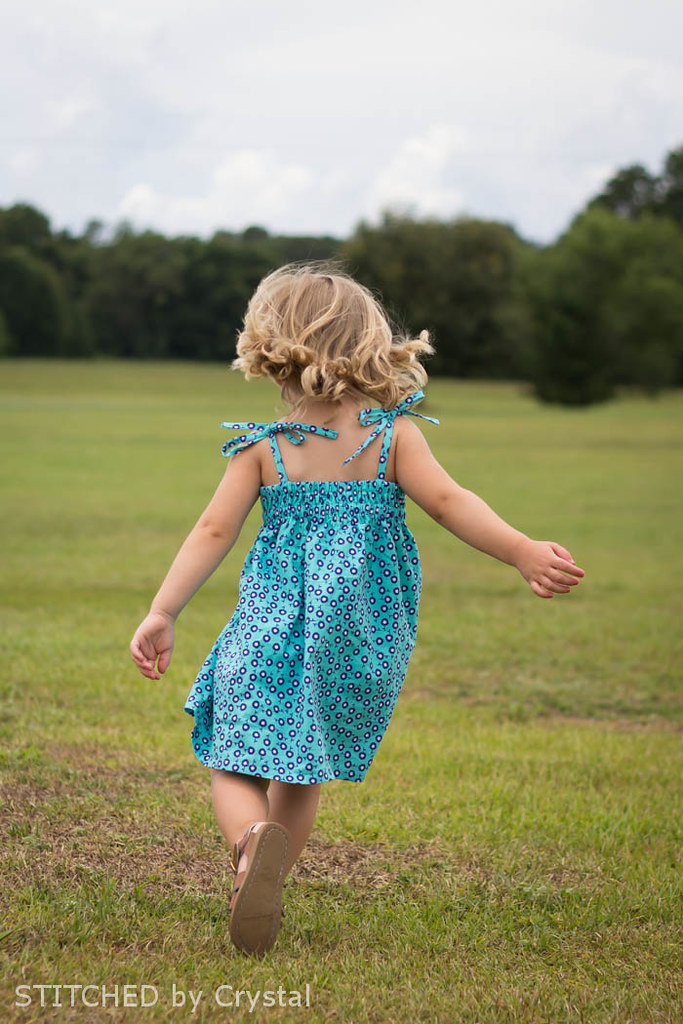
The skirt is not too full and it hits right about the knee.  It is easy to throw on and perfect for summer play!


This dress is a really quick sew and takes just over 1 yard of fabric!  In just a few days, you could have a whole wardrobe of summer dresses for your girl!


Want to make a sundress? Great! Here is how....

You will need:
  • 1.25 yard of fabric.  Anything lightweight works, quilting cottons are great...or try something like voile, seersucker, lined eyelet, or lawn.  
  • 1/4 yard of lining fabric.
  • 1 yard of 1/2" elastic.
  • Basic sewing supplies.
  • The dress pattern that you can download in sizes 2-6 HERE.

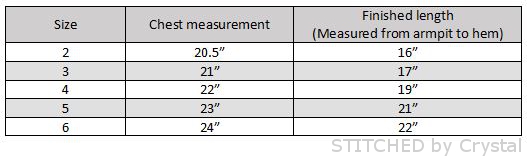
Use the size chart below to determine which size to sew.


 Use your pattern to cut one main bodice piece and one bodice lining piece on the fold.  Then cut the other pieces according to the chart below. (All measurements are in inches and are width x length)


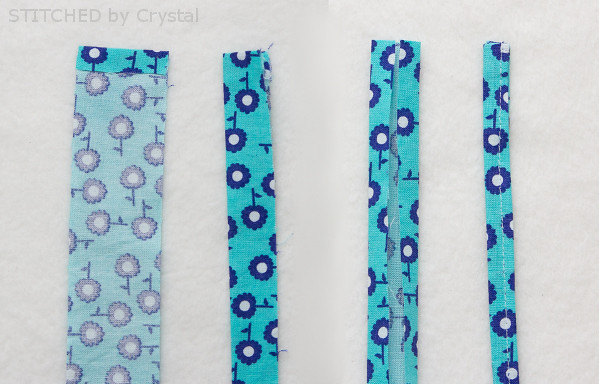
Start by sewing your straps.  First, fold one end down 1/2" towards the wrong side.  Next fold the strap in half wrong sides together and press.  Unfold and then fold the raw edges into the crease.  Refold on the center crease and sew along the edge to create your strap.  Repeat with the other 3 straps.  Place your two back straps aside (the longer ones).


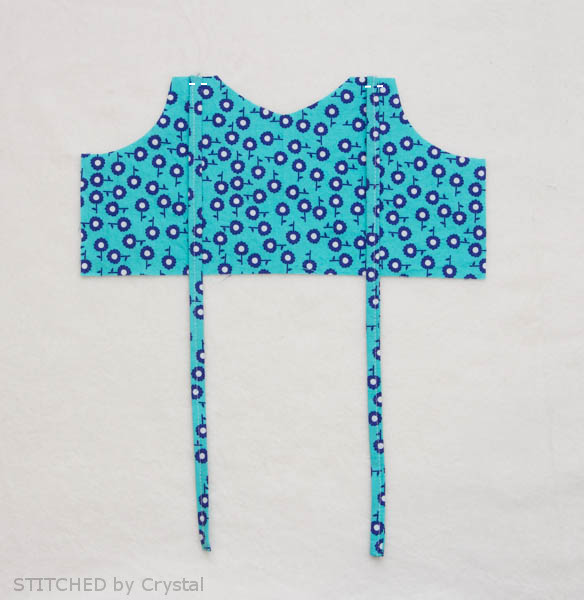
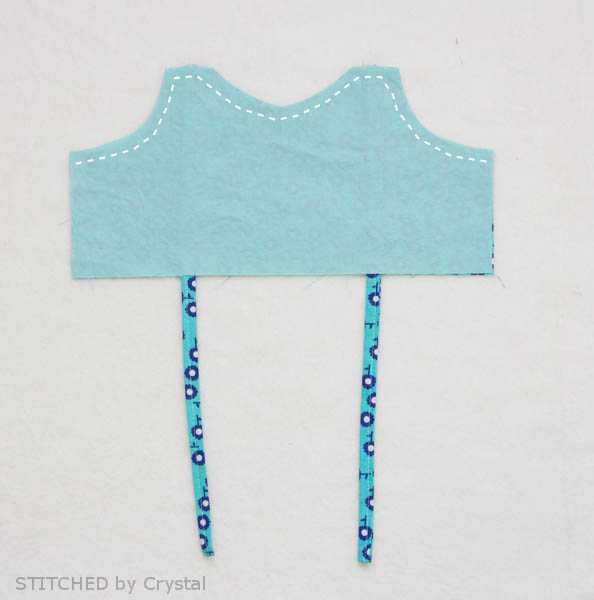
Pin your front straps in place on the right side of your bodice between the strap markings on the pattern piece.  Baste the straps in place.


Place your lining on top of your main bodice (right sides together), the straps should be sandwiched in between.  Sew along the top with a 1/2" seam allowance as shown below.  


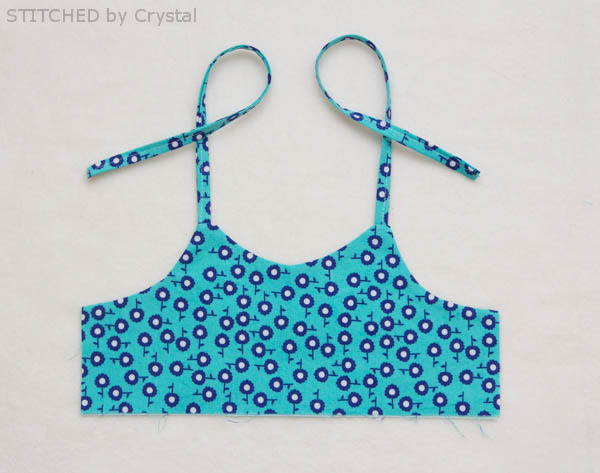
Clip the corners and notch the curves.  Turn the bodice right sides out and press.  


Gather the top edge of your front skirt piece do it is the same width as your bodice.


Move your lining out of the way and and sew the bottom of the main bodice to the gathered skirt, right sides together, with a 1/2" seam allowance.
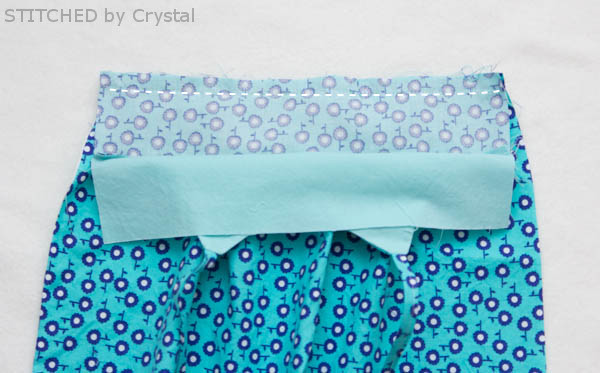


Press the seam towards the bodice.
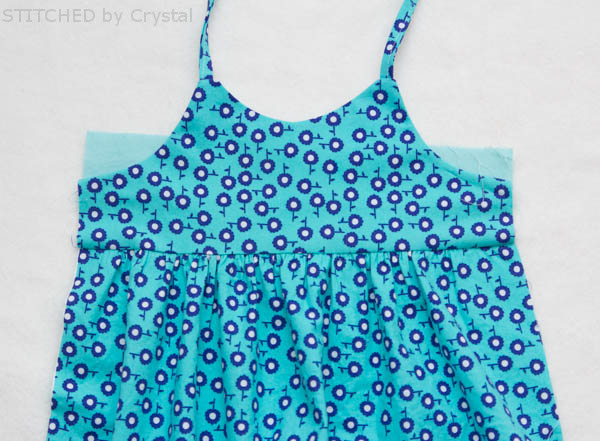


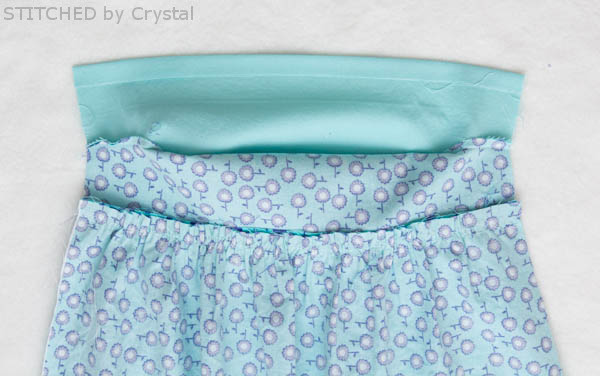
Fold the bottom of the bodice lining up 1/2" towards the wrong side.  Set this dress front aside.


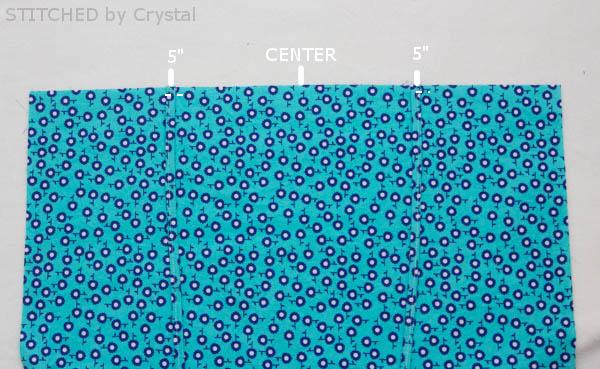
Find the center of your skirt back.  Place your back straps 5" from the center on each side.  Baste the straps in place on the right side of the fabric.


Place the back lining along top of the skirt back, right sides together.  Sew with a 1/2" seam allowance.
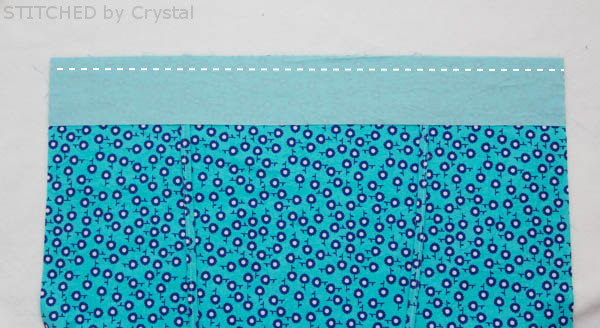


Press the lining up and press the bottom of the lining 1/2" towards the wrong side.
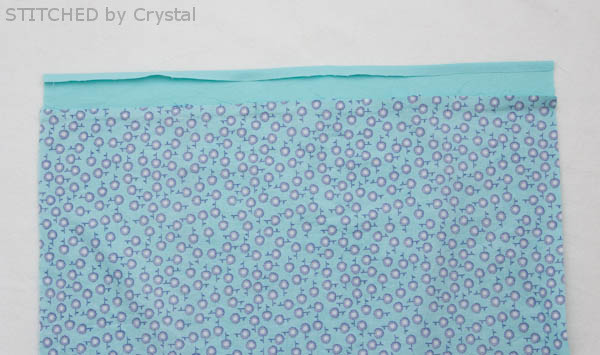


Press the lining down and sew along the folded edge.  Then create 2 channels for your elastic by sewing 5/8" from the line you just sewed and 5/8" from the top edge.
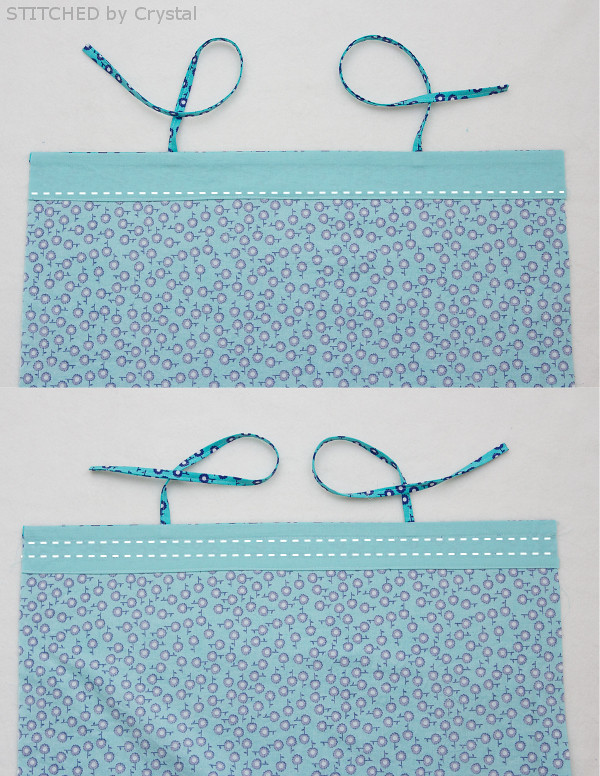


Using a safety pin, guide your elastic through your casings, sewing the ends in place on both sides.


Lift your front bodice lining out of the way and pin your dress front and back together.  The top of the dress back should line up with the top of the main bodice front and the bottom of the back lining should ling up with the front dress seam.  The skirt bottoms should line up.  Fold the front bodice lining down over the top of the dress back, keeping the lining bottom folded up.  Sew the side together with a 1/2" seam allowance, finish the seam with a serger or zig zag stitch.
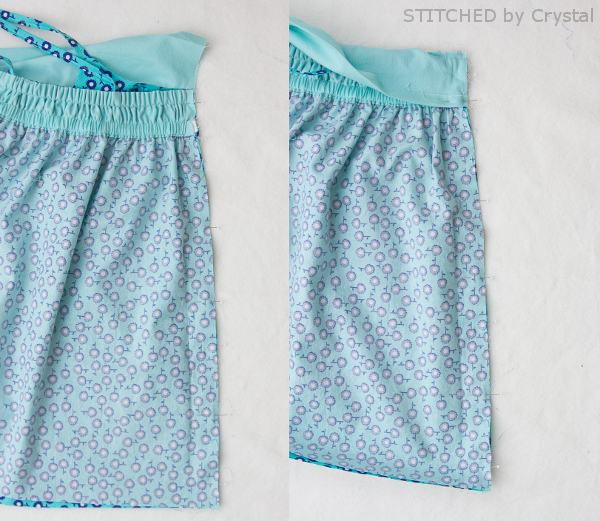


Repeat the previous step to sew the other side of the dress.
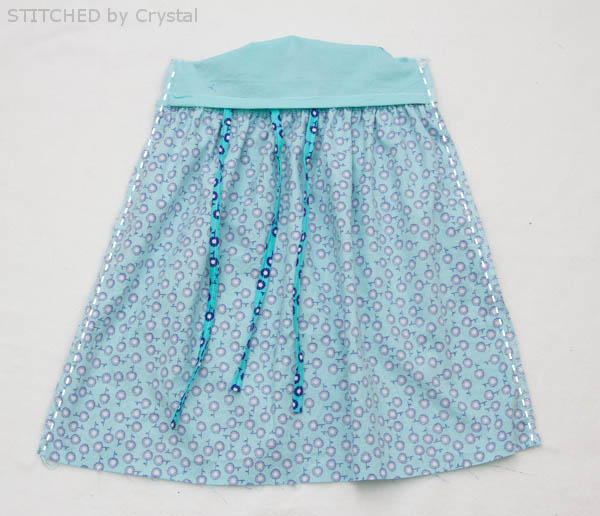


Flip the front bodice right side out.  Stitch the front lining down either by hand or machine.  Hem the dress with a 1" hem allowance.
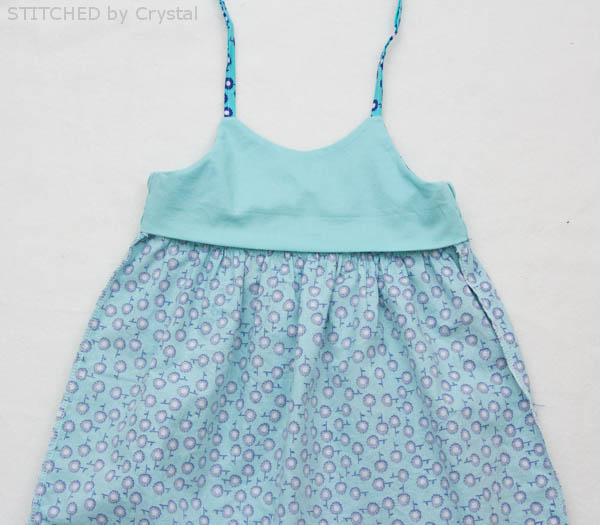


Woohoo!  Your dress is done!  


Thanks for stopping by! And don't forget to swing by Melly Sews to enter the giveaway and check all the great stuff going on for 30 days of sundresses!

LinkWithin

Related Posts Plugin for WordPress, Blogger...
I love reading all of your comments! Please make sure your blogger profile is linked to your email, so I can respond to your questions via email, otherwise I won't be able to email you back!

Please feel free to email me(stitchedbycrystal@gmail.com).

Thank you so much for reading! I If you like what you have seen here make sure become a follower of my blog so you can catch all my updates!!