Showing posts with label Baby. Show all posts

Mar 14, 2016

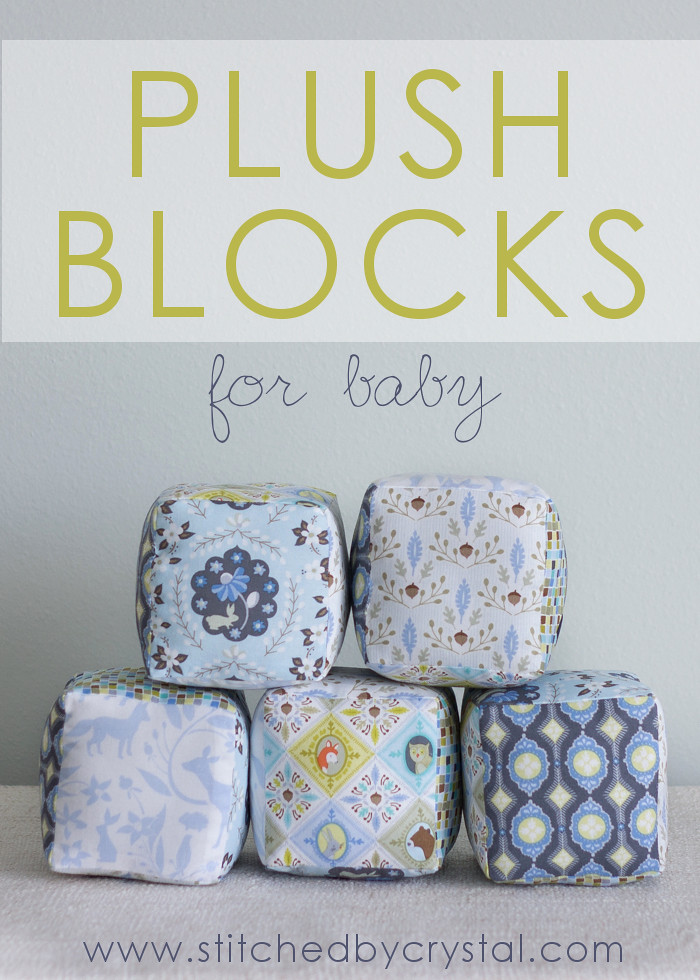
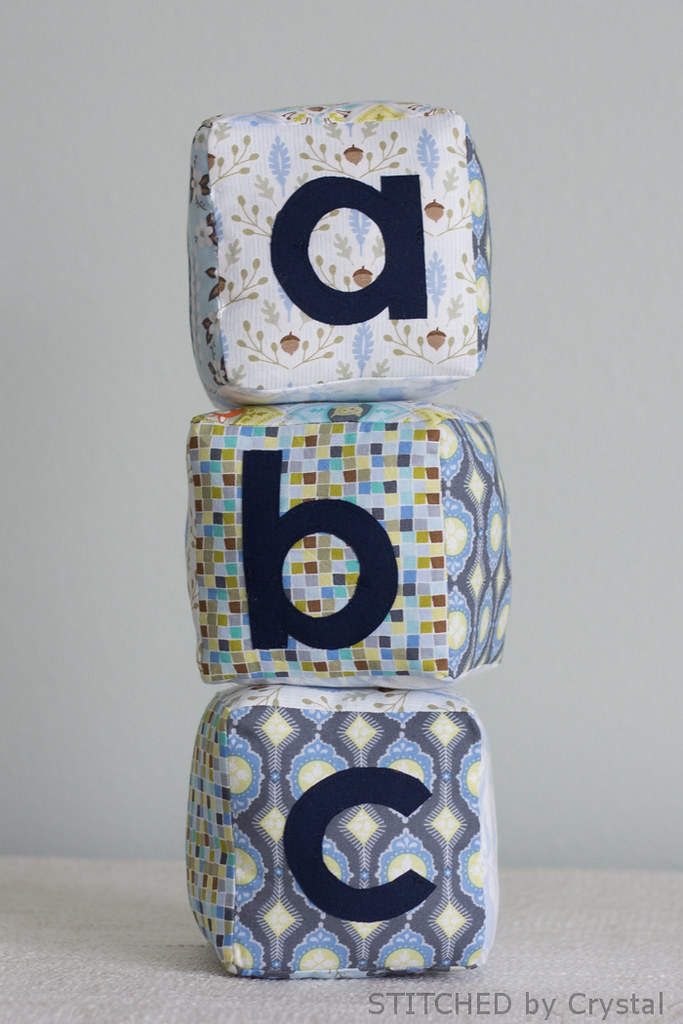
Plush Blocks for Baby

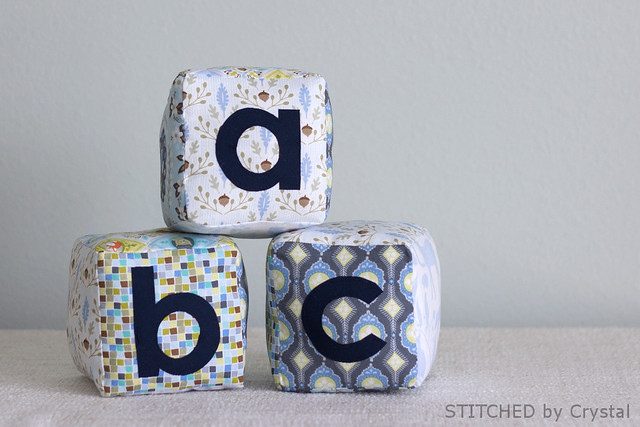
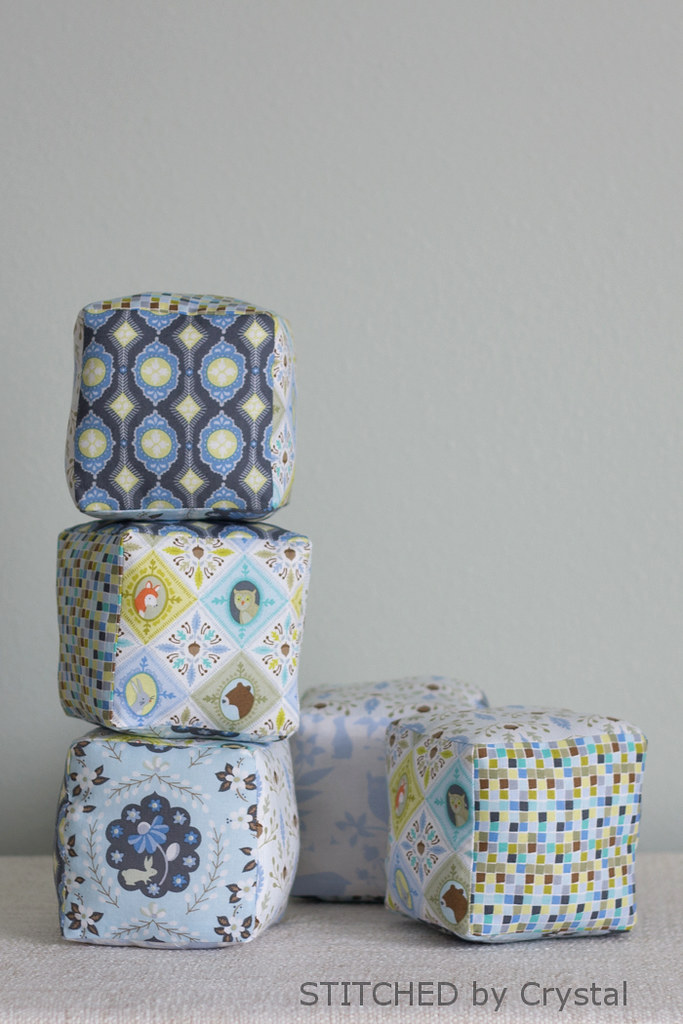
When I received some beautiful fabric in the mail last week I was excited to finally sew some for my new little guy! The Born Wild collection by Ana Davis for Blend Fabrics has both blue and pink color ways featuring adorable woodland creatures.  The blue colorway is perfect for baby boy!  I used all six of the blue prints for these six sided plush blocks.


These soft 4" blocks are great for snuggling, tossing, and stacking.  Baby J is still too small for them, but he will be playing with them in just a few short weeks and they make an adorable nursery decoration in the meantime!
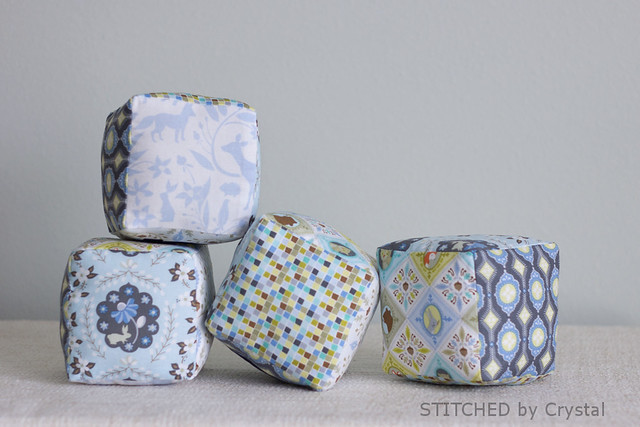

The blocks sew up fast and easy and would make a really fun baby shower gift!
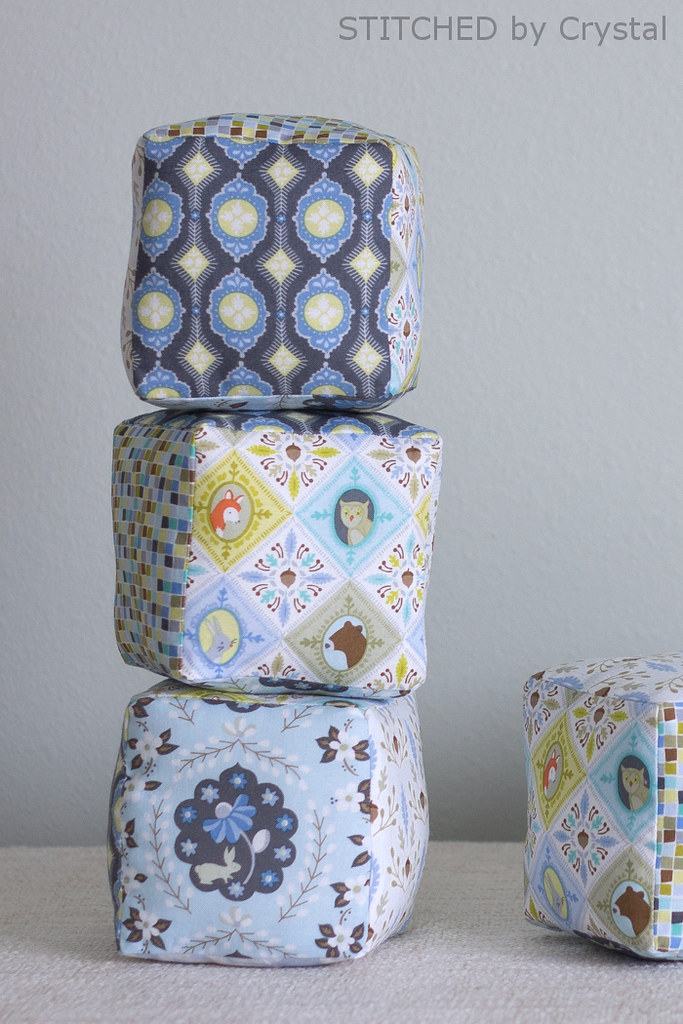

I just love these whimsical woodland creatures on the sides of these blocks!
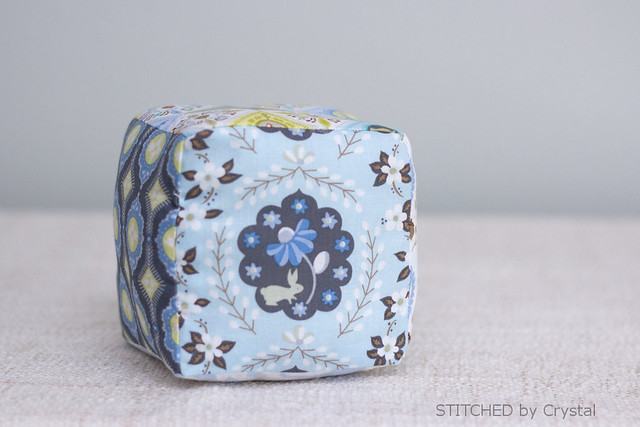

Some letters are a fun addition to the side of the blocks.  You can do a simple "a b c" or maybe spell out your little ones name. 

Want to make some plush blocks? Let me show you how!
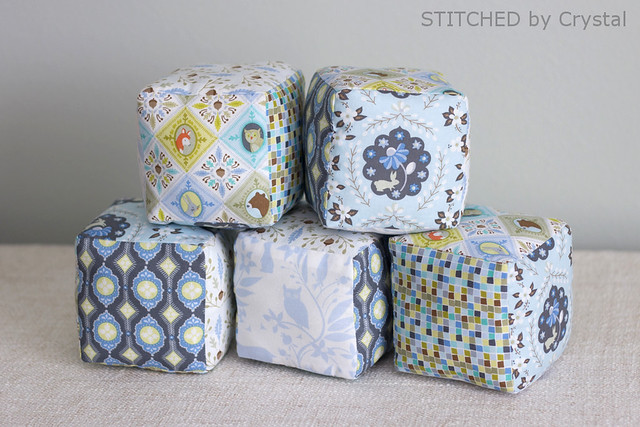

You will need...
If you want to add the letters you will also need...
  • coordinating fabric scraps
  • heat n bond
  • iron
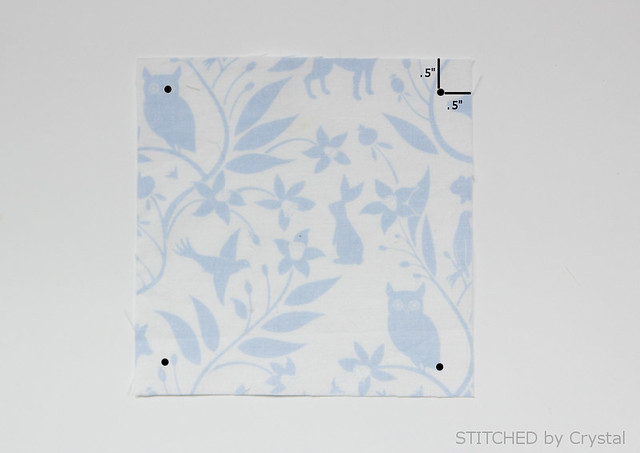
For each block, cut six 5" x 5" squares.  Mark the corners of each square 1/2" from the sides as shown below.

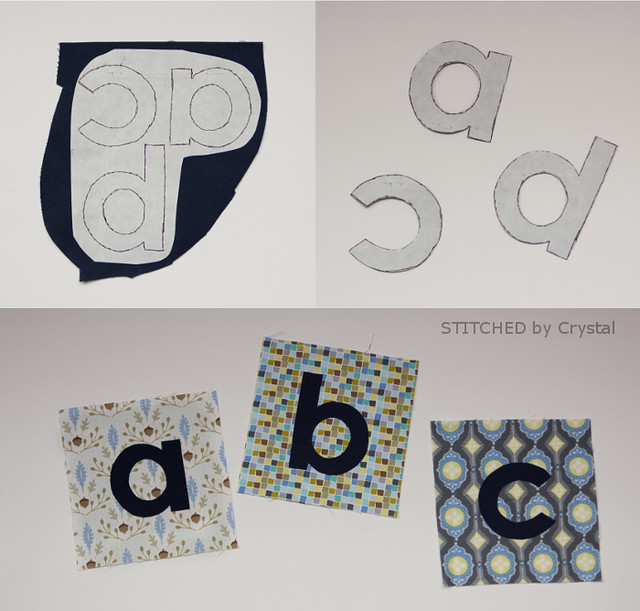
If you want to add letters to your blocks, draw or trace the letters to the paper side of the heat n bond.  The letters need to be backwards when drawn on the heat n bond.  Iron the heat n bond to the back side of the letter fabric.  Cut out the letters.  Remove the paper backing and iron the letters to the middle of the block squares.  sew around the letters with a straight or zig zag stitch.

Place 2 squares right sides together and sew along one side starting and stopping at the corner marks, 1/2" from the edges.  Make sure you back stitch at both ends to prevent your thread from unraveling.
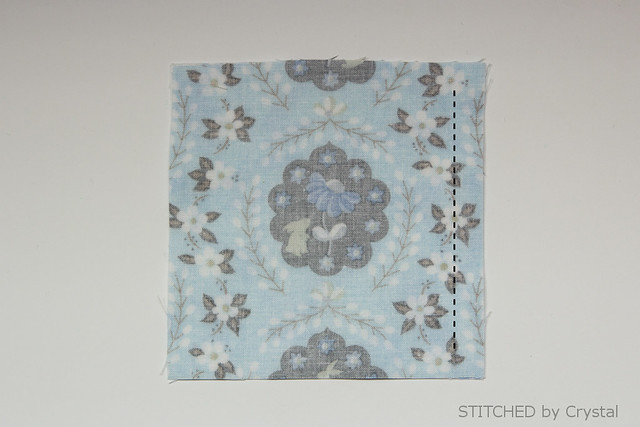


Press the seam open.
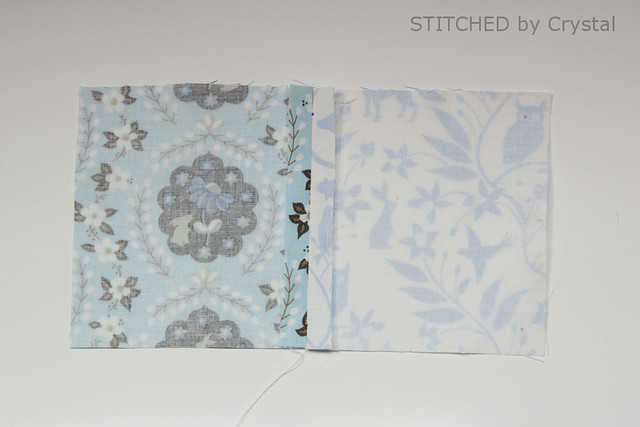

Repeat those steps to sew a row of four squares together.
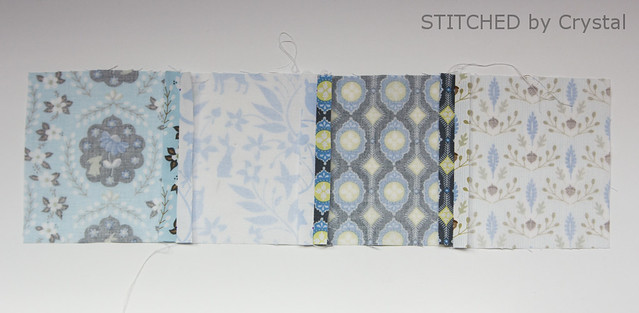

Fold the row to sew the 2 end blocks together.  Sew from the 1/2" marks about 1", leaving a 2" opening in the middle as shown below.  Again make sure you back stitch at the start and end of each stitch.
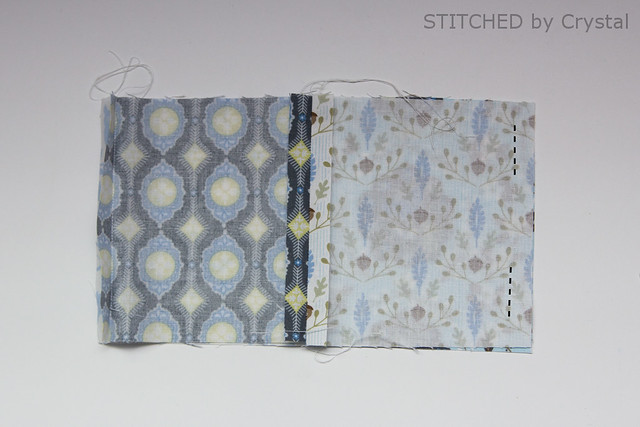

Pin one of the remaining squares to the top, lining up the corner marks with the seams.  sew all the way around the top of the cube.  Repeat to add the final square to the bottom.
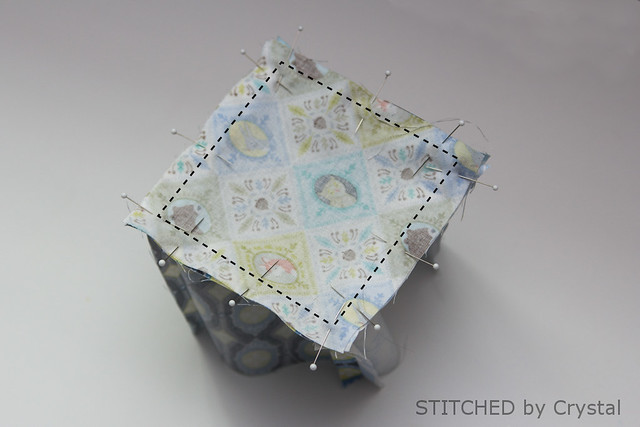

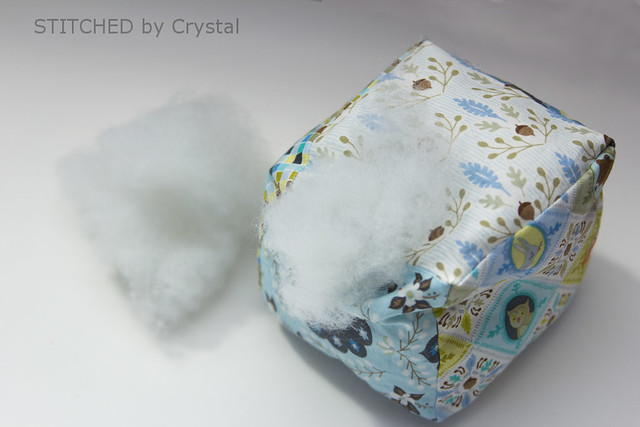
Turn the block right side out through the hole left in the side and stiff the block.

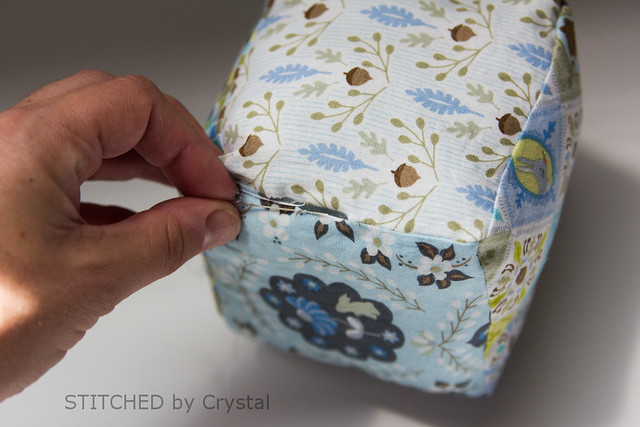
Hand stitch the hole closed with a ladder stitch.

Your blocks are ready for stacking!


May 27, 2015

A Baby Shower for Gracious Threads

I am over at Gracious Threads today for a new baby celebration!  Jess is about to welcome a new baby and is hosting a huge bloggy baby shower!  She has a really great line up of guests that will be sharing baby tutorials through The beginning of July.  Today I am rounding up 5 of my favorite baby tutorials to share for the celebration!


You can check out my post HERE and make sure you check out all the other great posts in the line up!

Apr 14, 2015

Handmade for Baby

A few weeks ago this book showed up in my mailbox!


It is a really cute book with 25 projects to sew or make for baby.  It has projects for nursery decor all the way through projects for baby's first birthday.  And it is filled with inspirational photos to get you excited about sewing for baby.


All the projects have illustrations to walk you through making them, and they have instructions for sewing with a sewing machine or by hand.


As you flip though the book you might recognize this little girl...


I contributed two projects to the book, that party skirt Em is wearing and a chevron baby quilt.  It was so fun to see my sewing in a book!


If you are interested in checking out the book, you can find it on Amazon.


Apr 3, 2014

Tutorial - Patchwork and minky baby blanket

I made this blanket last month and shared it over at icandy handmade as part of their DIY babies series.  In case you missed it over there, I am sharing it here today!


Blankets are my go-to handmade gifts for any baby shower.  A baby can never have too many blankets!  


This blanket is a quick sew with a great finished look.  The blanket measures just over 20" x 20" so it is a great size to roll up and throw in the diaper bag, it also makes a great blanket for the car seat or stroller.


The front of the blanket has a fun patchwork design and the back is a super soft minky that is extra cuddly for baby.  This is a great blanket to use up some fabric scraps, or you can use a charm pack of 5" x 5" squares.


I made this exact same blanket a few years back and it was a gift for a sweet baby boy.  He loved it! In fact, he loved it to pieces....literally.  His mom sent me a photo of his blanket that was all tattered and stained from the past few years of going with him everywhere.  So I sewed up another and mom replaced the new one with the tattered old one when he wasn't looking!


Want to make your own blanket? Here's how!...

Materials:
  • 25 5"x5" squares for the front
  • 2/3 yard of minky for the back
  • Thread
  • LOTS of pins
  • Sewing machine

Place two squares right sides together and sew along one side with a ¼” seam allowance.  Continue adding squares to the row until you have a row of 5 squares.


Press the seams open. 


Repeat with your other squares to make 5 rows of 5 squares each.


Place two rows right sides together, line up the seams and pin in place.  Sew them with a ¼” seam allowance.


Continue adding rows until all 5 rows are sewn together, press the seams open.


Carefully cut your minky so it is the same size at your patchwork top.  Place your blanket top and minky right sides together and pin around the edges.  Use lots of pins to prevent the minky from slipping as you sew.


Sew around the edge with ¼” seam allowance, leaving a small opening about 2”-3” on one side.  A walking foot is helpful for sewing the two layers together, if you don’t have a walking foot, don’t worry!  Just take your time and sew slowly to make sure the fabrics stay lined up. 


Clip the corners close to the seam to reduce the bulk.


Turn your blanket right side out through the hole you left.  Press the blanket on the fabric side.  Tuck the raw edge of the hole in and pin in place.


Top stitch around the blanket close to the edge making sure to sew the opening closed.  Again, I find a walking foot helpful for this step, if you don't have one just take your time.


I added an extra row of topstitching about 3/8” from my first row. 


Now you can stop here, or you can quilt  along the seams of the patchwork if you would like.  
Then fold it up and it is ready for gifting!


This post is linked over at Make it & Love it

Nov 20, 2013

Tutorial - Rainbow Baby Quilt


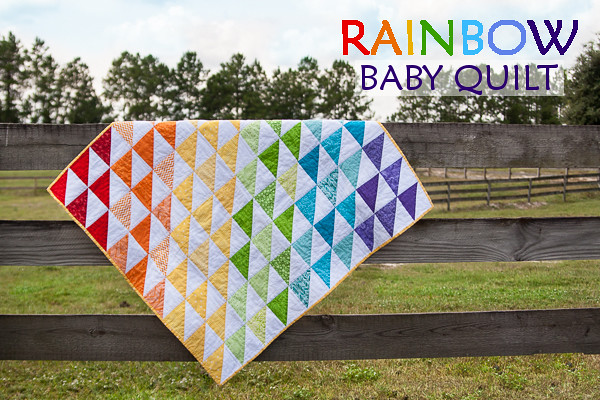
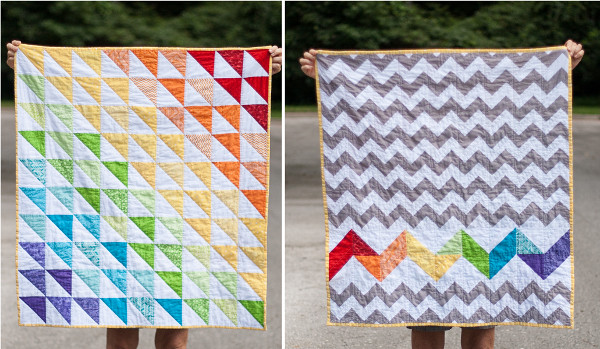
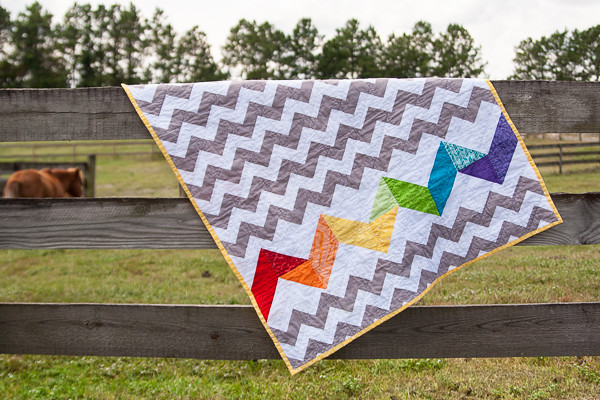
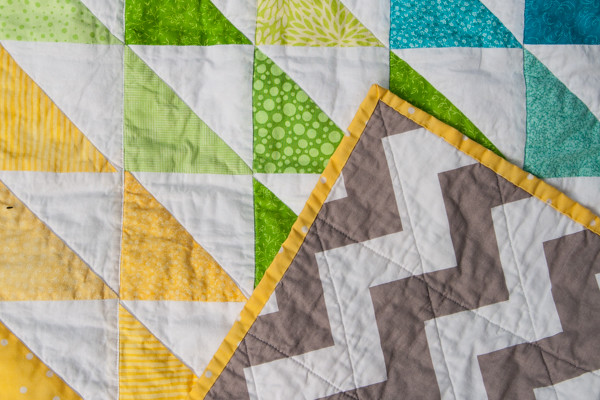
I LOVE how this quilt turned out!  It may be my favorite of all the quilts I have made!  The rainbow colors on the front are so cheerful and could work for either a boy or a girl.  I chose a grey chevron for the back which is a bit unexpected with all the color on the front, and used some leftover squares from the front to make a rainbow chevron for the back.


This quilt would be a great project for a beginner, it is easy to make and the end result is stunning.  I know some people are a bit intimidated by the idea of making a quilt, but trust me, if you can sew a straight line, you can make this quilt! 


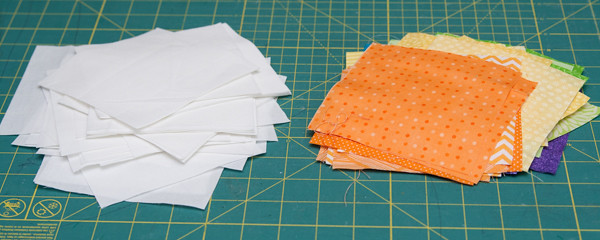
For the front of the quilt and the chevron on the back you will need some 5” x 5” squares.  The easiest way to cut squares of fabric is with a rotary cutter, a self healing mat, and a quilting square.  The number of squares of each color you will need is listed below:

                White: 56
                Red: 5
                Orange: 9
                Yellow: 14
                Green: 14
                Blue: 9
                Purple: 5

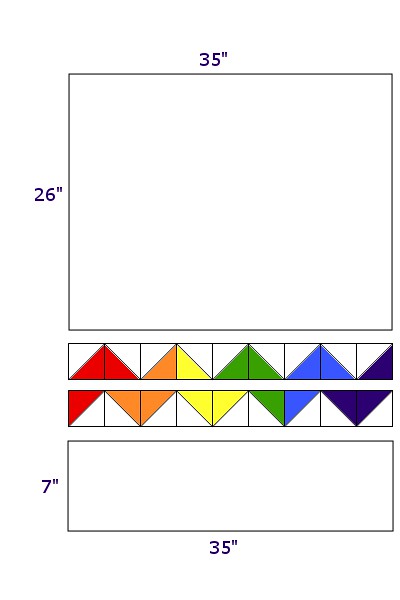
You will also need two rectangle for the back, one that is 35” x 7” and one that is 35” x 26”, and a piece of quilt batting about 36” x 40”.


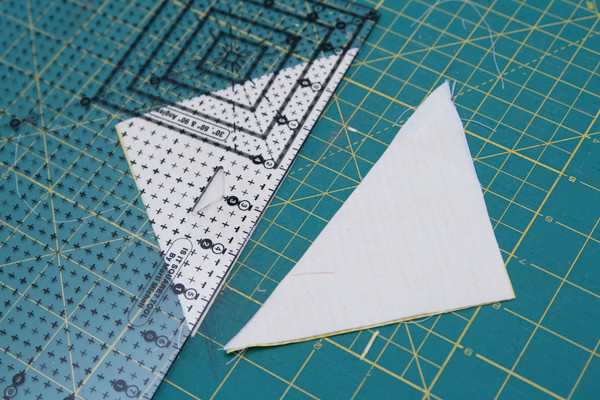
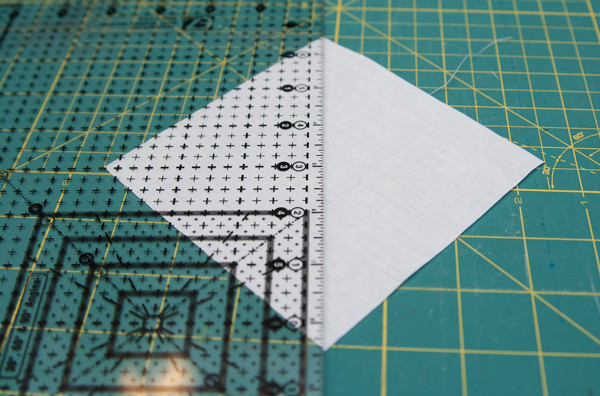
Once you have all your squares cut, draw a diagonal line across all of your white squares.


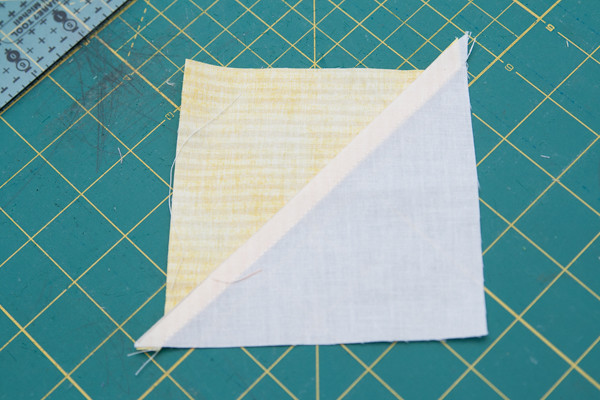
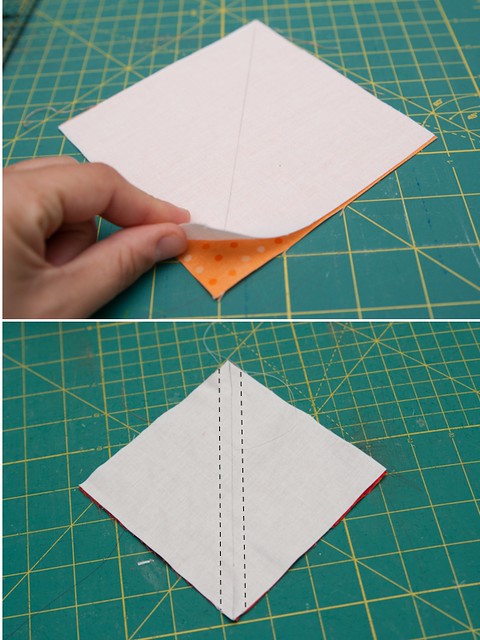
Lay one white square on top of a color square with right sides together.  Sew on both sides of the line you drew, ¼” from the line.  Repeat with all your squares.


Cut along the line between the 2 seams so you end up with 2 squares.


Press the seam away from the white side. Repeat with all the squares.


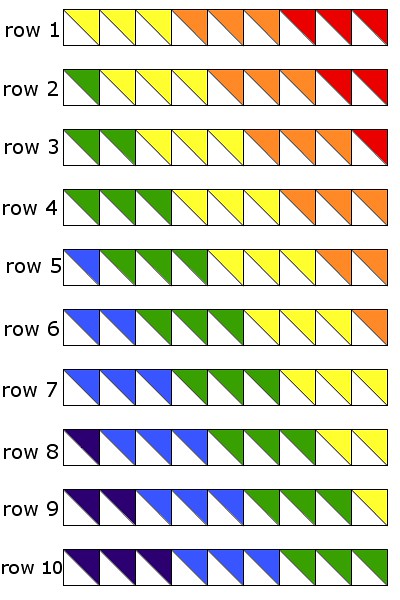
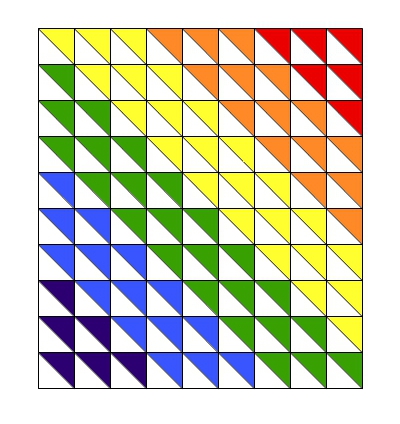
Next you will sew the squares into 10 rows of 9 squares.  To sew the squares together, place 2 squares right sides together with the color side of one square lined up with the white side of the other.  Sew along the side; continue adding squares until all nine are sewn in a row.  Press the seams open.  Refer to the drawing below for the color order of each row. 


Once you have all the squares sewn into rows, sew the rows together.  Press the seams to one side.


Take the remaining squares and line them up to create the chevron pattern using three squares of each color.  Sew them into two rows like the ones shown in the drawing below.  Then sew the two rows together.  Sew your large rectangles for the back on either side of the chevron.


Next you will sandwich the batting between the 2 quilt layers.   I like to use a basting spray to hold everything in place while I quilt. You can find basting sprays in the quilting section of any fabric store.

Lay your quilt top out face down on the floor.  Spray the back of it with a basting spray.  Spread the quilt batting over the quilt top.  Spray more quilt basting spray on the batting then spread the quilt back face up over the batting. 

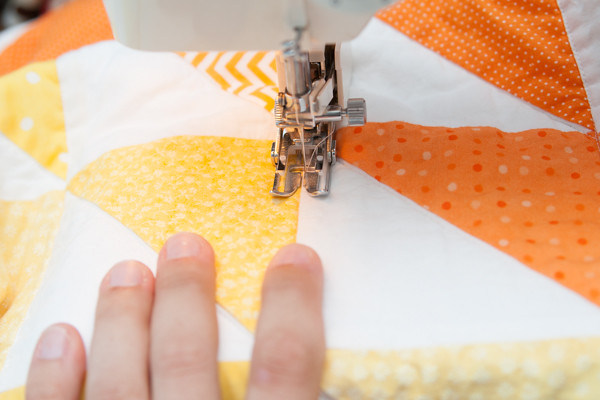
Quilt all three layers together by sewing straight lines along the vertical and diagonal seams of the quilt.  I find that a walking foot is really helpful for this step, it helps move all the fabric under your sewing machine foot. 

Find more tips on quilting HERE


After you finish quilting, bind the edges of the quilt.  I used a double fold binding that is machine sewn to the front and hand stitched to the back.  You can find more tips on quilt binding HERE.

LinkWithin

Related Posts Plugin for WordPress, Blogger...
I love reading all of your comments! Please make sure your blogger profile is linked to your email, so I can respond to your questions via email, otherwise I won't be able to email you back!

Please feel free to email me(stitchedbycrystal@gmail.com).

Thank you so much for reading! I If you like what you have seen here make sure become a follower of my blog so you can catch all my updates!!