Showing posts with label bag. Show all posts

Apr 3, 2015

Pineapple Backpack Tutorial for Make it-Love it

It has been a while since I have guest posted over at Make It - Love it, But I am really excited to be back over there today with a fun tutorial!  If you didn't get enough fun fruity bags from my post a few weeks ago make sure you check this out!  I am sharing a fruity backpack inspired by my favorite fruit...the pineapple!


Super fun, right?!  Make sure you head over and check it out!!


Mar 19, 2015

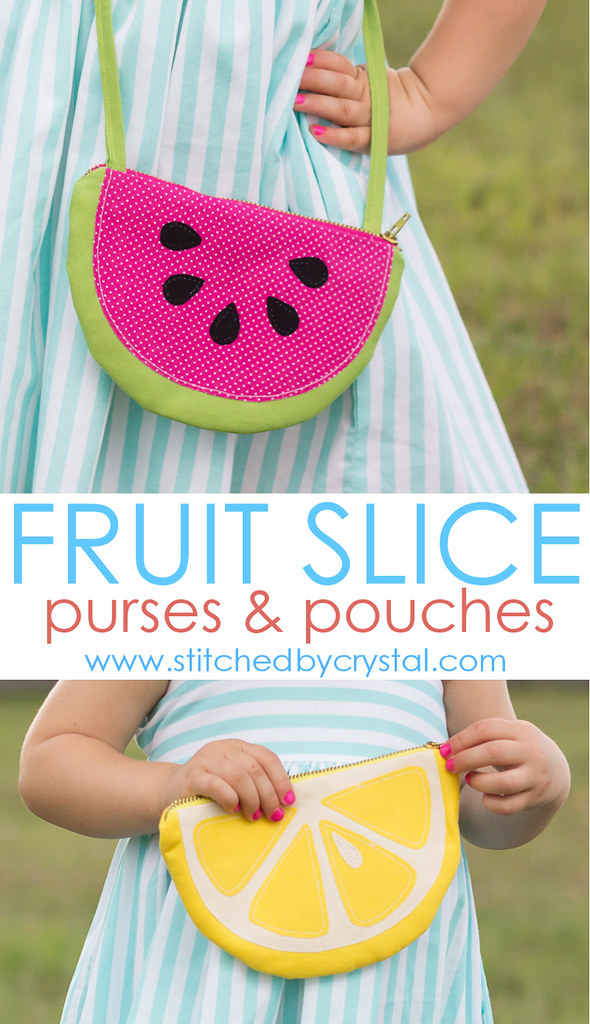
Tutorial - Fruit Slice Purses and Pouches

Is winter over where you are? Or are you in the southern hemisphere, just gearing up for the cold?  Here it has been feeling like summer and I couldn't be happier about it!

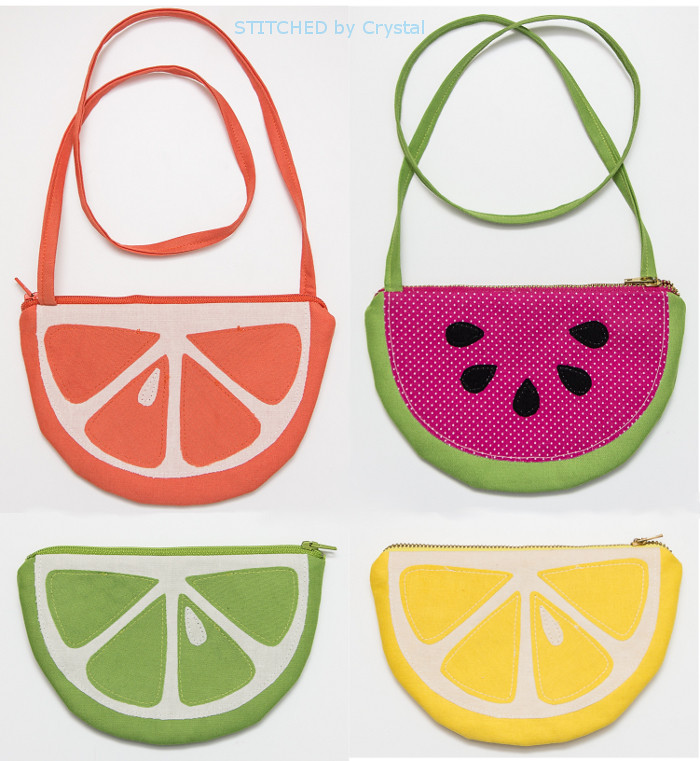
Today I have a really fun project to help you gear up for warmer weather...or to help kick those winter blues!  I have been busy sewing up some cute little coin pouches and purses for my kiddos and I have a pattern and tutorial to share with you!


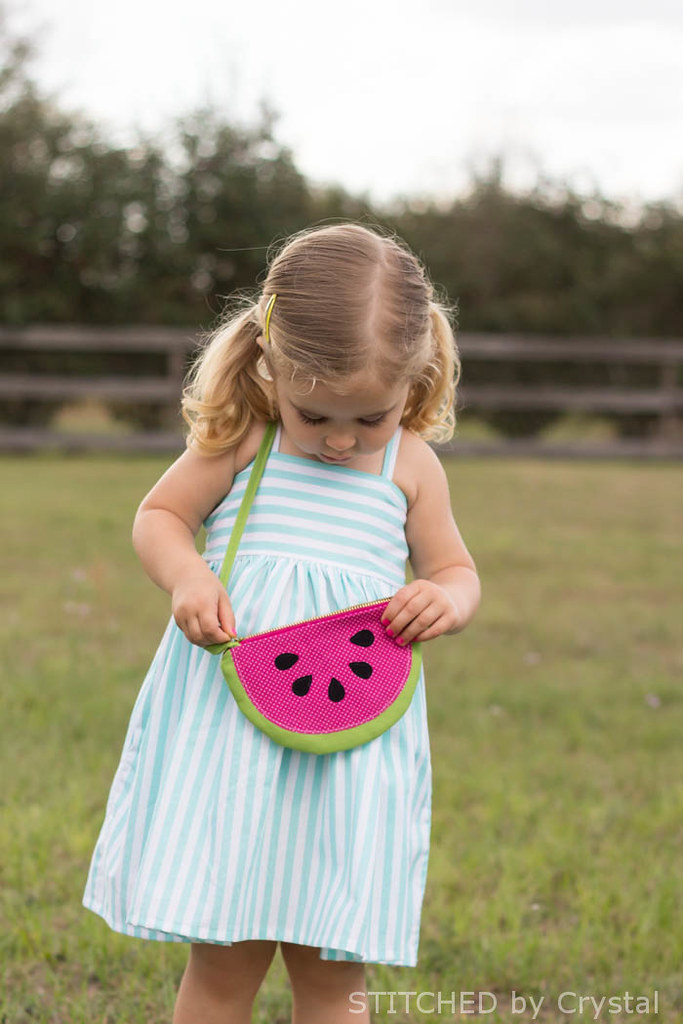
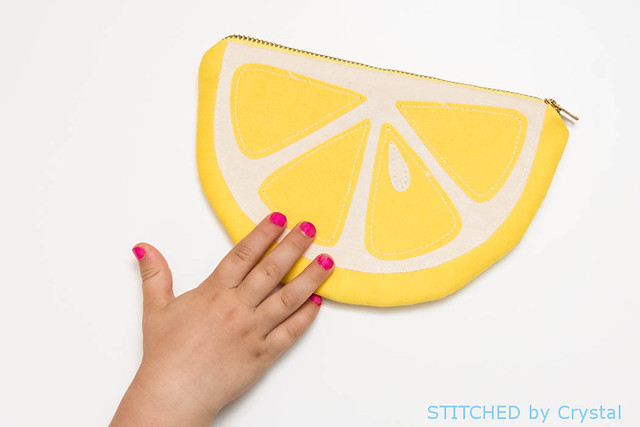
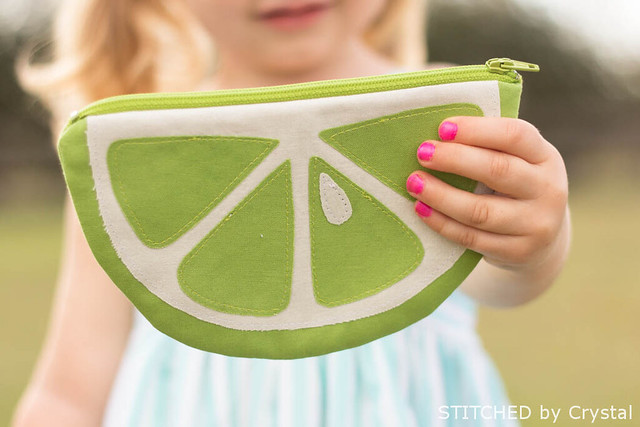
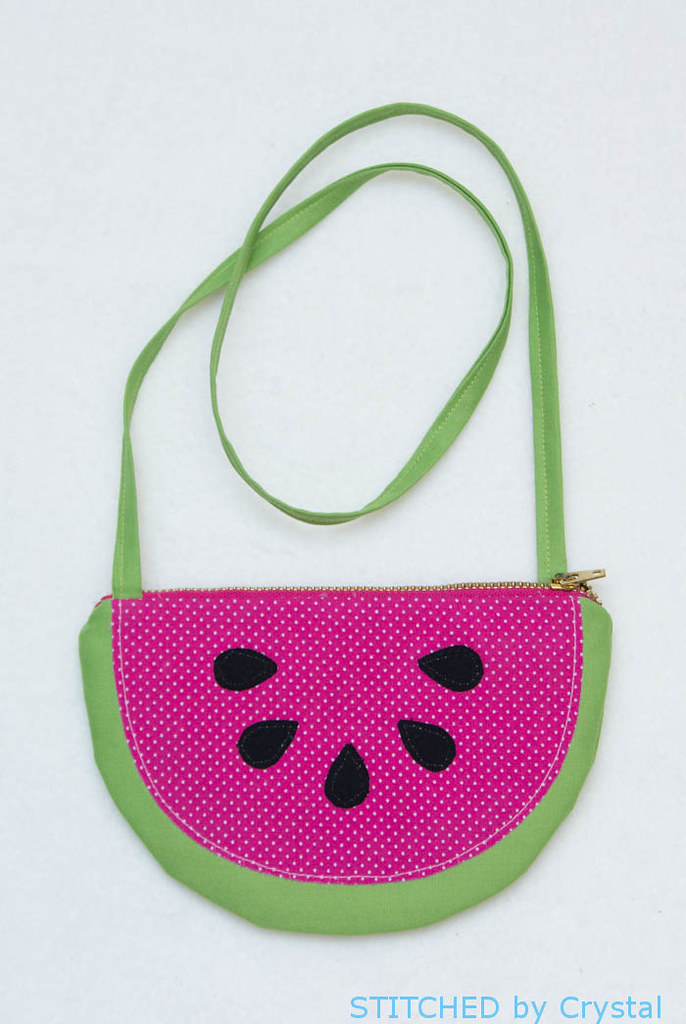
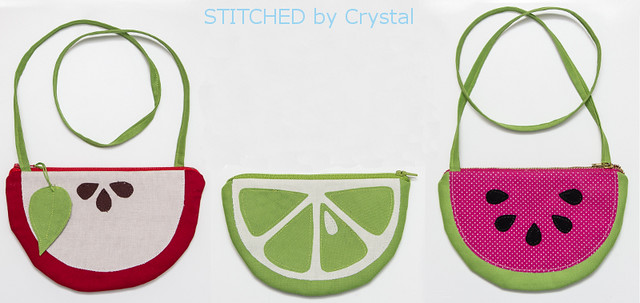
I thought that it might be fun to sew up a lemon clutch.  And it was.  Then I thought a lime one would be fun too, and then maybe a watermelon purse...soon I had 6 fun little fruit inspired purses.


These little pouches are a quick sew and don't take much fabric at all.  I raided my scrap bins and was able to find everything I needed to make these.  If you have never sewn a zippered pouch before, it is really easy, and fun...you will want to make six of them too!  And any little girl in your life will love a fruity purse, or sew one up for you!


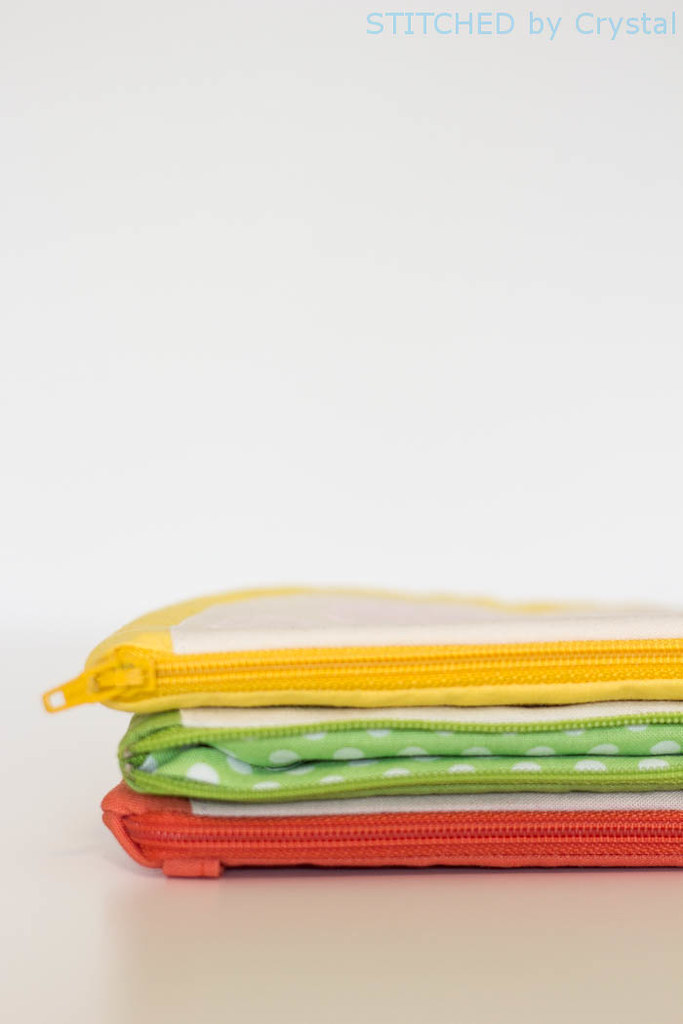
These pouches measure about 7.5" wide and 5" tall.  They are fully lined and close with a zipper. 


You can make these with a strap for a purse or leave the strap off and you can use it to hold anything small.  I made my purses with a 30" strap, which is perfect for my two year old, but you can easily make the strap longer if sewing for bigger girls or yourself.


The fruit details are all appliqued on, but you don't need any special equipment, everything is done on a home sewing machine.

Want to sew a fruit purse too? Here's how...

You will need:
  • A pattern...you can download and print that HERE.  You will see a little 1" square in the corner of one page, just check to make sure that is 1" after you print so you know your pattern printed the right size....you wouldn't want a tiny coin purse (or maybe you do!)  If you are having trouble with the download, try a different browser, I think Google Chrome works best.
  • Some fabric scraps in fruity colors and some fabric for the lining.  If you are buying fabric, 1/4 yard will be more than enough.
  • A zipper that is at least 8" long.  
  • Some scraps of fusible fleece (again 1/4 yard will work)
  • Heat n Bond Ultra, to make the appliqueing really easy
  • Optional 30"-45" of double fold bias tape for the purse strap (store bought or make your own, I will show you how).  30" is a great length for my 2 year old and also works pretty well on my 4 year old.  I might try 35" for someone around 5-7, 40" for 8-10, but those are just guesses.  And I think 45" would be comfortable on me, so try that for anyone adult size.  If you have your girl handy, You can just measure over her shoulder and down to the opposite hip, where a purse would sit to get a measurement for the strap.
  • Basic sewing supplies - sewing machine, iron, scissors, coordinating thread, etc.
Let's get started! Start by printing your pattern and cutting out all the pattern pieces you need.  Don't cut out your fabric yet because some of the pieces will need to have Heat n Bond ironed to them before they are cut out.  

Cut out your main bag pieces, 2 from your outer fabric, 2 from your lining, and 2 from your fusible fleece. Set all those pieces aside for now.

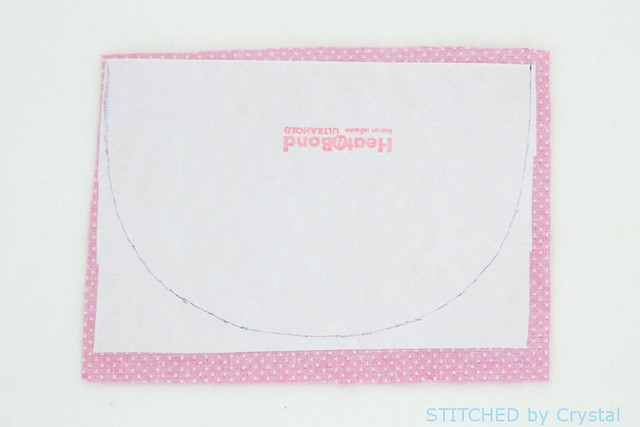
Trace the front accent piece onto the paper of a piece of Heat n Bond.  Then iron the Heat n Bond to the back side of your accent fabric.  


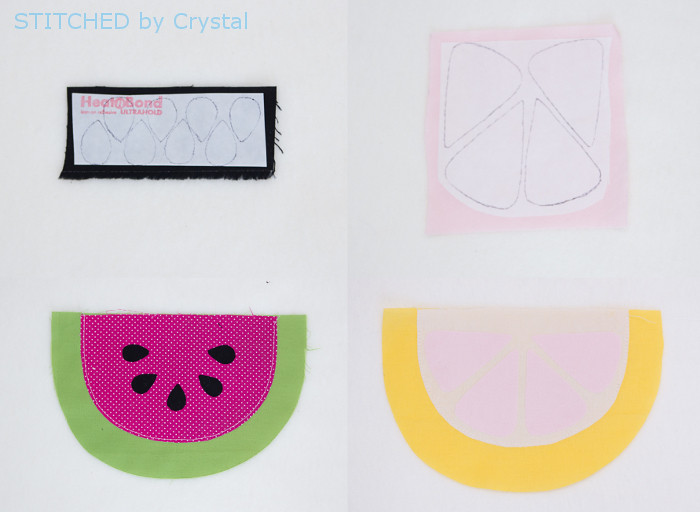
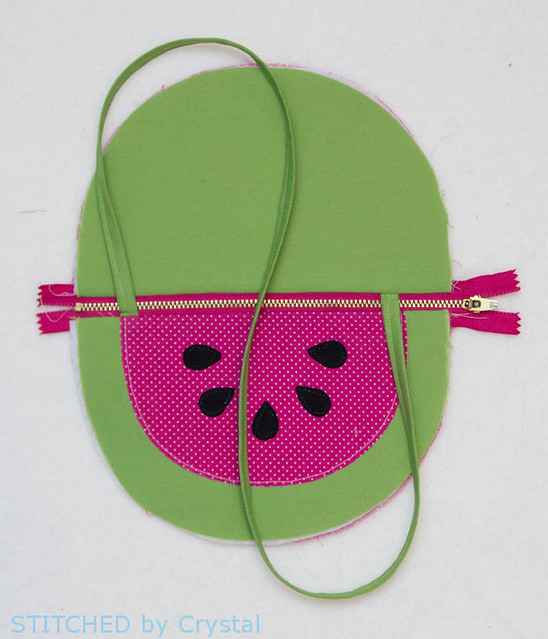
Cut out the accent piece on the line you drew.  Peel the paper backing from your piece.  Center your accent piece on your main bag piece, lining up the raw edges.  Iron on top of your accent piece to adhere it to the main bag.  Topstitch along the curve.  You can do the topstitching with either a straight stitch or a zig zag stitch. With the straight stitch, the edges of the fabric may fray a bit over time but only up to your stitching line.  


Next trace the fruit wedges or seeds onto the paper side of some Heat n Bond.  Adhere the Heat n Bond to the wrong side of your fabric.  Cut out the shapes and position them on your bag.  Leave room at the top for your zipper seam allowance (3/8").  Iron the pieces in place and carefully sew them down by stitching around the edge.


Trim 3/8" off the top edge of your fusible fleece then fuse it to the back side of your main bag pieces.


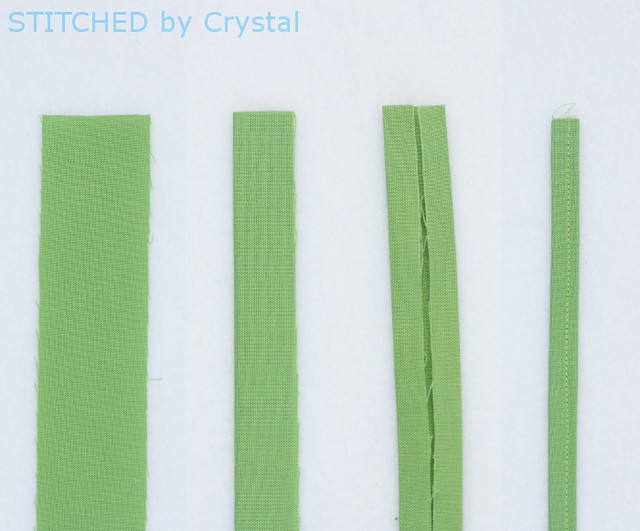
Next, if you are making a purse, you need to prepare your strap (if you are not doing the strap, skip down a couple steps to the zipper).  If you are using store bought bias tape, sew it closed along the open edge.  If you want to make your own, cut a 1.5" strip of fabric that is the length you want for your strap.  It doesn't need to be cut on the bias for this project, you can just cut it selvage to selvage.  Then fold the strip in half and press, open it up and fold the raw edges in to the center fold and press, Then refold it on the center fold and press again, sew along the open side.


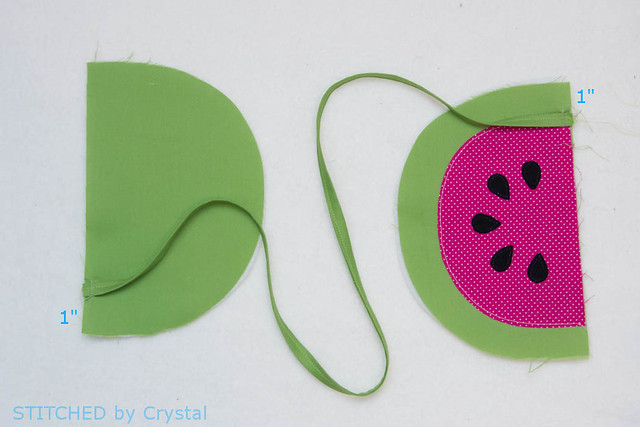
Make a small mark on the top of both your outer bag pieces that is 1" from the left side.  Baste the end your strap to the inside of that 1" mark, lining up the raw edge of the strap with the top of the bag.


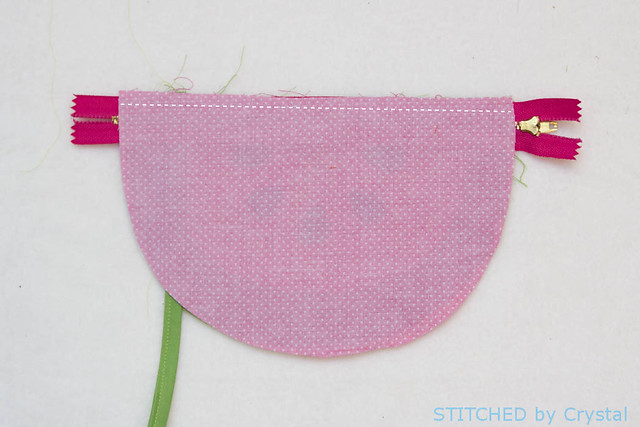
Place your zipper right side down on top of one of your bag pieces.  Pin the zipper in place, then with a zipper foot, baste the zipper in place.


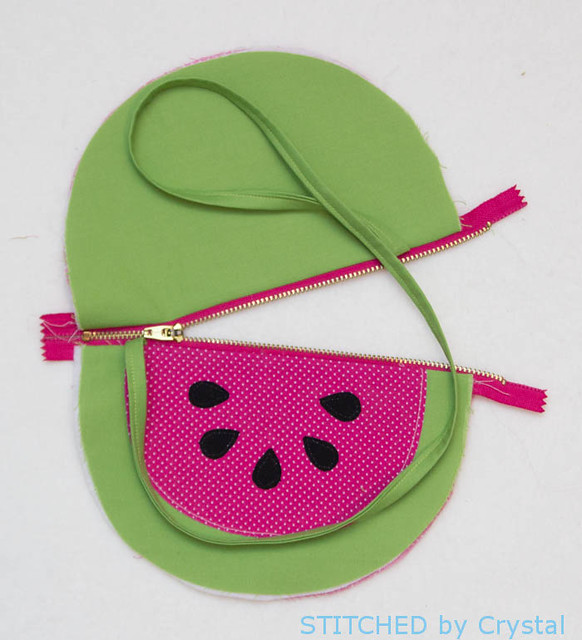
Lay a lining piece right side down on top of your zipper.  You should have your bag outer and lining right sides together with the zipper sandwiched in the middle.  Pin then sew along the zipper edge.


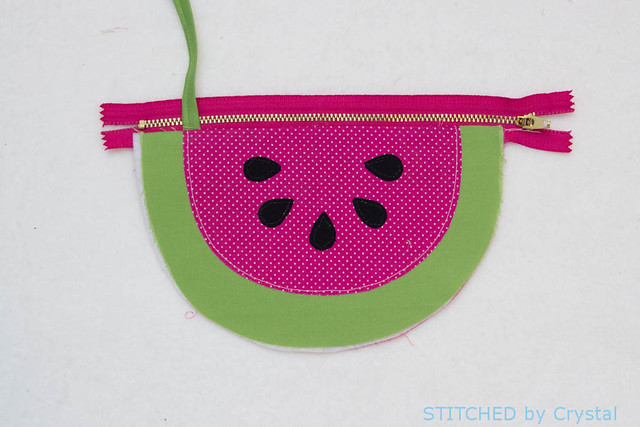
 Turn your pieces right side out and press. 


With the outer bag facing up, lay your other outer bag piece on top, right side down.  If you are making a purse, make sure your strap is not twisted.  Pin the top of the bag to the zipper edge, then baste it in place.  


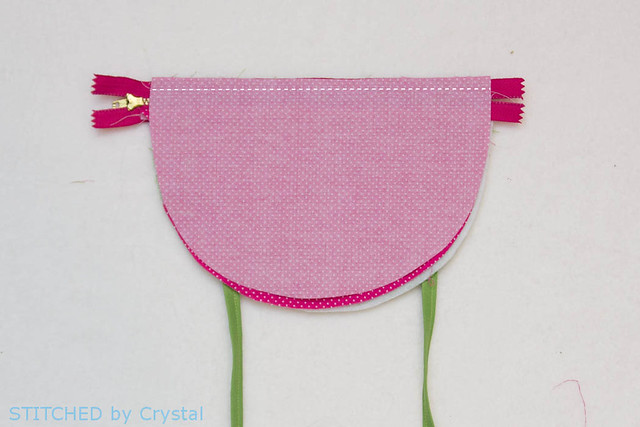
Flip the bag over so the lining you have already sewn on is facing up and then lay your other lining piece on top of it, right side down.  You will have your zipper sandwiched in between your main and lining pieces again, but this time the main bag and lining from the other side will be sandwiched in there too.  Pin and sew along the zipper.


Now flip those pieces right side out and you should have your main bag and lining pieces on each side and a zipper in the middle.


Now OPEN YOUR ZIPPER!  This step is very important, if you skip over it, you won't be able to turn the bag right side out at the end and you will need to find your seam ripper!  Position your zipper pull somewhere in the middle of your bag, you want it pretty open, but not so open that the pull gets in the way, about 3/4 of the way is good.


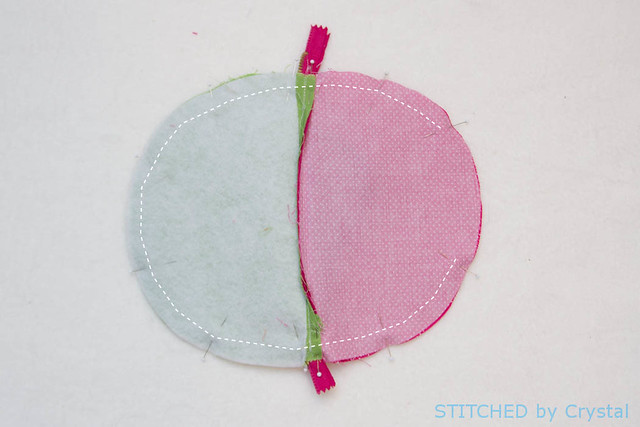
Almost done!  Take your two outer bag pieces and put them right sides together, do the same with your lining pieces.  Line up the curved edges and pin, if you are making a purse, make sure the strap is tucked inside and away from the seam allowance.  When you get to the zipper, squish it flat, pushing the teeth towards the outer bag side.  Starting towards the bottom of the lining, sew around the bag with a 1/2" seam allowance, stop when you get about 3" from where you started leaving an opening at the bottom of the lining.


Turn the bag right side through the hole you left in the bottom.  Turn the raw edges of the hole in and sew the opening closed.  


Tuck the lining down inside the bag and you are done!


Unless you want to add a cute apple leaf zipper pull...I made mine by sandwiching some Heat n Bond between 2 layers of green fabric, then I stitched my leaf shape and cut it out.


Now go make some fruity bags and get in the mood for warm weather!


Jun 16, 2014

Girls Purse Tutorial for Make it & Love it

Everything is so much cuter when it is tiny!  I made a little purse a few weeks ago for Em and it turned out so cute.  She loves it, she has been toting her things around town in it since the moment it came off my sewing machine.
I wrote up a tutorial on how I made this cute little purse and I am sharing all the details over at Make it & Love it today.


The purse only takes a fat quarter of fabric to make and sews up quick.  Make sure you head over to Make it & Love it today to see my tutorial and more pictures of my cutie pie with her new purse!
  

May 15, 2014

Tutorial: Colorblock Tote

Isn’t there always room in your closet for one more bag?
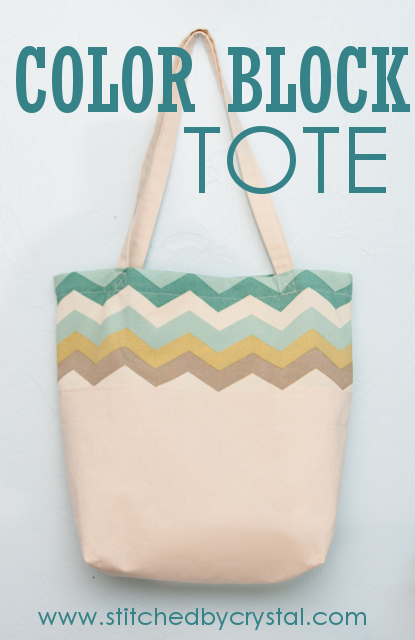
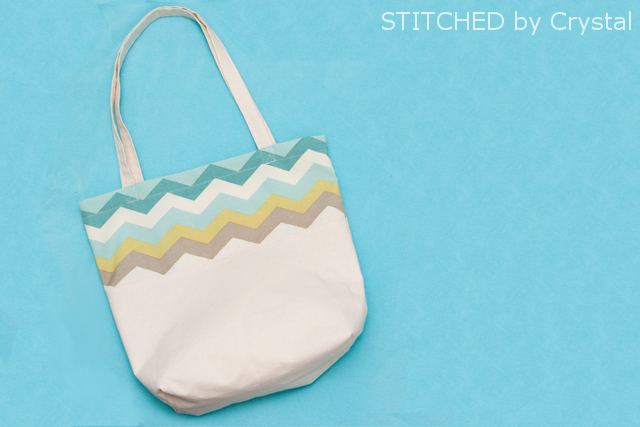
I love making bags; they are easy, quick and useful too!  And I make a lot of them, like this grocery bag, this beach bag, or this leather clutch.  I made this bag a few months ago and shared it over at SNAP.  Today I am sharing it here with you!


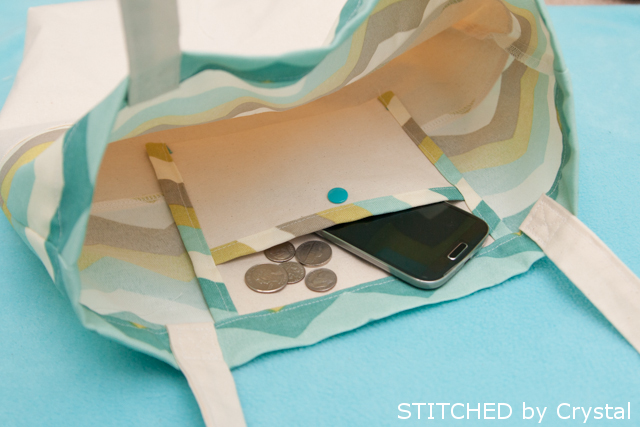
This color block tote measures about 16 inches x 16 inches.  I added a little pocket on the inside to keep me keys and phone in so they are easy to find.


This bag is perfect for the beach or pool this summer, or would be great just for running around town too.  


Wnat to make one?  Let’s make a bag!
For durability, this bag should be made out thicker fabric, something like canvas, twill, duck cloth, or corduroy.  Try looking in your fabric store’s home décor, apparel, or utility fabric sections for something you like that has some weight to it.
You will need:
  • 2/3 yard of the fabric you will use for the bottom of the bag and the straps
  • 1/4 yard of the fabric you will use for the top of the bag
  • Some double fold bias tape if you want to add a pocket.
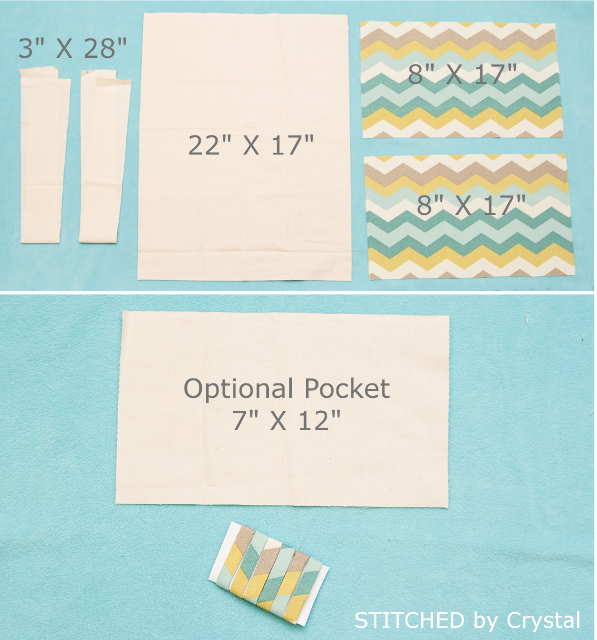
From the 2/3 yard, cut one 22 inch x 17 inch rectangle and two 3 inch x 28 inch rectangles.
From the 1/4 yard, cut two 8 inch x 17 inch rectangles.
For the optional pocket, cut one 7 inch x 12 inch rectangle


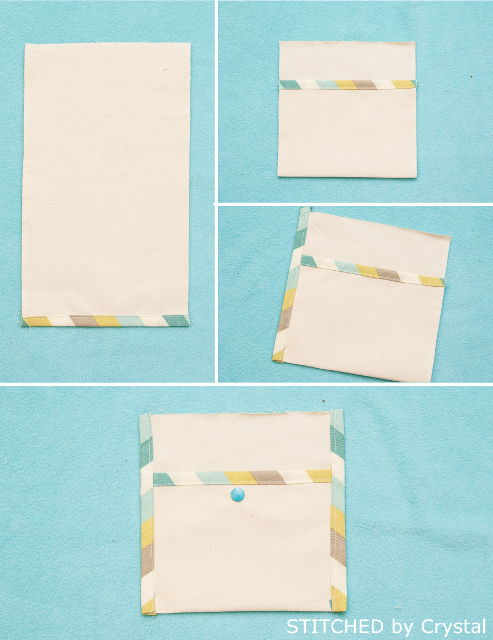
To make the pocket, enclose one of the 7 inch edges of your pocket piece inside some bias tape and sew it in place.  Fold that end up about 5 inches and sew two more strips of bias tape on the sides to cover the raw edges.  If you want, you can add a snap to keep everything inside the pocket.  Set your pocket aside.


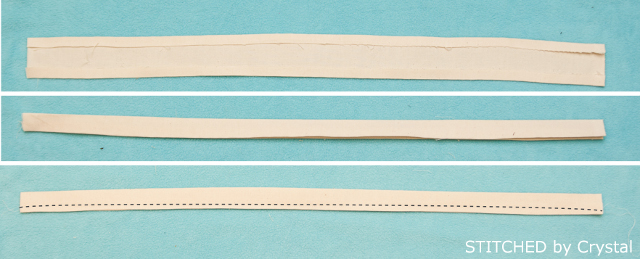
Next, prepare your straps. Folding the edges in 1/4 inch then fold the strap in half and sew along the edge to close the opening.  Set the straps aside.


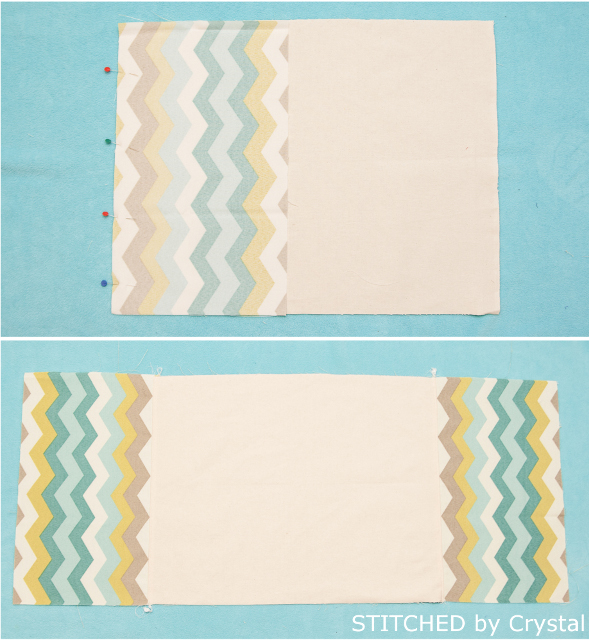
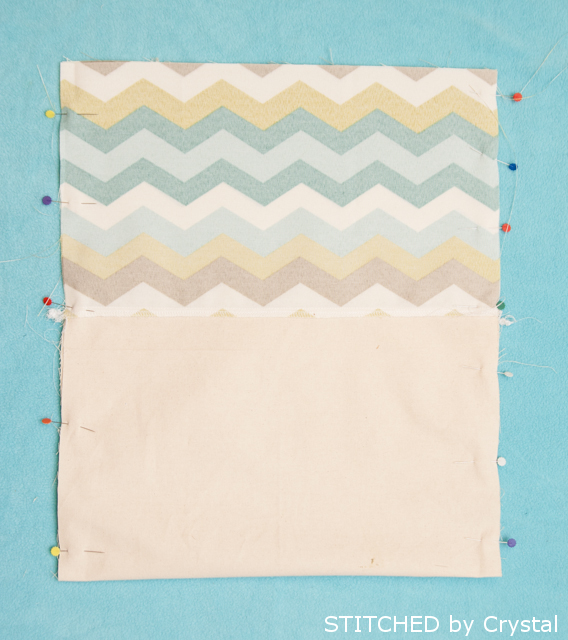
Line up one of the 17 inch sides of the bottom bag piece and one of the top pieces with the right sides together.  Sew along the edge with ½ inch seam allowance.  Finish the edge with a serger or zig zag stitch on your sewing machine.  Press the seam up and top stitch.  Repeat those steps to sew the other top piece on the other side.  You should now have one long rectangle with the bottom piece sandwiched between the top pieces.


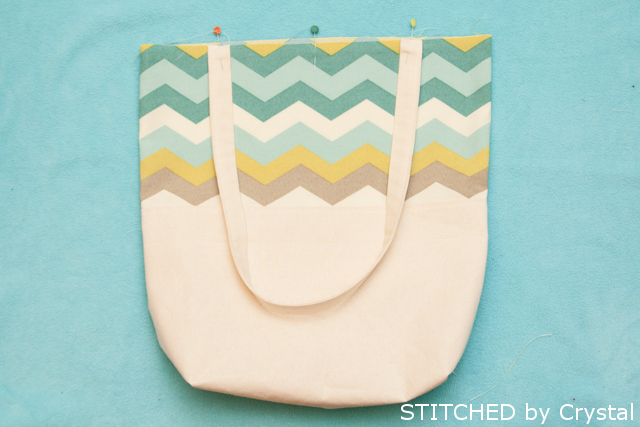
Fold the bag in half and pin, lining up the seams where the top fabric meets the bottom fabric.  Sew the side seams and finish the seams with a serger or zig zag stitch.
 

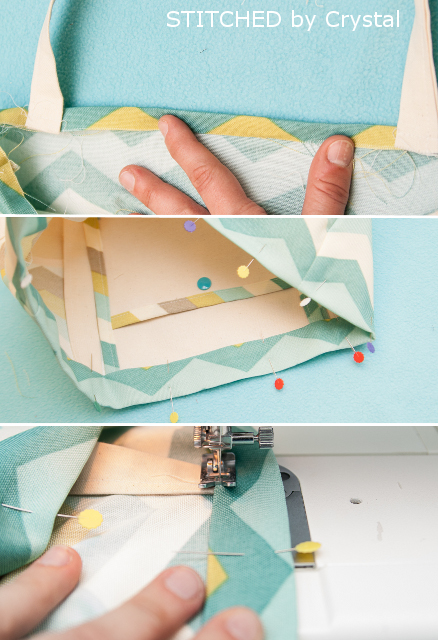
Create gussets at the bottom by measuring 2 inches over from the side seam and 2 inches up from the bottom and cutting a square out of the bottom corners.  Pull the fabric apart so the raw edges line up and sew across the gusset with ½ inch seam allowance. Finish the seams with a serger or zig zag stitch.


Turn your bag right side out.
Find the middle of one side of the bag.  Pin your strap about 3.5 inches from the middle on each side.  The raw edges of the straps should line up with the raw edge of the bag and the strap should be pointing down.  Baste the strap in place.  Repeat with the other strap.


Hem the top of the bag by folding the top edge down ½ inch then another 1 inch press and pin in place.  The straps will be down inside the bag.  If you are adding a pocket, tuck the raw edge of the pocket into the hem between the straps on one side.  Sew along the folded edge to hem the bag and secure the pocket.


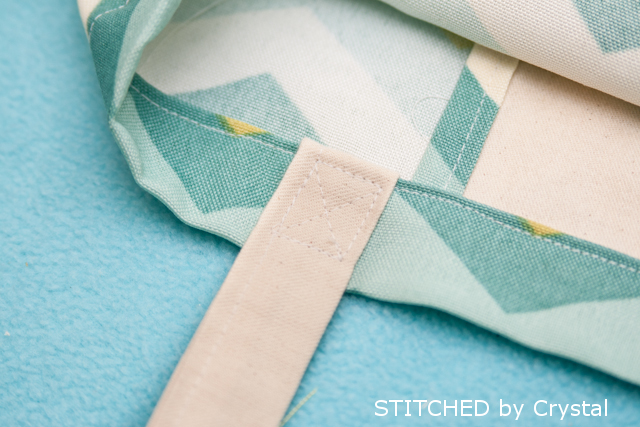
Flip your straps up and secure them with a box stitch (a box with an X inside it)


Your bag is done!


Nov 11, 2013

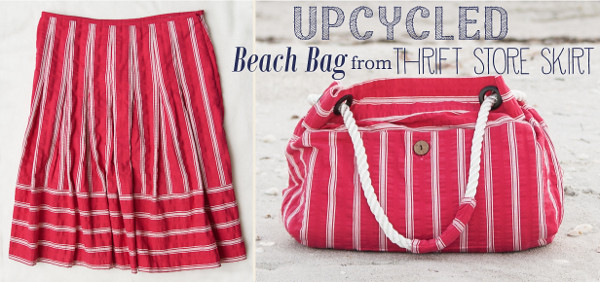
Tutorial - Upcycled Beach Bag from Thrift Store Skirt

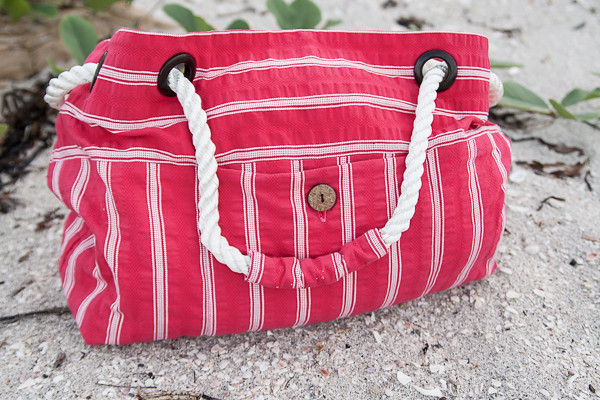
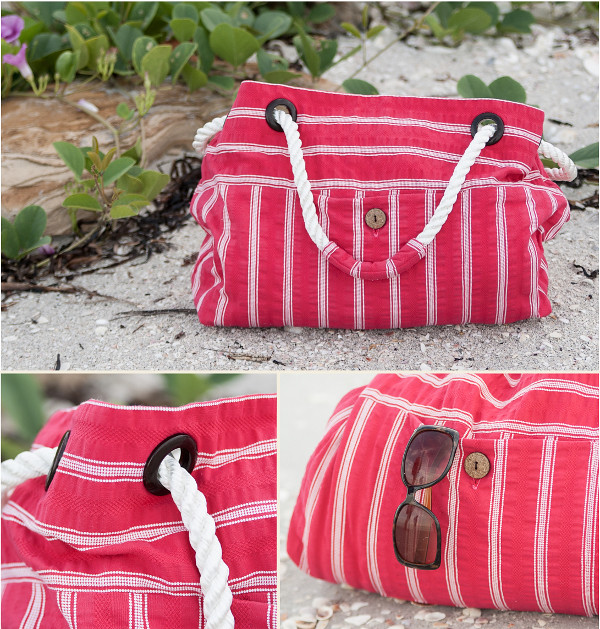
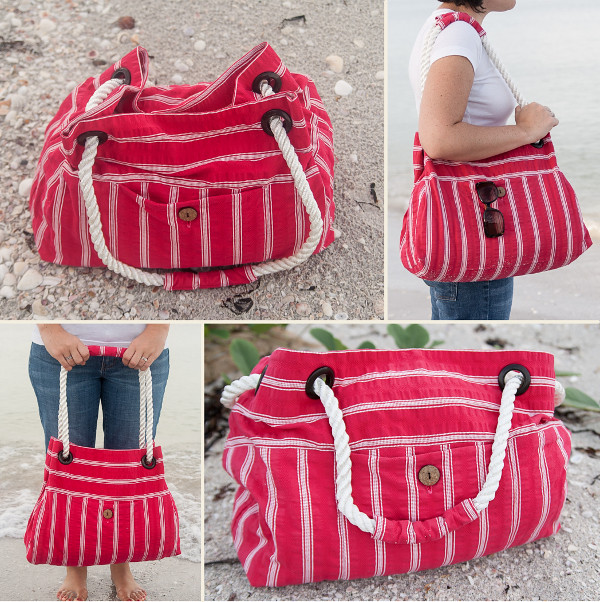
This bag was my entry for the SYTYC upcycle challenge.  The challenge was conveniently scheduled for right after my annual family trip to the beach!  So right after I finished the bag I hit the beach with it, it saw lots of beach time.  I like that it is roomy enough for a couple beach towels and has a little pocket on the front so I can keep track of things like my phone and keys.


To make this bag, I started with a skirt I bought at the thrift store.  I took out all the box pleats at the top f the skirt and ended up with quite a bit of fabric.  You could also make this bag with 1 yard of fabric, something with a bit heavier works best.  You will also need two strips of iron on interfacing that are 25” x 3”, 8 grommets, a button for the front pocket, and 5 feet of rope.


I picked my grommets up at the craft store in the home décor section; they came in a pack of 8, perfect!  I got the rope at the hardware store; you can buy it there by the foot.


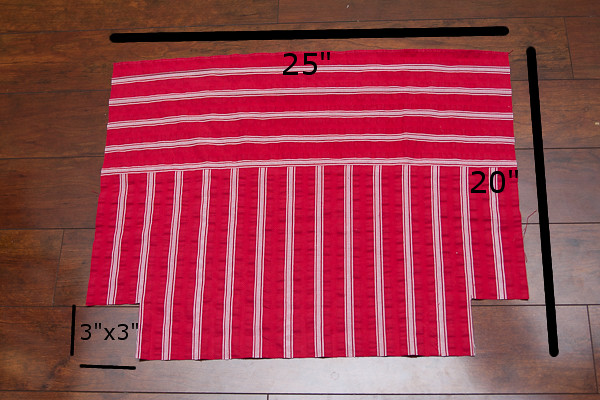
Start by cutting your fabric to two 20” x 25” rectangles.  Then cut 3” x 3” squares from the bottom corners.  You will also need cut two 9” x 9” squares for the pocket and two 6” x 4” rectangles for the handle covers.


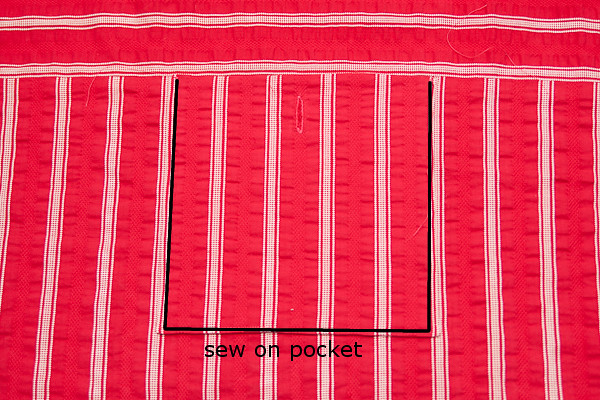
Place the 9” x 9” squares right sides together and sew around all four sides leaving a small opening on the bottom to turn it right side out.  Turn the pocket through the hole you left and press it.  Add a button hole to the center top of the pocket.  Top stitch the pocket to the bag along the sides and bottom, make sure the opening in the bottom where you turned it gets closed when you top stitch.  Sew the button to close the pocket.


Iron your 3” strips of interfacing to the top of each side of the bag.  My fabric was already finished across the top from the skirt hem, but if yours isn’t you may want to leave ¼” of fabric above the interfacing to fold over when you hem so you have a finished edge. 


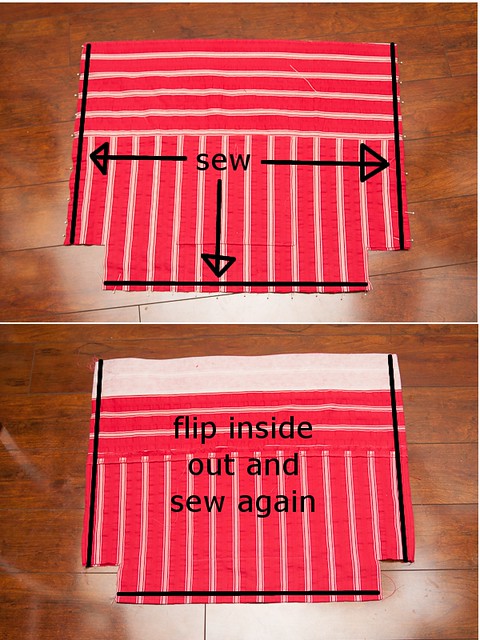
I sewed the bag with french seams so there are no exposed seams inside the bag.  To make the french seams, pin your bag wrong sides together along both sides and the bottom.  Sew the sides and bottom with ¼” seam allowance, leave the top of the bag and the 3” squares in the corners open. 

Turn the bag inside out and press.  Sew along the sides and bottom again, encasing the raw edge inside the seam allowance. 


Next you will sew the bottom corners.  Turn the bag right side out again; pull the top corners of the corner cut outs apart.  Line up the side and bottom seams and sew along the edge with a ¼” seam allowance.  Turn inside out press and sew over the corner again to make a french seam.  Repeat with the other corner.


Hem the top of the bag by folding it over at the bottom of your interfacing and sewing.

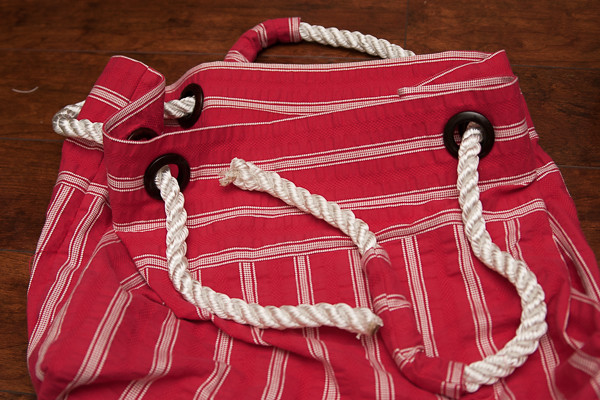
Measure 3” and 6” from the side seams on all sides and make a mark for your grommets.  Attach the grommets according to the instructions on the package. 

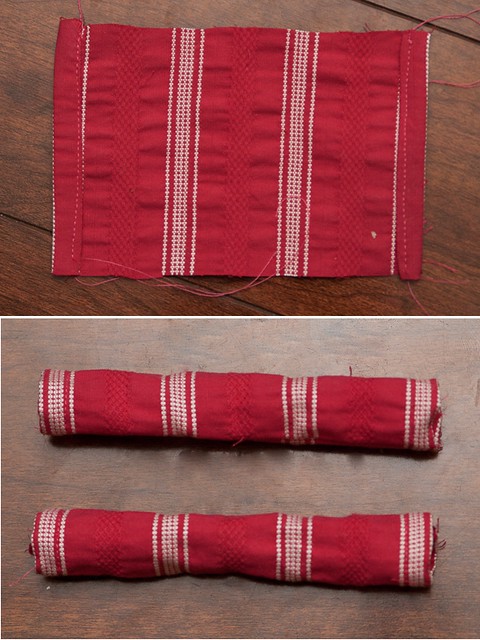
Fold the short sides of your handle covers over ½” and ½” again.  Press and top stitch along the folded edge.  Determine how big the covers need to be by wrapping them around your rope and marking where the raw edges meet.  Sew them right sides together at that point.  Then trim off any extra and turn them right side out. 


Weave your rope through the grommets starting by going in one of the middle grommets.  When you get to the middle of the other side, slip one of your handle covers on.  Then keep weaving until you get back where you started.  Slip the other handle cover on. 


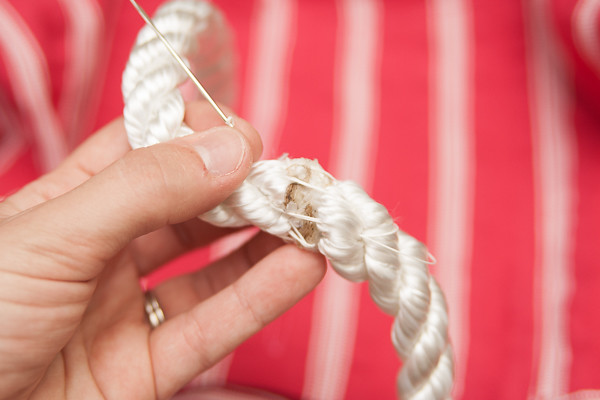
 Sew the ends of the rope together by hand.  I used button thread and an upholstery needle.  Sew several places to make sure the handle is secure. 


Then slide your handle cover to cover the seam.  You can add a little craft glue under the covers so they don’t slide around if you want. 

Your bag is done, go hit the beach!


LinkWithin

Related Posts Plugin for WordPress, Blogger...
I love reading all of your comments! Please make sure your blogger profile is linked to your email, so I can respond to your questions via email, otherwise I won't be able to email you back!

Please feel free to email me(stitchedbycrystal@gmail.com).

Thank you so much for reading! I If you like what you have seen here make sure become a follower of my blog so you can catch all my updates!!