Jan 28, 2014

My Little Plumcake Skirt

If you have been around my blog much, you may have noticed I sew with a lot of seersucker.  I have used it for this romper, these shorts, last years Easter dress, and this sunglasses case.  Most recently I used it for a pttern test of a sweet skirt by My Little Plumcake.


The skirt is a high waisted pleated skirt with optional straps and will be part of their spring line coming in March.  I made the size 18 months for Em and love this look on her, doesn't she look like a little southern belle in pleated seersucker?


Em is a shorty so the skirt is a bit long on her, but I like that she has some growing room.  It closes on the side with a hook and eye.  I found some hook and eyes in my stash that I had inherited from my grandmother.  They had a price tag on them for $0.19!


I am loving this skirt!  Thanks My Little Plumcake for the chance to test!  I am looking forward to testing more of their spring line soon and will be sharing more sneak peaks with you!


Jan 23, 2014

Small Fry Skinnies

You guys....I made jeans!

Small Fry Skinnies sewn by Stitched by Crystal

In all my years of sewing I have never attempted jeans.  But when Pattern Revolution asked me to sew up these Small Fry Skinny Jeans by Titchy Threads for review I jumped at the chance!  

Small Fry Skinnies sewn by Stitched by Crystal

Aren't they awesome?  E looks like a total rockstar in her skinnies!

Small Fry Skinnies sewn by Stitched by Crystal 

Stop by Pattern Revolution to see my full review of these jeans HERE!

Small Fry Skinnies sewn by Stitched by Crystal


Jan 16, 2014

Tutorial: Bias cut bodice stripes

After I posted about 
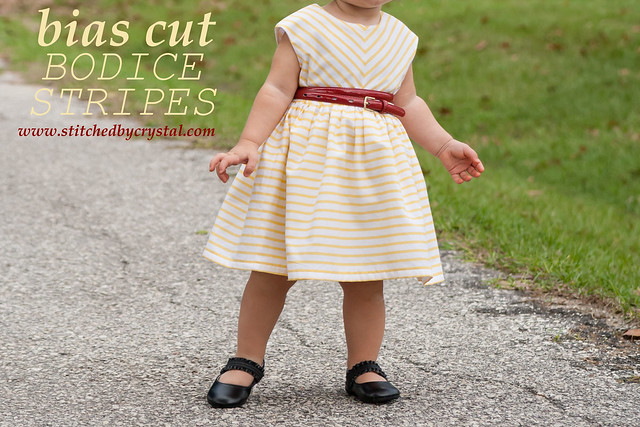
the Caroline Party Dress I made last month, I had a few people email me asking about how to do the stripes on the bodice.  I decided to put a quick tutorial together to share my technique for cutting bodice stripes on the bias.


I love sewing with stripes, you can play with the orientation of the stripes to give your garment a totally different look.  As soon as I saw The Caroline Party Dress by Mouse House Creations, I knew I wanted bias cut stripes on the bodice to accent the faux cap sleeves.

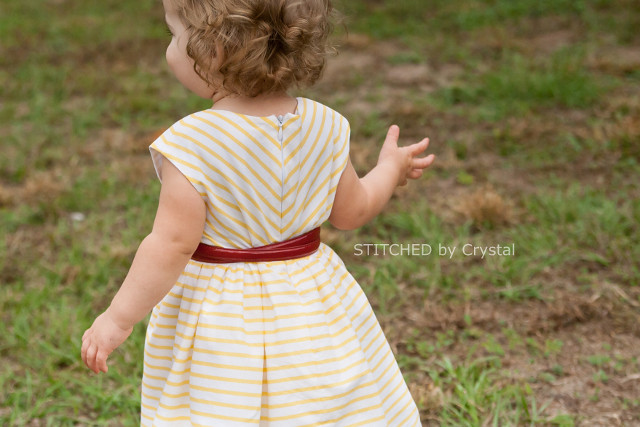
This technique for cutting your bodice will give you perfectly aligned bias cut stripes on the front and back of your dress as well as lining up the stripes over the shoulders too.


*You may need to buy a bit more fabric than the pattern calls for to have enough for cutting the pattern on the bias.*
This technique can be used on any basic girls bodice pattern.


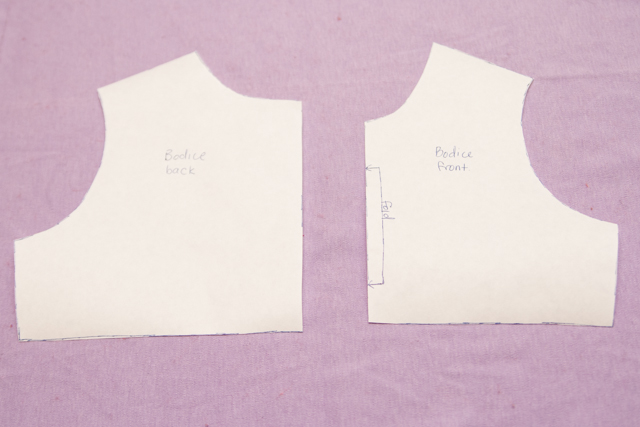
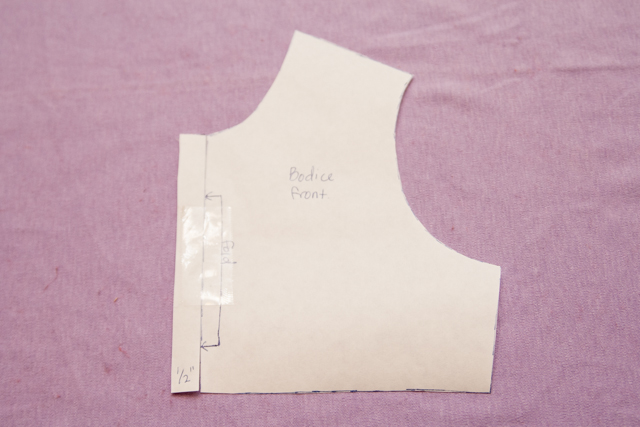
Most bodice fronts are cut on the fold.  Because the front will have a seam in it, you will need to add a seam allowance to your pattern.  I did this by cutting a strip of paper 1/2" wide and adding it to my pattern piece.


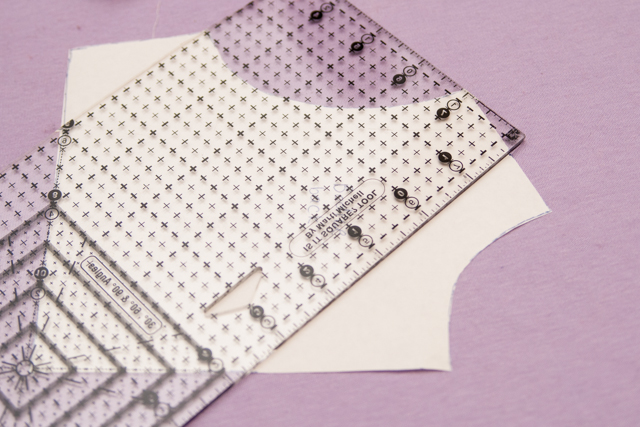
Draw a line on your pattern at a 45 degree angle from the straight side of the pattern.  You will want the line to intersect the shoulder.
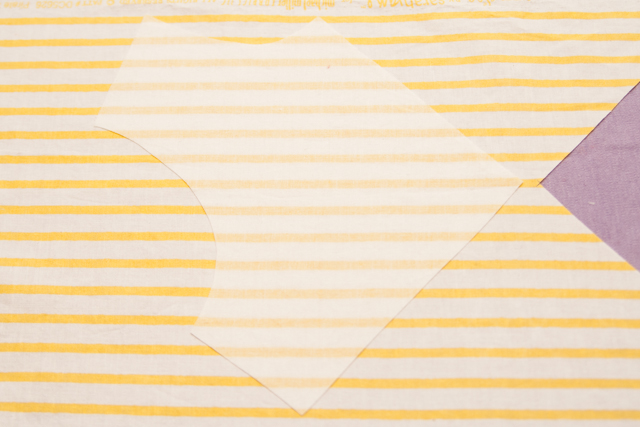
I wrote "yellow stripe" below my line so that I know to line my pattern up with a yellow stripe below that line.  That is not so important when you only have one color stripe but can be helpful if you are working with a fabric that has several different color stripes.


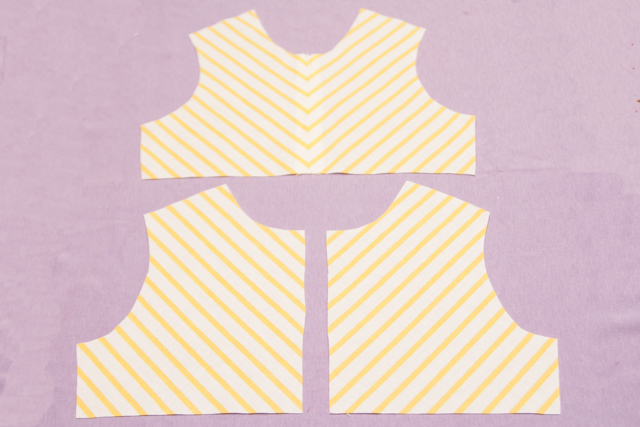
Lay your pattern piece on top of your fabric with the line you drew lined up with the stripes.  Cut one front bodice piece.


Next take the bodice piece you just cut and lay it on top of the fabric, line up all the stripes and use it as a template to cut your second front bodice piece.


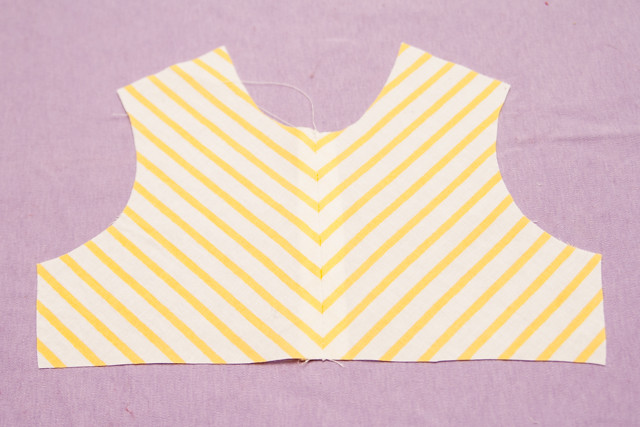
Now you have 2 mirror image front bodice pieces cut on the bias!


Place the 2 bodice fronts right sides together and sew along the center with a 1/2" seam allowance to create your bodice front.  Press the seam open.


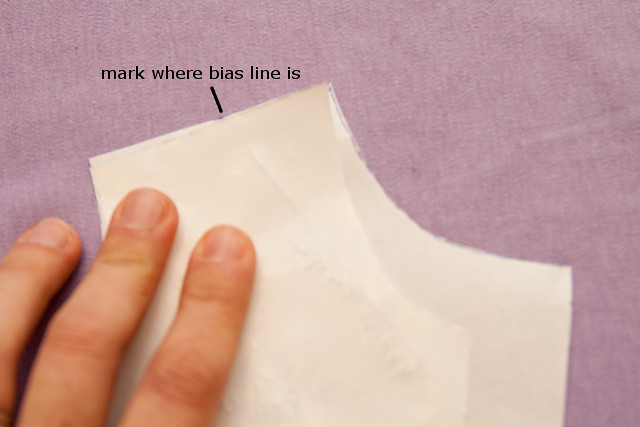
Line up the shoulders of your front and back pattern pieces.  Make a small mark on the back pattern piece where the bias line from the front pattern piece.


Draw a line at 45 degrees from the center back intersecting that point at the shoulder.  Label it with the same color stripe you used for the front.


Cut your back bodice pieces just like you did the front pieces.
You now have your bodice pieces and are ready to sew your dress!


Cut all your lining and skirt pieces and sew your dress as directed in the pattern.  Make sure you remove the extra seam allowance from the pattern front or fold it under when you cut your lining pieces.


Jan 15, 2014

Football Coasters

Are you planning a party for the Super Bowl?
Today I am over at SNAP! sharing a tutorial for these adorable football coasters that would be a perfect addition to any football party!  Head over and check them out!

Jan 6, 2014

Free Stuffed Fox Pattern


Woodland creatures are really trending right now and that sly fox seems to be the real favorite.  Looks like I have jumped on the fox bandwagon...I made these adorable little stuffed foxes for my kids and have a pattern to share so you can make some too!


These guys are so easy to make and have been a big hit with my kids. They have both been so pleased with their new toys and these foxes have been drug all around town for the past few weeks.   


They are about 15" tall and are made from soft fleece and they are super snugly.  And with their fuzzy scarves, they are dressed for the season!


You could use buttons for the nose and eyes, but I appliqued on some fleece so they are baby safe.  They would be such a cute shower gift for a mommy to be, just make sure you stitch down his scarf too or skip it all together.  


I have made other stuffed toys in the past (like the rag doll bunny and Seamus) but these guys are for sure my favorites!  


Want to make a fox of your own? You can find the pattern and all the instructions to make one by clicking HERE. It is a PDF download, so you need to have a PDF reader to open and print it.  You can download adobe reader for free.  The pattern includes 1/4" seam allowances.

***Note - I have been told that not all browsers work when downloading this pattern.   If you have trouble downloading try using a different browser.  I have been told Google Chrome works.***

Go download the pattern and make it now, or save it to your computer and sew it up later.

Jan 1, 2014

2013's top 10

Happy New Year! I can hardly believe it is already 2014, it seems time just keeps going faster.
I hope you all had a great holiday season! I had a relaxing holiday filled with lots of family time, it was just perfect!

I feel like 2013 was a pretty big year for my little blog.  I had lots of fun opportunities like pattern testing, guest posting, and joining in on some blog tours.  Today I am taking a look back at the last year and sharing my top 10 projects from 2013!

So here they are...in no particular order... my 10 favorite projects from 2013! 


LinkWithin

Related Posts Plugin for WordPress, Blogger...
I love reading all of your comments! Please make sure your blogger profile is linked to your email, so I can respond to your questions via email, otherwise I won't be able to email you back!

Please feel free to email me(stitchedbycrystal@gmail.com).

Thank you so much for reading! I If you like what you have seen here make sure become a follower of my blog so you can catch all my updates!!