
Showing posts sorted by relevance for query red riding hood. Sort by date Show all posts

Oct 22, 2014

Little Red Riding Hood (and a hooded cape tutorial!)

Halloween sewing is hands down my absolute favorite!  This year for Halloween, I got to pick Em's costume.  I was hoping to do coordinating costumes for my kids, but when A decided he wanted to be Superman I decided to scratch that idea, I just couldn't get excited about a Lois Lane costume for her.  And since she doesn't really have an opinion on her costume yet the decision was left to me! I decided on Little Red Riding Hood for her, partly because I was Little Red Riding Hood once when I was little and it was one of my most favorite costumes, but mostly I picked it because I thought she would make the cutest Little Red!


For her costume, I made her THIS gingham dress.  I felt like a Little Red Riding Hood costume gave me the freedom to make any dress I wanted really, there are so many different variations of Little red, ones that wear red dresses, ones that wear black corsets, ones that wear grey dresses...So really she just needs a dress and a red hooded cape.  I chose to do a gingham with some eyelet trim and I love love how it turned out.


Then I made her cape.  It is red (of course) on the outside and I lined with a vintage looking fabric that is cream colored with little red flowers.  And finished it off with a little toggle to keep it on.  More details on how I made the cape are at the end of this post!


And to finish off her costume, I picked up a basket at Hobby Lobby for Little Red to carry all her goodies for Granny (or her candy for trick-or-treating).



And Little Red Riding Hood is ready to head off into the forest alone to take some goodies to her poor sick Granny....OK wait, who sends their kid off into a forest alone where she could get eaten by a wolf?!   I think we will be sticking to supervised trick-or-treating in a wolf free zone:)  Although, A has informed me that I shoud dress at the wicked wolf, and he says that I have to wear a costume if I want to go trick-or-treating with him...we'll see.


Alright, one more photo of my adorable Little Red and I will get on to the cape tutorial!


Want to make a hooded cape? Here is how I made mine!
You will need:
  • Fabric for the outside of the cape, red if you are making little red but this cape could be used for lots of costumes...Like a vampire, Harry Potter, you could even modify it a bit to make a Frozen Anna cape.  As far as how much you need, that depends on the size you want to make, I used 1 1/4 yard for my 2 year old
  • Fabric for the lining, the same amount as the outer fabric
  • Something to fasten the cape, I used a toggle, but you could use something like a ribbon to tie or a button and fabric or elastic loop.
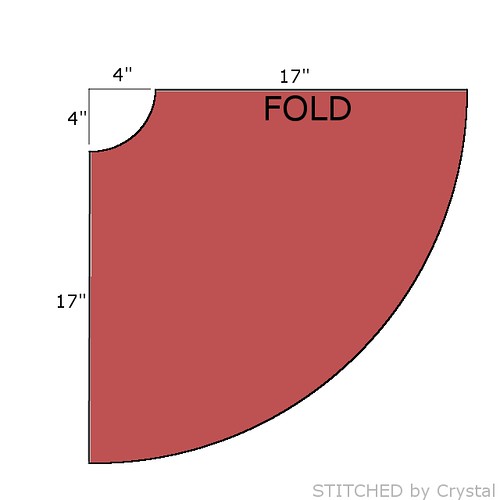
The cape is made from a big half circle.  Determine the what the finished length you want your cape and then add 1", for my daughter the finished cape is 16" so I cut my cape 17" long.  Fold your fabric in half, then cut a quarter circle on the fold (when you unfold it it will be a half circle).  Cut a quarter circle with a radius of 4" at the top, then cut a second circle measuring the finished length +1" from the first circle as shown in the photo below.  You will need one of these in your outer fabric and one in your lining.  The 4" radius at the top should work for most small kids, for bigger kids or adults, you may want to go up to 5".

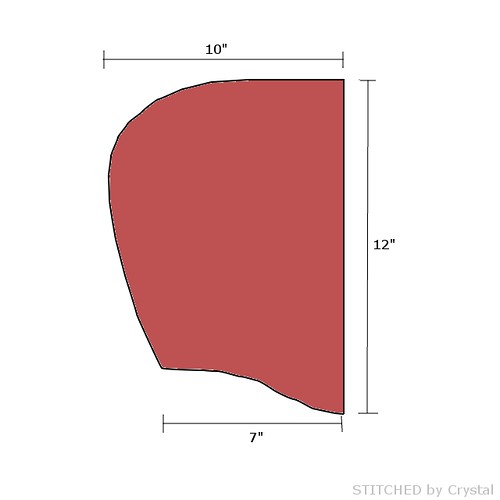
To cut the hood, I drew out a hood shape that was roughly 10" wide and 12" tall.  You can see the shape I cut below.  Again, this size works for my 2 year old, you will want to adjust for bigger sizes.  An easy way to get a good hood size and shape is to trace a hood off of one of your kids sweatshirts that fit well, simply lay the hood flat and draw around it.  You will need 2 hood pieces for the outer cape and 2 hood pieces for the lining.  

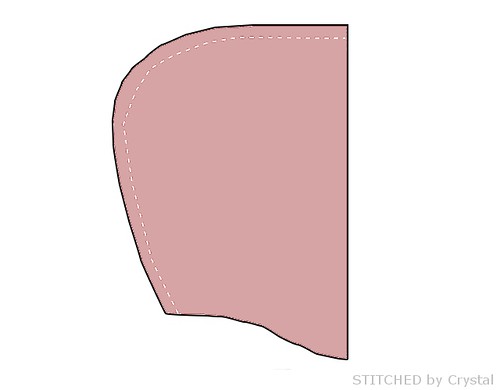
Sew your hood pieces right sides together as shown below.  Repeat with the lining hood pieces.

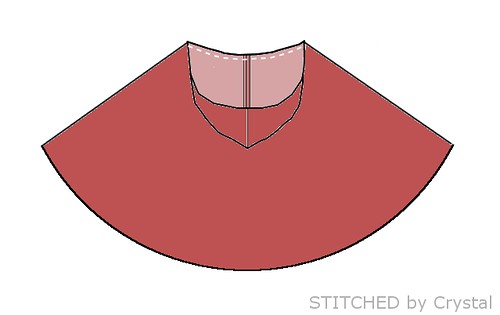
Open your hood and pin the bottom of the hood to the neck hole of the cape with the right sides of the hood and cape together.  Sew the hood to the cape, repeat with the lining.

If you are using ribbon or a button loop as your closure, baste them in place now. Baste them to the right side of the cape lined up with the raw edge of the cape, close to the hood.  
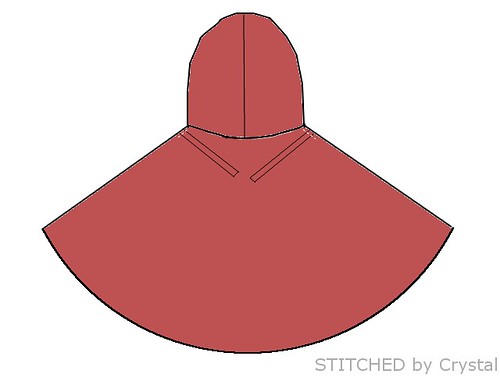

Place your cape and the lining right sides together and sew all the way around the edge, leave a 3" opening at the bottom of the cape.


Turn the cape through the hole left in the bottom.  Press the cape, then topstitch around the edge of the cape and hood, making sure you close up the hole at the bottom.
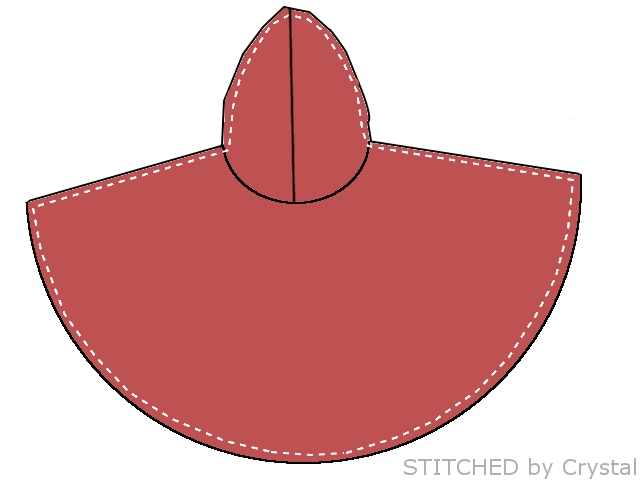

If you are using a toggle, sew it in place now.  And your cape is done! Easy right?!

Jan 19, 2015

Red Riding Hood Doll

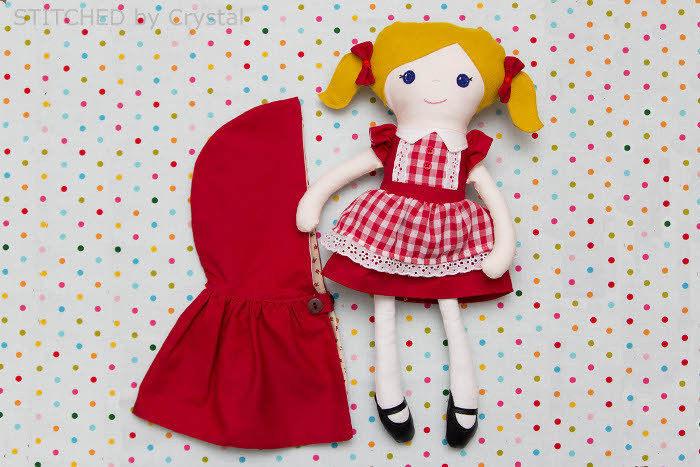
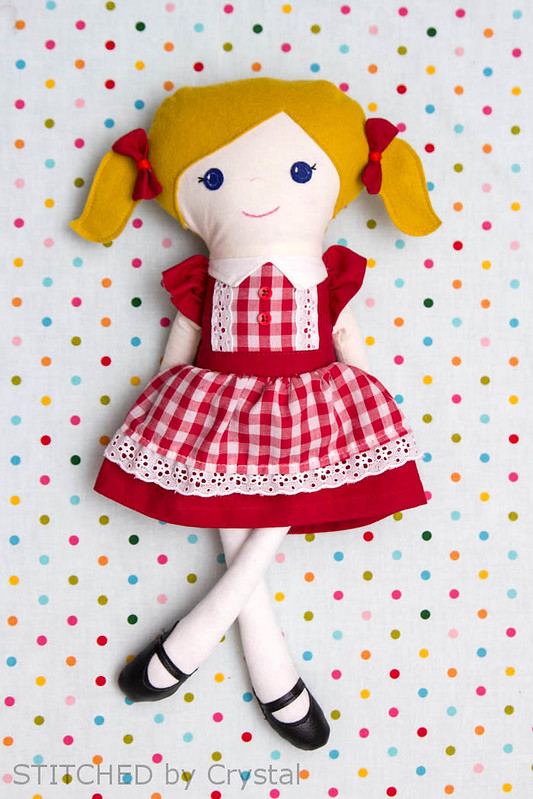
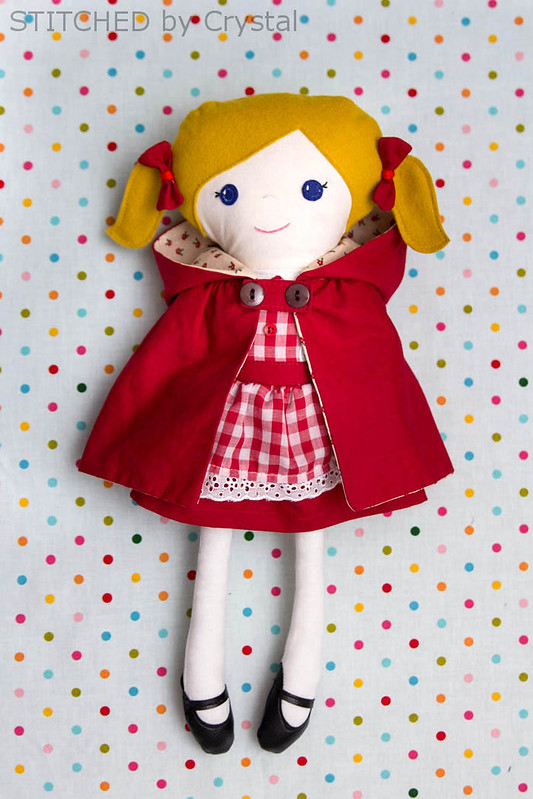
This was a really fun project for me!  Em has loved all things Little Red Riding Hood since she dressed as her for Halloween.  One day last week she asked me if I would make her a Red Riding Hood doll....um, of course!  So, I decided it would be really fun to make a doll of Em dressed as little red.


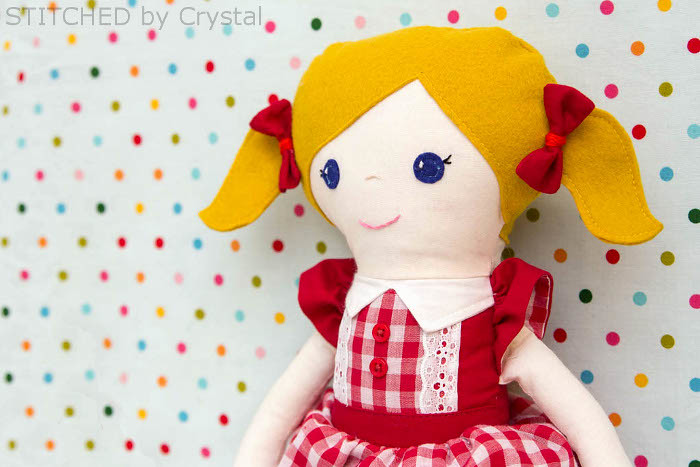
The doll's dress is a miniature version of the dress she wore for her costume, and she even has matching white tights and black leather shoes.


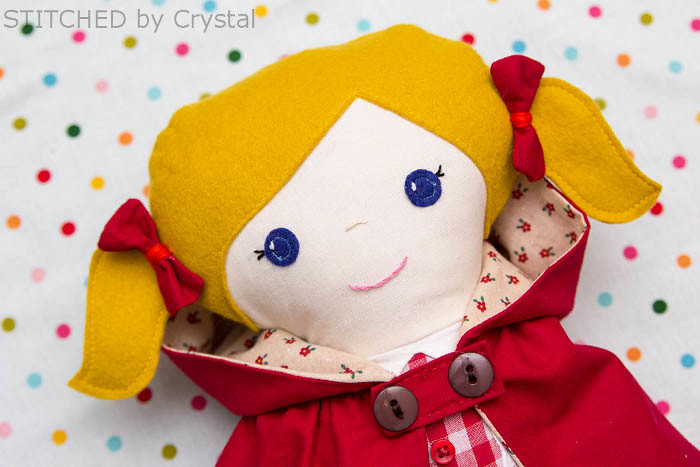
She's got a tiny little cape, just a hood (that took me three tries to get the right size, that dolls head is bigger than it looks) and gathered cape.  I used some little buttons instead of toggles like Em has on hers.  The buttons are just decorative, it closes with a little velcro on one side.


And with the blonde pigtails, blue eyes and tiny upturned nose this doll is a tiny little Em :)


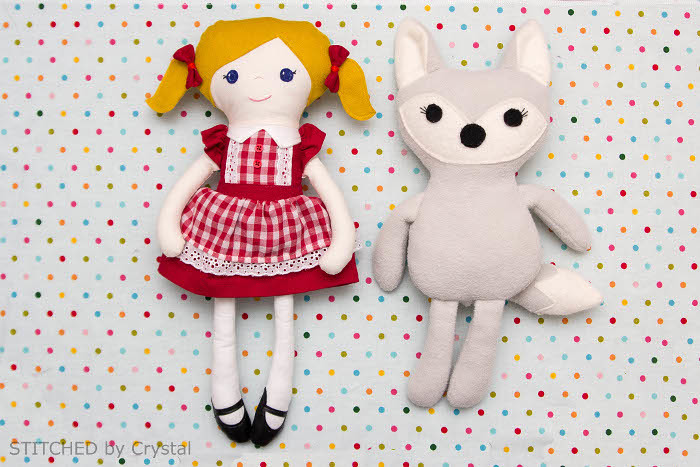
To make the doll, I started with my stuffed fox pattern...who actually doesn't make a half bad wicked wolf.  Then I made the body and head a bit skinnier and the legs and arms longer and skinnier (and obviously eliminated the ears and tail...and added a dress)


I made the hair out eyes out of a wool blend felt and hand embroidered the face details.


This little doll took me almost 5 hours to sew, but part of that was working out the pattern and sewing a muslin doll.  She is so worth all the time and effort though, both Em and I love her :)


As soon as I finished her brother asked me "are you making superman next?"

Dec 29, 2014

Sew Geeky - Alice in Wonderland

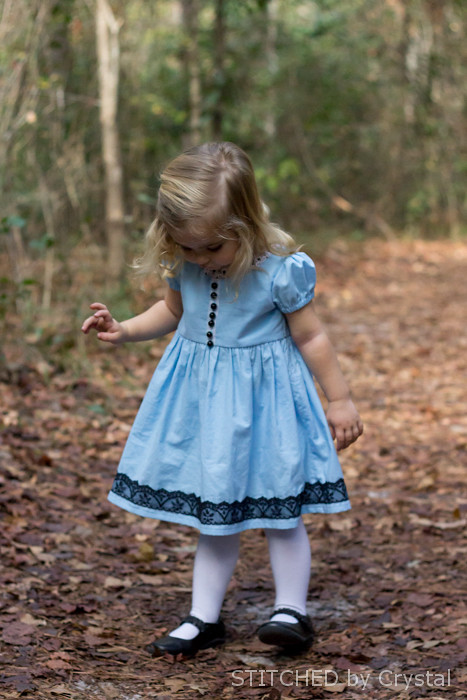
This year I had a hard time deciding between a Little Red Riding Hood or an Alice in Wonderland costume for Em's Halloween costume.  I ended up going with Little Red Riding Hood, so I was excited when Sew Geeky gave me an excuse to sew her an Alice in Wonderland dress!


Sew Geeky is a sewing series that happens once a month, hosted by Sew Chibi and Max California. Each month they pick a theme and invite others to sew along with the theme.  This month is Tim Burton month, so I sewed up a dress inspired by Tim Burton's Alice in Wonderland!


My inspiration came from the dress that Alice wears in the beginning of the movie at the garden party, where she receives and unwanted marriage proposal and then follows the white rabbit into the woods....


 and then falls in the rabbit hole.  


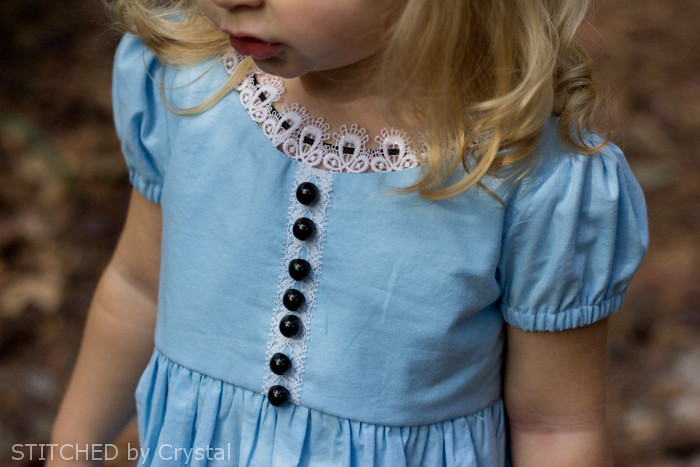
I used  the Caroline Party Dress pattern by Mouse House Creations, mostly because I already had it printed in her size from her Christmas dress. I altered the bodice quite a bit to have a lower neckline and some puff sleeves.  Then I added lace trim to the neckline and wove a tiny grosgrain ribbon through it and I added a bit of lace down the front with little black buttons.


In the movie, Alice has a little black embroidery design along the bottom of her dress, I subbed some black lace there for a similar effect.


Thanks for stopping by! Make sure you check out all the awesome, geeky, things Sew Chibi and Max California have going on!

LinkWithin

Related Posts Plugin for WordPress, Blogger...
I love reading all of your comments! Please make sure your blogger profile is linked to your email, so I can respond to your questions via email, otherwise I won't be able to email you back!

Please feel free to email me(stitchedbycrystal@gmail.com).

Thank you so much for reading! I If you like what you have seen here make sure become a follower of my blog so you can catch all my updates!!