Nov 6, 2013

Pattern Review - Peek-a-boo Pattern Shops Classic Oxford

This review originally appeared last month over at Pattern Revolution. I had the chance to sew up this adorable Classic Oxford by Peek-a-boo Pattern Shop.  I was given the pattern in exchange for my honest review.

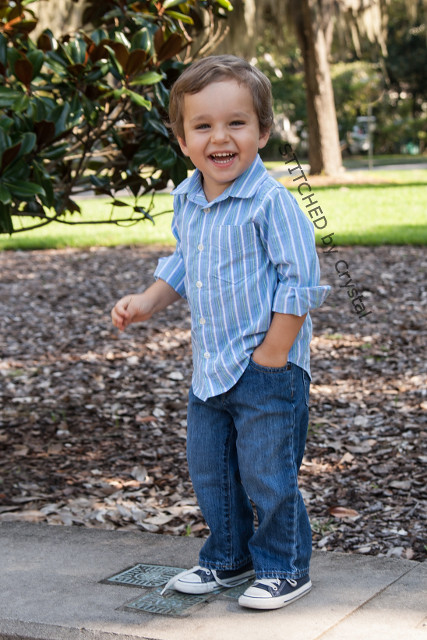
I don't sew for my son nearly enough and he was so excited to see that I had made him a shirt. I am pretty excited about this shirt too, I used one of my husbands old shirts to make it.  It was a shirt he used to wear when we were dating and was one of my favorites of his, I must say I think I like it even more on my son :)


I love the classic look of this shirt.  The pattern has options for short or long sleeves, there is also an optional pocket and optional button tabs to roll up the sleeves.  I went with the long sleeves without the convertible sleeve option for a dressier look, he wore the shirt to a weeding the weekend after I made it.


This pattern is available in sizes 3 months all the way up to 12!  The shirt has a slimmer fit, and the designer recommends sizing up if you like a looser fit.  There is also a size chart with measurements so you can double check your kiddos size before you sew.  My son is mostly wearing 3T these days and I made a 3T.  It fits him well but doesn't leave much growing room around his chubby toddler tummy.


This is not really a quick sew.  It took me about 3 1/2 hours including cutting out the pattern.  It has some pretty advanced stuff, like sleeve plackets and a collar stand, but if you have never done those before, don't worry the pattern has great step by step instructions and pictures for every step.  The designer really does a great job of walking you through this pattern.  I think anyone with intermediate sewing skills could easily tackle this one. 

The only issue I ran into was I a bit of trouble sewing the sleeves on, no matter how I stretched them, they came up a bit small for my shirt. Amy has since adjusted the pattern a bit to fix the issue.



I think I will be sewing a lot more of these in the future!  It is such an adorable, classic look, I can see myself making these for my son until he outgrows this pattern! 


Also, don't forget about voting in the final round over at SYTYC!  Voting ends tomorrow! Head over to see my upcycled kids art station and vote for your favorite project in the finals!
Nov 5, 2013

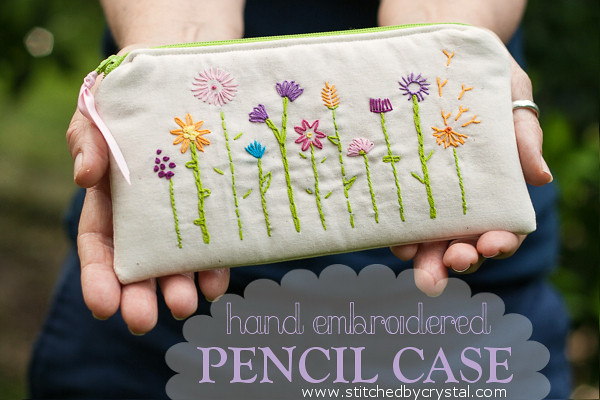
Tutorial: Hand Embroidered Pencil Case

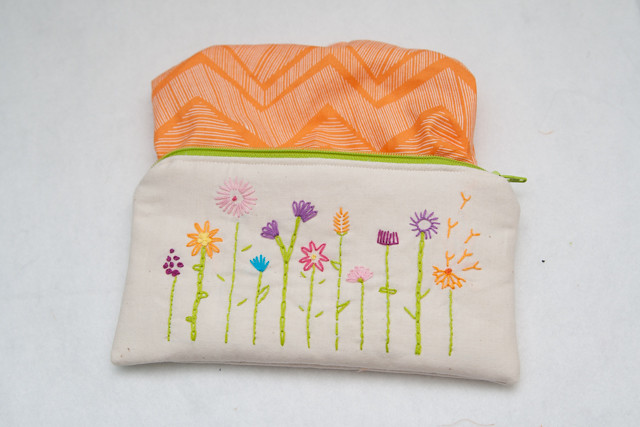
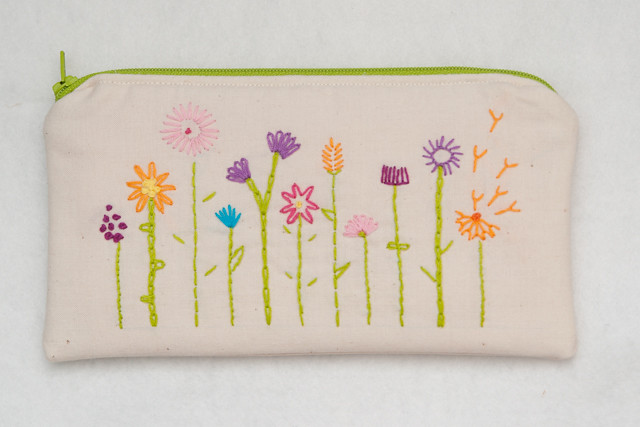
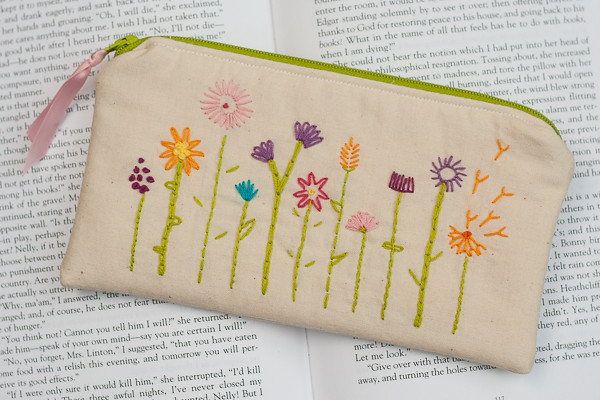
I have been so busy with my projects for SYTYC and other things I had going on I haven't had a chance to share the tutorials for all my projects I entered in the competition.  I am going to start working my way through them starting at the beginning.  Today I am going to share my back to school themed audition project with you, a hand embroidered pencil case.


This little case is perfect for holding pencils for back to school, but could also make a great case for make up, your smart phone, glasses, or anything small.  It would also make a perfect handmade gift for the upcoming holidays!


To make this case, you need one 10" zipper, some fabric, fusible interfacing, and embroidery thread.

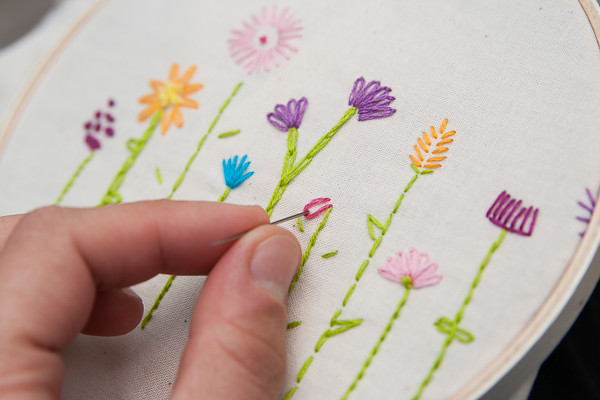
Start by embroidering the flowers on your fabric for the outside of the case.  You can download my hand drawn flowers HERE, trace them on your fabric and embroider them with embroidery thread.


Then cut the fabric to be 10" x 6" with the flowers centered in the middle.  Cut a second 10.5" x 6" rectangle from the outer fabric and 2 10" x 6" rectangles from the lining fabric.  Cut and iron your fusible interfacing to the 2 outer pieces.  


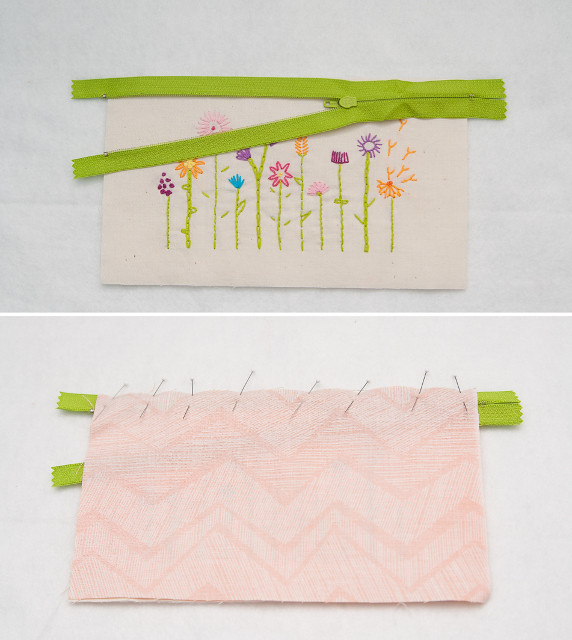
Lay your flowers face up and place the zipper face down on top.  Sandwich the zipper with the lining fabric and pin along the edge.


Sew the zipper in place.  The easiest way to do this is to position the zipper pull somewhere in the middle, with your zipper foot, sew up to the zipper pull.  Stop sewing and move the zipper pull past your sewing machine foot, continue sewing where you left off.


Repeat those steps to attach the outer and lining fabric to the other side of the zipper.  Topstitch along the zipper on both sides.


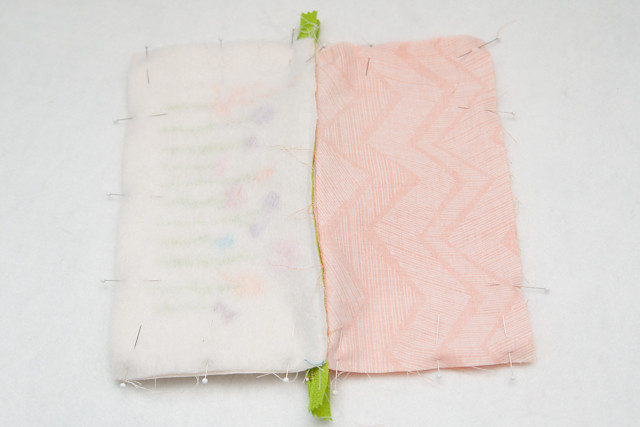
*Make sure your zipper is open* Pin the lining fabrics and outer fabrics together.  


Fold the zipper towards the outer fabrics.  Sew all the way around the case leaving a 3" opening at the bottom of the lining.


Turn your case right side out through the hole in the lining.  


Sew the opening closed and stuff the lining down inside the case.


Enjoy your new pencil case!


Nov 4, 2013

SYTYC Finals Week!

I am over at SYTYC today competing in the final round!  It is just Lynda from Oh So Shabby and I left in the competition.  This weeks competition is not anonymous so I get to share my project with you, I really love it and I hope you do too!


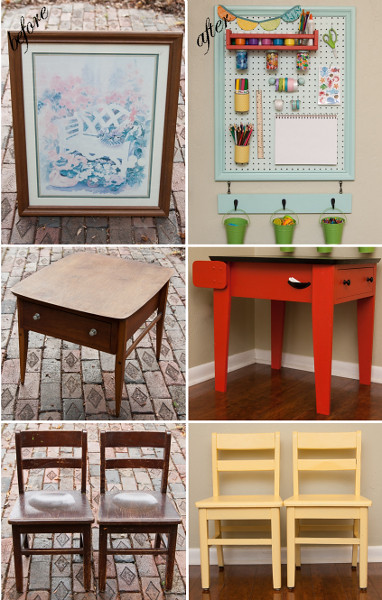
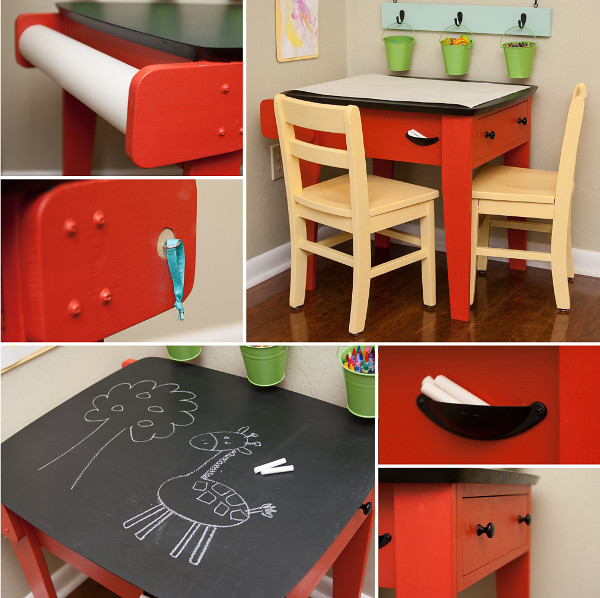
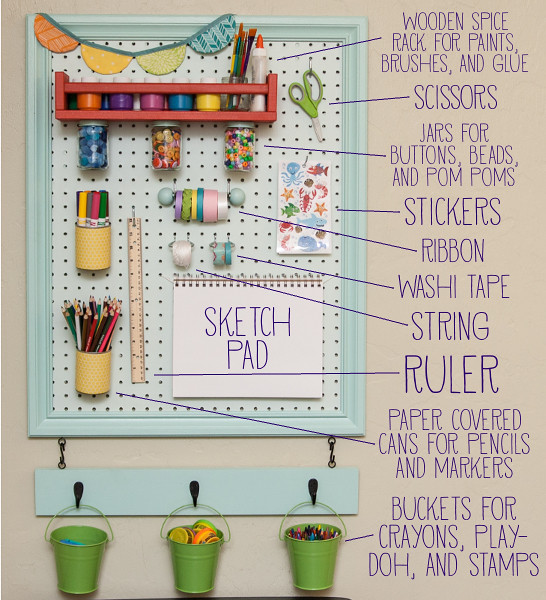
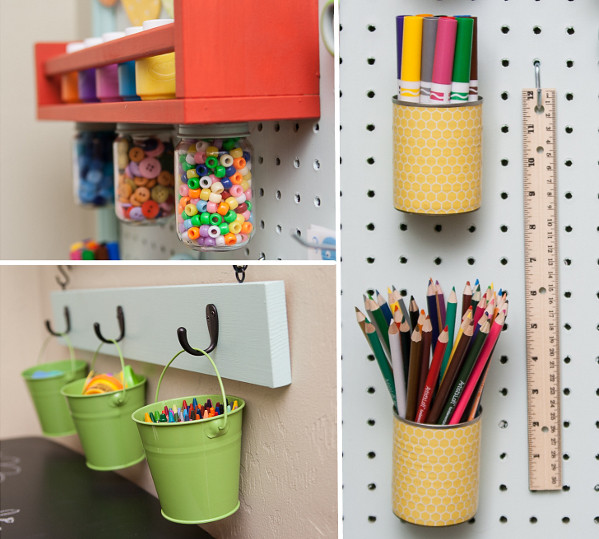
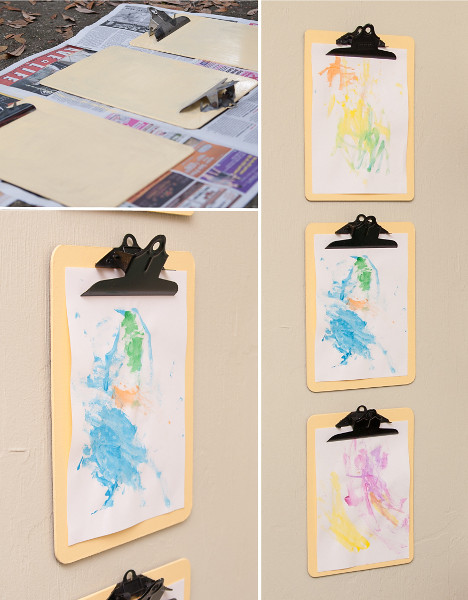
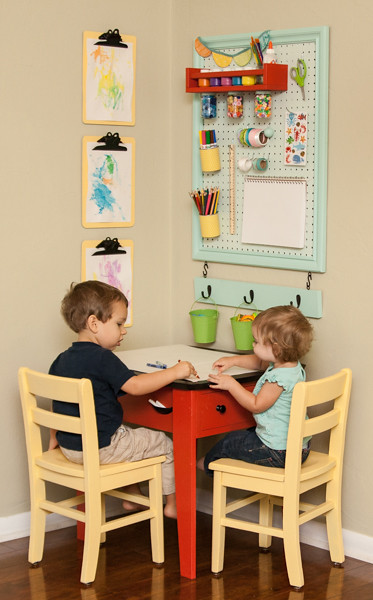
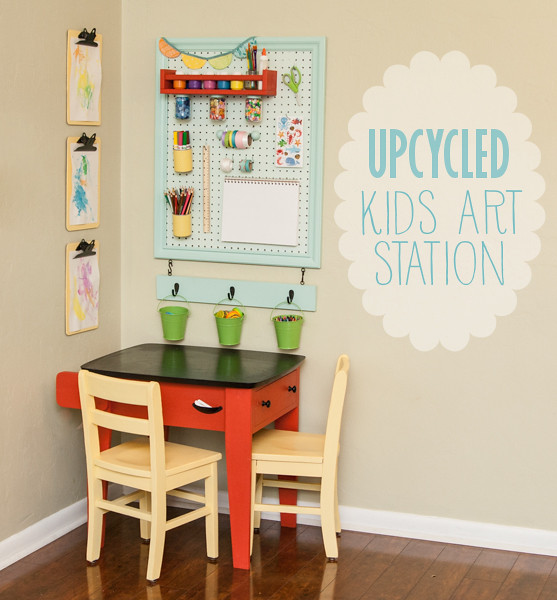
I used some thrift store finds and few things I picked up from the hardware store to make this little corner art station for my kids, they love it and I am so happy with how it turned out!  


The little art desk is my favorite part.  It is made from an end table I got from yard sale when I was in college, we haven't used it for a while and it has been shoved in the corner of my son's room.  It was lower than most end tables, but it got some new legs to make it taller.  It also got a large roll for drawing paper added to the side and chalkboard paint on top.


I picked up a frame at the thrift store and replaced the print with pegboard for organizing their craft stuff.  


I made a little art gallery for m kids by painting some unused clipboards.  Now they can hang up their work for display and change it out whenever they want.


And the little chairs I got for a steal on craigslist and painted them yellow.


Please take a few minutes to head over to SYTYC, check out both projects and vote for your favorite!  

LinkWithin

Related Posts Plugin for WordPress, Blogger...
I love reading all of your comments! Please make sure your blogger profile is linked to your email, so I can respond to your questions via email, otherwise I won't be able to email you back!

Please feel free to email me(stitchedbycrystal@gmail.com).

Thank you so much for reading! I If you like what you have seen here make sure become a follower of my blog so you can catch all my updates!!