
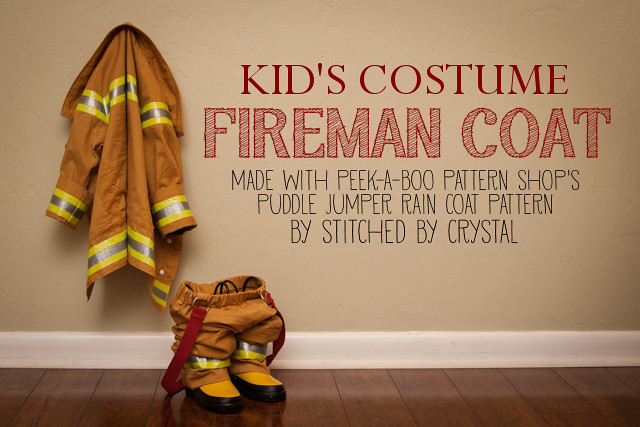
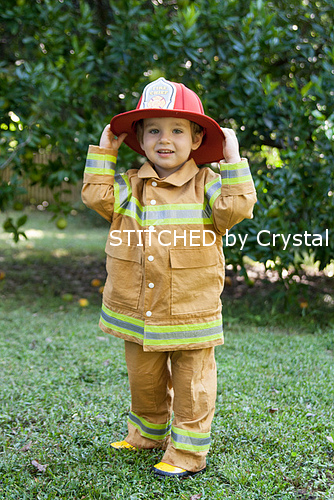
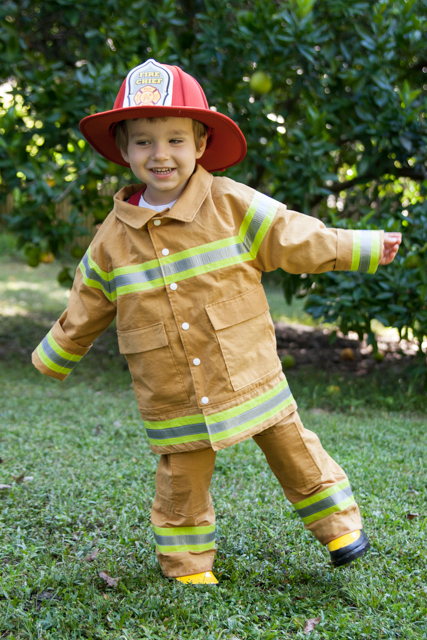
I love making costumes. Costumes are probably my favorite thing to sew, I love the fantasy of costumes and the chance to go a little over the top. I think this fireman costume is pretty awesome!
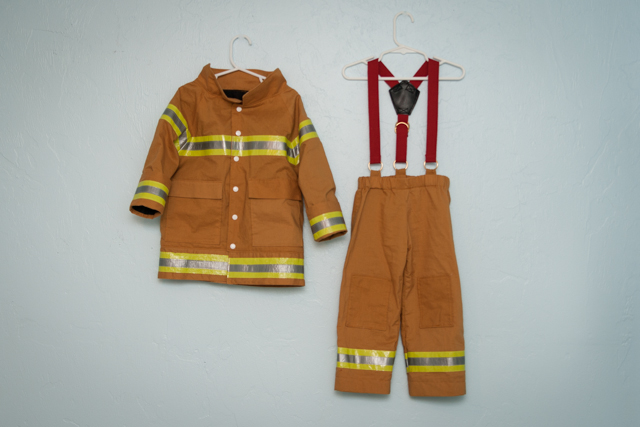

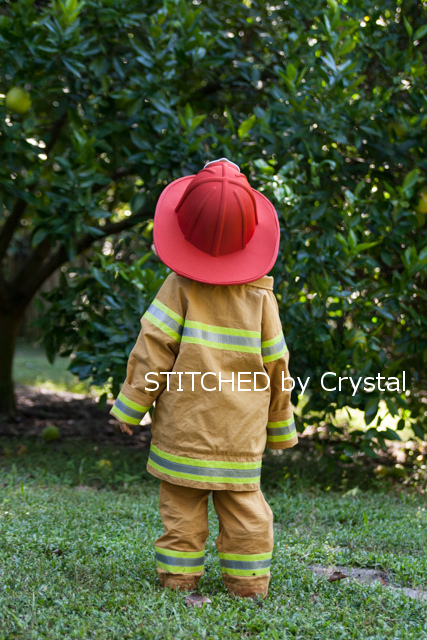
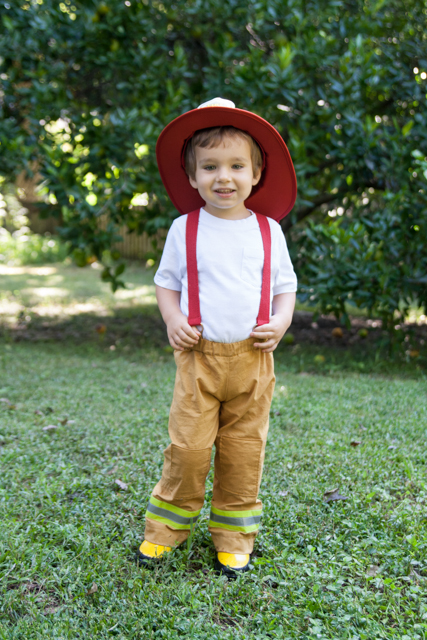
My son is really into firemen these days and I wanted him to be able to use this costume for pretend play for years after this Halloween was over so I made the coat in a size up and rolled up the sleeves. I also made him some bunker pants (you can get the details on those HERE). I made the pants with some extra length in the hem I can let out as he grows and adjustable suspenders so they should grow with him for a while.
I used the Puddle Jumper pattern and cut out all the pieces according to the pattern except I skipped the hood and hood binding.
Next I added my reflective tape (AKA duct tape). You can buy an iron on reflective tape but my local craft store doesn't carry it, duct tape was both cheaper and more accessible so I went with that. I ended up finding this perfect yellow tape at K-Mart.
I started with the cuffs. I folded the cuffs in half and put my yellow tape about 1/2" from the fold. Then I cut a piece of silver so it was 3/4" wide and put that in the middle. I found it was easiest to stick the tape on my self healing mat and use my rotary cutter to cut it, it doesn't stick to the mat well so it was easy to get up.
Next I flipped the cuff over and put tape on the other side too. I knew I would be rolling the sleeves since I was making a size big and wanted the tape to show with the sleeves rolled, but also show when he grows and they aren't rolled. So I ended up with two rows of tape about 1" apart on both cuff pieces.


Then I repeated the process with the bottom band piece. I folded it in half and placed my tape about 1/2" from the fold.

To add the tape to the jacket, I started with the sleeves and put the tape about 1" above the corner where the armpit will be. Then I added it to both front pieces and the back piece, making sure it was even with the tape on the sleeves.
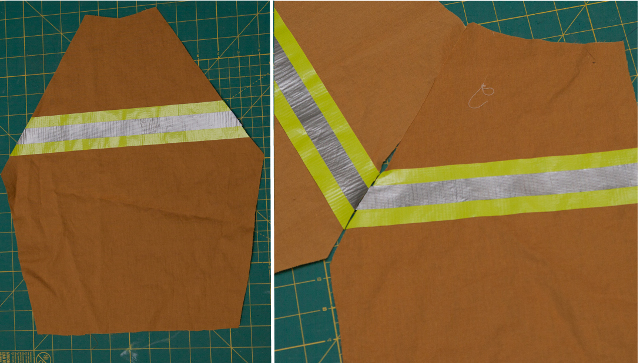
I sewed all the edges of the duct tape down. Sewing the tape was not as tricky as I thought it might be. It did gum up my needle a bit, I wiped it down with rubbing alcohol occasionally while I was sewing and then changed my needle when I was done.

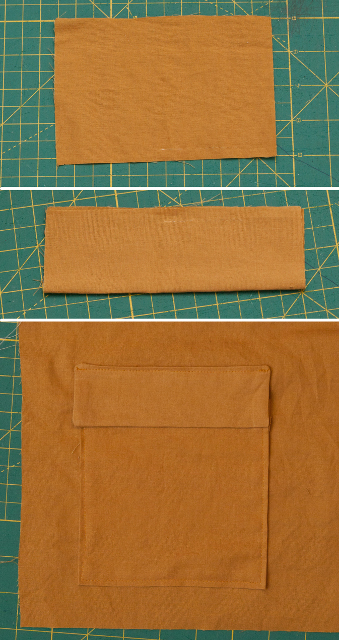
I added the pockets to the front pieces of the coat according to the pattern instructions. I made the flaps over the pockets by cutting two rectangles that were as wide as my pocket pieces and 4" long (for the 4/5 size coat they were 6" x 4"). I folded the rectangles and sewed around the edges, leaving a small opening on the top for turning. I turned, pressed and top-stitched the flaps over the pockets with the folded edge at the bottom and the hole at the top so it would get closed up when I top stitched.
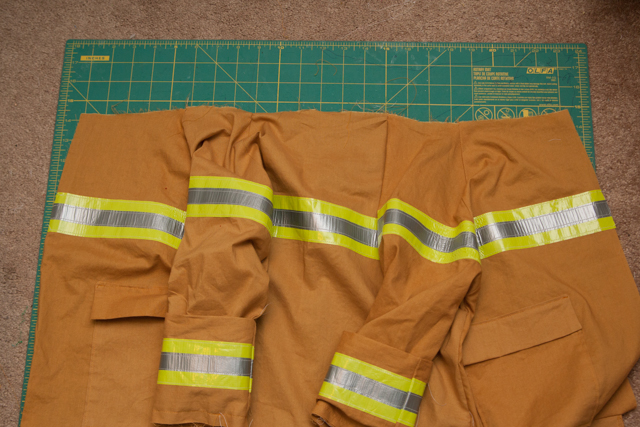
I sewed the jacket pieces and lining pieces according to the pattern. Be careful when you are sewing that you do not iron your duct tape! If you need to iron anywhere there is duct tape use a pressing cloth, duct tape will melt without it!
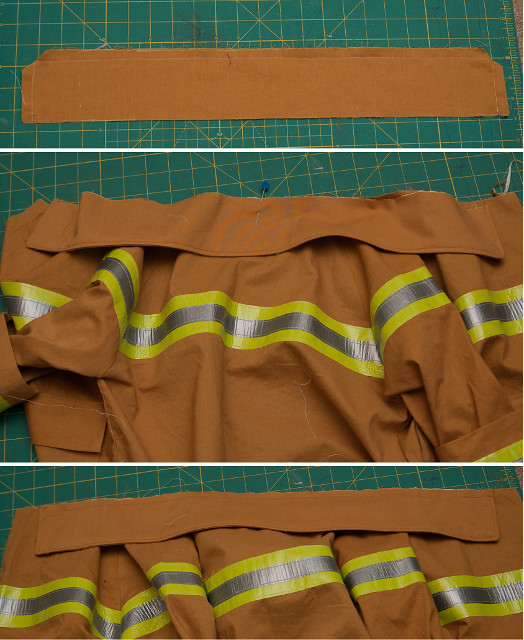
Once I had the outer coat and lining done but not sewn together, I made my collar. I measured the length of the neck opening of the jacket.
I cut two rectangles for my collar 1" smaller then the opening and 3" wide (22" x 3" for size 4/5). Iron interfacing to one of the rectangle then sew along three sides, leaving one long side open. Clip the corners, turn the collar right side out and press. Top stitch along the 3 finished edges.
Find the middle of the collar and the center back of the coat. Pin the collar to the right side of the coat, starting in the middle and working out. Baste the collar to the coat.
Attach the lining, finish the sleeves and add the snaps according to the pattern.
Make sure to check out how I made these adorable bunker pants HERE!
I can't believe you made this---that's incredible!!!!!
ReplyDeleteJulie
www.thechirpingmoms.com
This is really a nice and informative, containing all information and also has a great impact on the new technology. Check it out here: Best waxing places in Manhattan
ReplyDeleteI can't trust you made this - that is incredible!!!!! Amazon Leather Jackets Sale
ReplyDeleteAwesome! What fabric did u use for the coat and bunker pants.
ReplyDeleteAbsolutely amazing fireman outfit any child would be proud to wear. Thank you so much for this wonderful tutorial. I can wait to get started on one for my Granddaughter Isla Kate.
ReplyDeleteIt's easy to forget the school curriculum due to a lot of homework, there was no time at all, and after that, I was advised to pay someone to write my essay, any written work is made to order
ReplyDeleteฝาก20รับ100 pg ล่าสุด การฝากถอนในเกมสล็อต PG SLOT เป็นกระบวนการที่ง่ายสะดวกสบายทำให้ผู้เล่นสามารถเข้ามาเล่นเกมได้โดยไม่มีความยุ่งยากมากมาย นี้คือขั้นตอนที่ทำให้การฝากถอนใน PG Slot
ReplyDeleteImmerse yourself in the world of opulence and grandeur with our mesmerizing banquet hall images . Perfect for those planning a lavish celebration or seeking inspiration for event venues, these stock photos showcase the exquisite details and sophistication of banquet halls, promising an unforgettable visual experience.
ReplyDeleteVery good idea for teaching children different professions. We also held similar events in elementary school. Now I'm studying at university and the learning process here is much more difficult. Somehow I found out about residency personal statement writers and decided to use their services. I was pleased with the way they completed my written assignments. I improved my grades in some subjects and my writing skills became better.
ReplyDeleteSlither IO - Keep a steady hand and stay calm under pressure to avoid making rash decisions that could lead to collisions.
ReplyDeleteIf you enjoy creating something unique with your own hands, like this adorable mini hat project, then you might be interested in custom jewelry design from Olertis. They of>https://olertifer custom jewelry design https://olertis.com/services/custom-jewelry-design/ where you can bring your wildest ideas to life. You will get a piece of jewelry that will reflect your personality and style, just as this mini hat project adds a special charm to any look.
ReplyDeleteLittle boys and girls will definitely love this Skribbl IO costume, I'm going to make one for my nephew.
ReplyDeleteFireman coats are iconic for their durability and functionality, providing unmatched protection in critical situations. Similarly, finding reliable products enhances everyday experiences. For vaping enthusiasts, the Elux Nic Salts offer high-quality flavors for a consistently smooth experience. Both emphasize reliability and performance!
ReplyDeleteThe fireman coat costume is a timeless choice for kids during Halloween, bringing both fun and creativity to the celebration. It's a great way to inspire imaginative play, similar to the engaging activities found on abcya where kids can learn and explore in a fun environment.
ReplyDeleteCheck out the Fireman Coat from the 2013 Halloween Costumes collection, which complements A's look perfectly (you can find the pants HERE). This vibrant costume deserves a spot on your wordle game wishlist for creativity. Get ready to celebrate Halloween in style and warmth!
ReplyDeleteKraken C-Liquid offers a smooth and satisfying experience, making it a popular choice for those seeking premium quality. Known for its potent blend and exceptional consistency, it provides users with a relaxing and enjoyable sensation. Perfect for unwinding after a long day, Kraken c-liquid stands out in its category. Products like these are perfect for creating a calm and soothing atmosphere. With its reliable effects and quality assurance, it's a trusted choice for enthusiasts looking for the best in herbal incense solutions. Discover how it enhances relaxation and brings balance to daily routines.
ReplyDeleteLooking for a scorching hot costume idea from 2013? A Fireman Coat is a classic! But if that feels too…basic, maybe you'd prefer the intense pressure of a summer rush? Then ditch the fire hose and grab a spatula because you're about to experience the ultimate frozen treat challenge: Papa's Freezeria ! Craft sundaes to perfection and keep those customers happy. It's much cooler than fighting flames, promise!
ReplyDeletePapa's Freezeria: A Sweet Time Management Game
ReplyDeletepapas freezeria is a popular time management game developed by Flipline Studios where players create delicious ice cream sundaes for demanding customers. In Papa's Freezeria, you'll take on the role of an employee at a beachside ice cream shop, managing every step of the sundae-making process.
The gameplay of Papa's Freezeria involves taking orders, blending ingredients, adding toppings, and serving your creations to earn tips and upgrade your shop. With its colorful graphics, engaging gameplay loop, and challenging time management elements, Papa's Freezeria has become a fan favorite in the Papa's series.
Available on multiple platforms, papas freezeria continues to delight players with its sweet combination of strategy and creativity.
I appreciate how you utilized an existing pattern to create a new product. Adjusting a few small details while maintaining balance and functionality shows that creativity does not always start from scratch. For those who enjoy experimenting with design, this issue requires Friday Night Funkin skills, meaning trying multiple variations, balancing different elements, and coordinating flexibly so that the final result is both creative and effective.
ReplyDelete