Oct 24, 2014

Flip this Pattern

Hey there! I am competing in Flip this Pattern over at Frances Suzanne this week!  In case you haven't heard of it, it is a super fun challenge where they give the same pattern to 4 different sewing bloggers and ask them to make it over into something a bit different than the original design.  I am up against some pretty stiff competition! All the ladies competing this month are amazing...seriously amazing!  

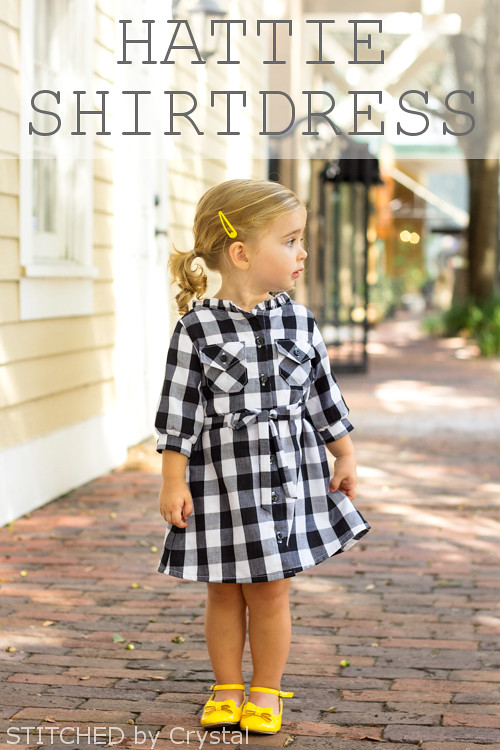
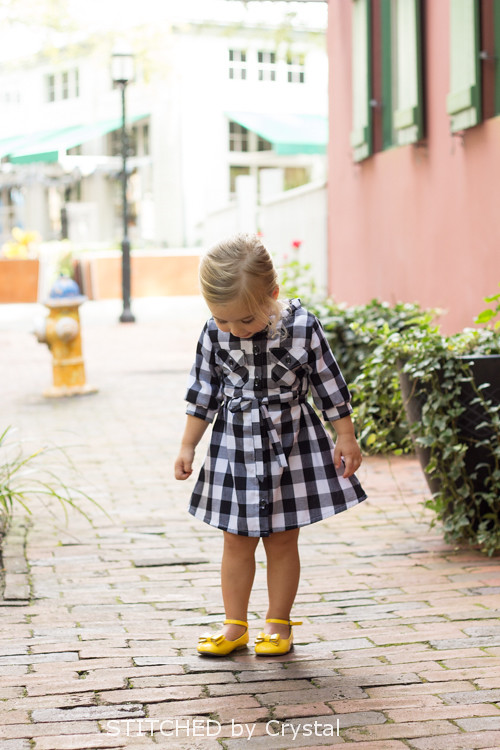
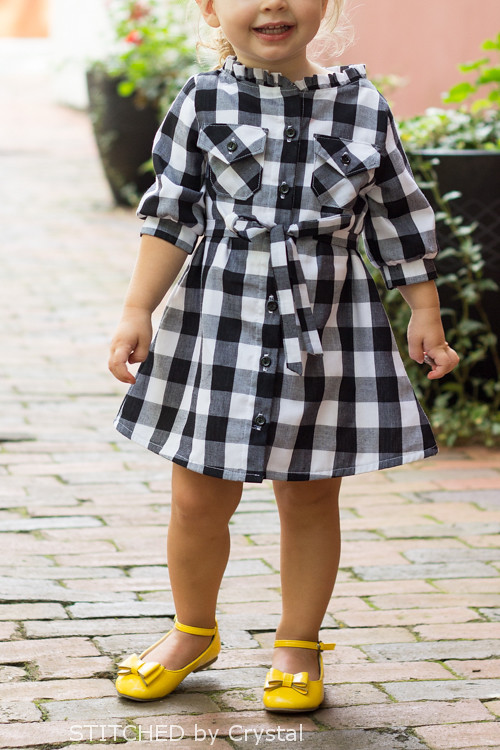
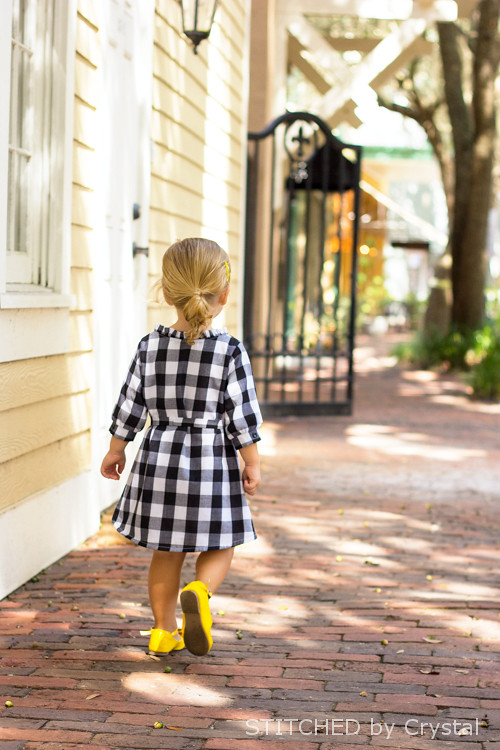
For my flip, I too the Hattie dress by Brownie Goose and flipped it into a shirtdress for Em!  You can see a bit more about my dress below, and if you missed it earlier this week you can see my full post about my flip HERE.  And of course make sure you head over to Frances Suzanne and see the other four incredible entries and vote for your favorite (I would love it if it was mine ;) )


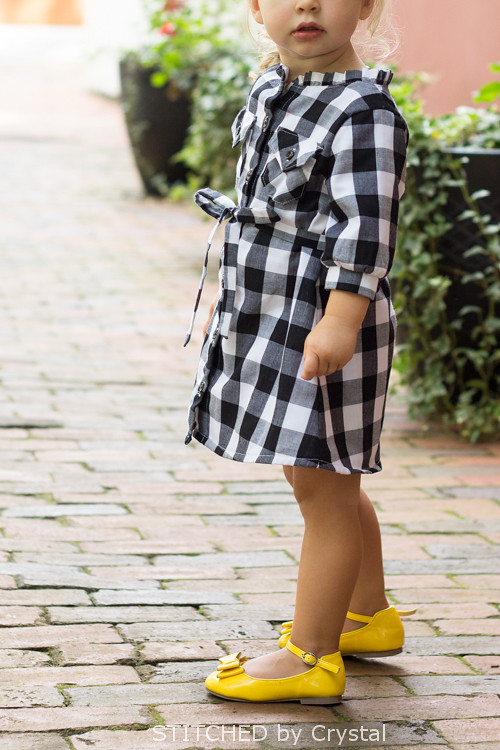
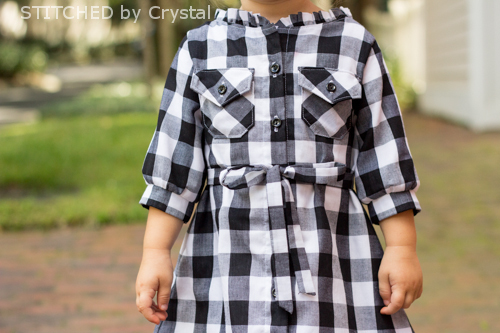
To flip the Hattie into this shirtdress, I switched things around a bit so it opens in the front and put buttons all the way down the front of the dress.  I kept the collar because that ruffled collar is my favorite part, and a distinguishing feature of the Hattie I didn't want to lose, but I curved the ends down at the button placket.  I also made my dress fully lined so the ruffle has no exposed seams at the neckline.

  
I shortened and slimmed the sleeves a bit and added some little buttons to the back of them.  


And I added some little chest pockets and a sash to cinch it in the middle a bit.


I am pretty stoked about how it turned out! I just love the look of this dress for fall!


Make sure you head over and VOTE for your favorite Hattie flip!


Oct 23, 2014

Ansley Top

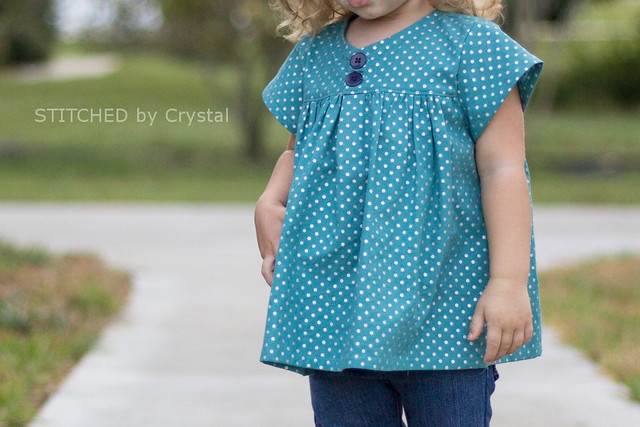
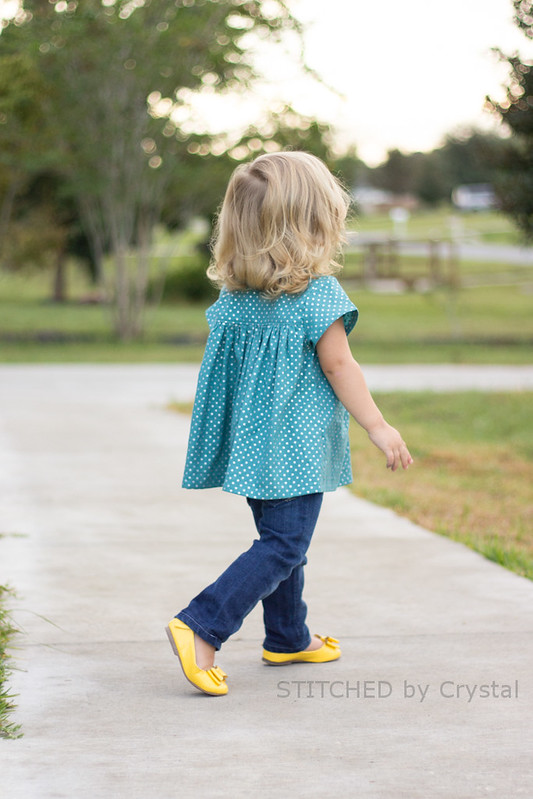
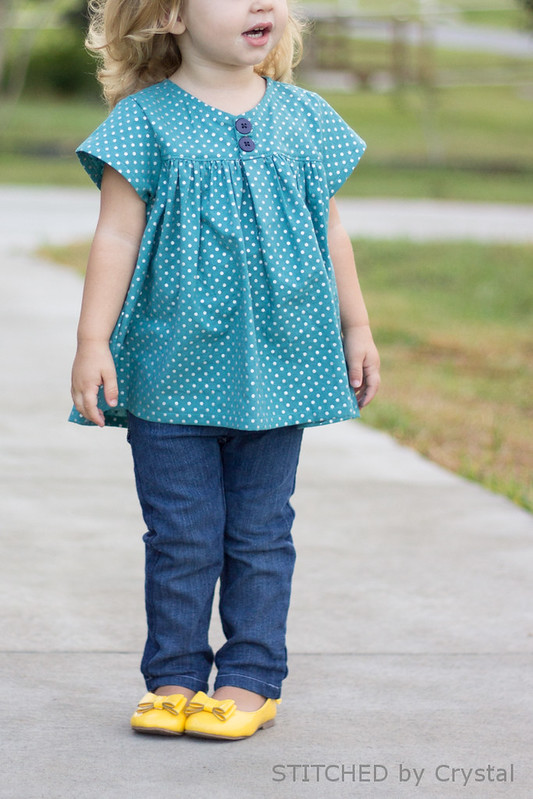
I got the chance to sew up the new Ansley top and dress pattern from Blaverry Patterns  and I am over at Pattern Revolution today sharing my version.


I had never sewn a pattern from Blaverry before, but I really love the designers style, she has some really cute stuff!  I was so excited to try one of her patterns out.  I really liked it! it is well written and the end result is cute, I will be sewing more Blaverry in the future for sure!


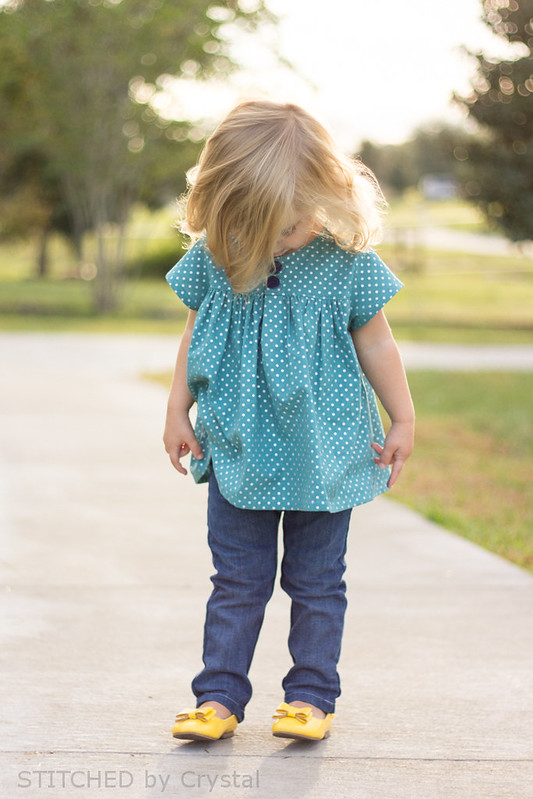
This pattern has tons of options, 2 lengths, 6 sleeves, several hem options, collars, cuffs...the possibilities are endless!  I sewed up the top version with short sleeves.  OK, actually I sewed up the dress version with 3/4 length sleeves and decided last minute to chop off the sleeves and the dress.  Ha! I can never make up my mind! 


I love the way this top turned out.  It is so cute with her skinnies, but would be cute with shorts too, or layered with long sleeves under it when it gets colder.  


You can check out my whole review and read all the details about this pattern over at Pattern Revolution today!

Oct 22, 2014

Little Red Riding Hood (and a hooded cape tutorial!)

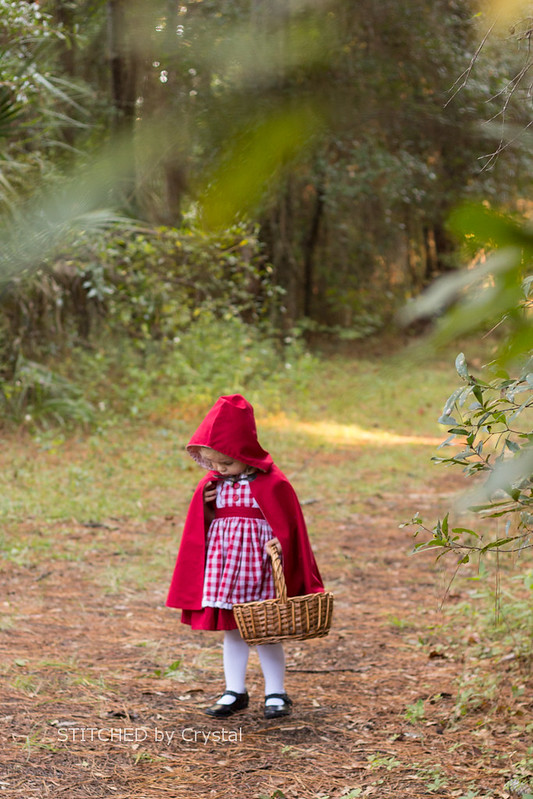
Halloween sewing is hands down my absolute favorite!  This year for Halloween, I got to pick Em's costume.  I was hoping to do coordinating costumes for my kids, but when A decided he wanted to be Superman I decided to scratch that idea, I just couldn't get excited about a Lois Lane costume for her.  And since she doesn't really have an opinion on her costume yet the decision was left to me! I decided on Little Red Riding Hood for her, partly because I was Little Red Riding Hood once when I was little and it was one of my most favorite costumes, but mostly I picked it because I thought she would make the cutest Little Red!


For her costume, I made her THIS gingham dress.  I felt like a Little Red Riding Hood costume gave me the freedom to make any dress I wanted really, there are so many different variations of Little red, ones that wear red dresses, ones that wear black corsets, ones that wear grey dresses...So really she just needs a dress and a red hooded cape.  I chose to do a gingham with some eyelet trim and I love love how it turned out.


Then I made her cape.  It is red (of course) on the outside and I lined with a vintage looking fabric that is cream colored with little red flowers.  And finished it off with a little toggle to keep it on.  More details on how I made the cape are at the end of this post!


And to finish off her costume, I picked up a basket at Hobby Lobby for Little Red to carry all her goodies for Granny (or her candy for trick-or-treating).


And Little Red Riding Hood is ready to head off into the forest alone to take some goodies to her poor sick Granny....OK wait, who sends their kid off into a forest alone where she could get eaten by a wolf?!   I think we will be sticking to supervised trick-or-treating in a wolf free zone:)  Although, A has informed me that I shoud dress at the wicked wolf, and he says that I have to wear a costume if I want to go trick-or-treating with him...we'll see.


Alright, one more photo of my adorable Little Red and I will get on to the cape tutorial!


Want to make a hooded cape? Here is how I made mine!
You will need:
  • Fabric for the outside of the cape, red if you are making little red but this cape could be used for lots of costumes...Like a vampire, Harry Potter, you could even modify it a bit to make a Frozen Anna cape.  As far as how much you need, that depends on the size you want to make, I used 1 1/4 yard for my 2 year old
  • Fabric for the lining, the same amount as the outer fabric
  • Something to fasten the cape, I used a toggle, but you could use something like a ribbon to tie or a button and fabric or elastic loop.
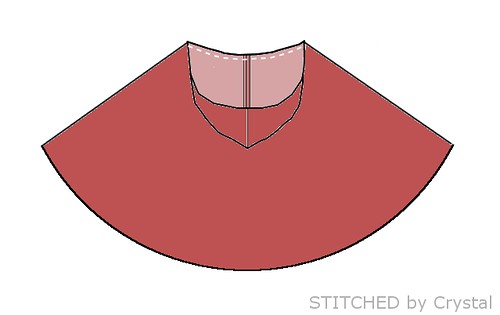
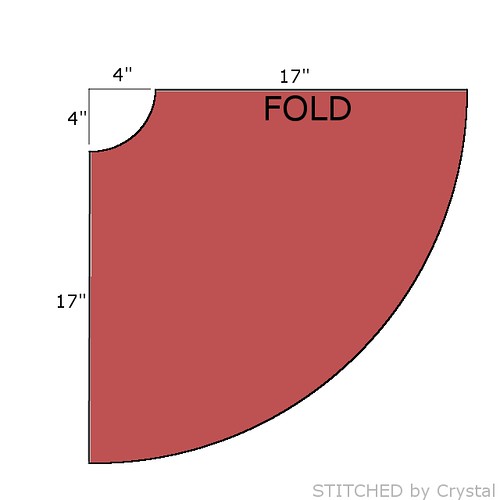
The cape is made from a big half circle.  Determine the what the finished length you want your cape and then add 1", for my daughter the finished cape is 16" so I cut my cape 17" long.  Fold your fabric in half, then cut a quarter circle on the fold (when you unfold it it will be a half circle).  Cut a quarter circle with a radius of 4" at the top, then cut a second circle measuring the finished length +1" from the first circle as shown in the photo below.  You will need one of these in your outer fabric and one in your lining.  The 4" radius at the top should work for most small kids, for bigger kids or adults, you may want to go up to 5".

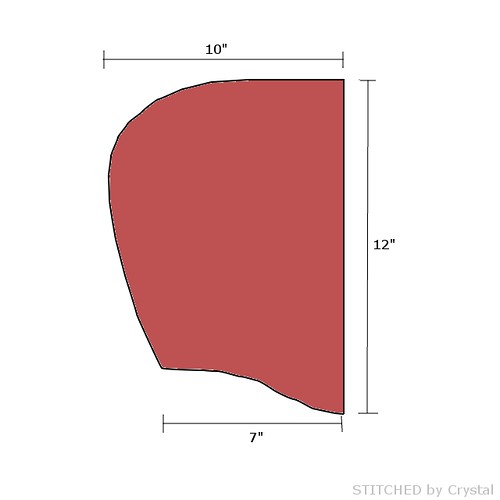
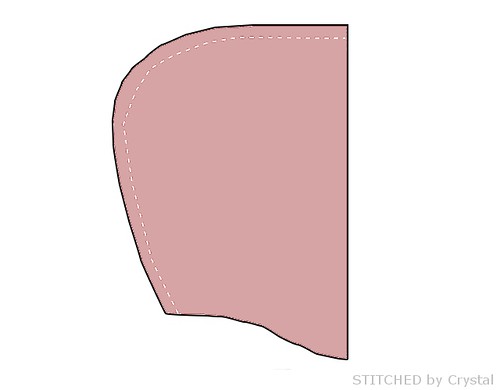
To cut the hood, I drew out a hood shape that was roughly 10" wide and 12" tall.  You can see the shape I cut below.  Again, this size works for my 2 year old, you will want to adjust for bigger sizes.  An easy way to get a good hood size and shape is to trace a hood off of one of your kids sweatshirts that fit well, simply lay the hood flat and draw around it.  You will need 2 hood pieces for the outer cape and 2 hood pieces for the lining.  


Sew your hood pieces right sides together as shown below.  Repeat with the lining hood pieces.


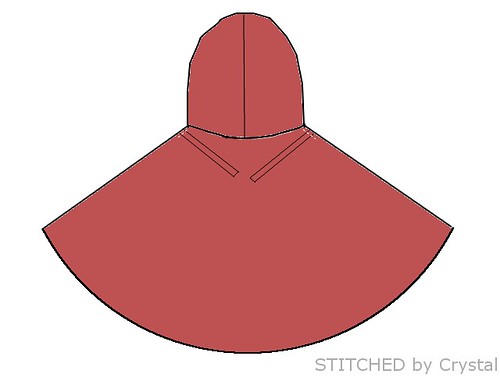
Open your hood and pin the bottom of the hood to the neck hole of the cape with the right sides of the hood and cape together.  Sew the hood to the cape, repeat with the lining.


If you are using ribbon or a button loop as your closure, baste them in place now. Baste them to the right side of the cape lined up with the raw edge of the cape, close to the hood.  


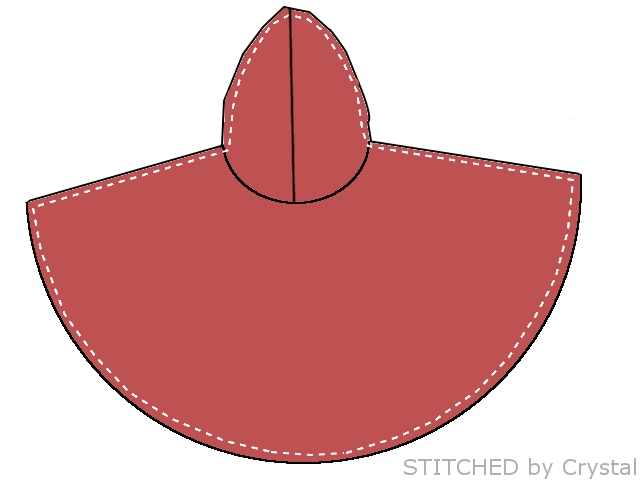
Place your cape and the lining right sides together and sew all the way around the edge, leave a 3" opening at the bottom of the cape.


Turn the cape through the hole left in the bottom.  Press the cape, then topstitch around the edge of the cape and hood, making sure you close up the hole at the bottom.


If you are using a toggle, sew it in place now.  And your cape is done! Easy right?!

Oct 20, 2014

Marissa Mermaid and a giveaway!

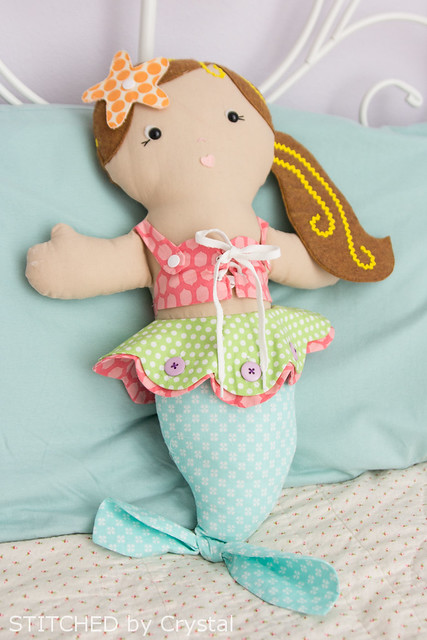
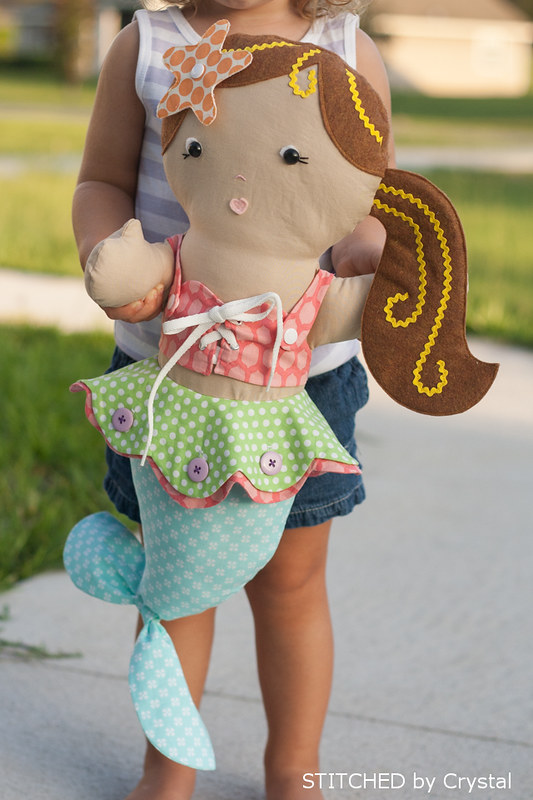
If there was ever a perfect sewing pattern for me to sew I think the Marissa Mermaid Doll by Ruby Jean's Closet has be it!  Seriously, it's got my name written all over it! I love sewing dolls, I have loved mermaids since I was a little girl (maybe an embarrassing fact about me...my room in college was decorated with mermaids everywhere :) ), and I am an occupational therapist so I get excited about things the work on fine motor skills.  This adorable doll combines all of those loves for me!


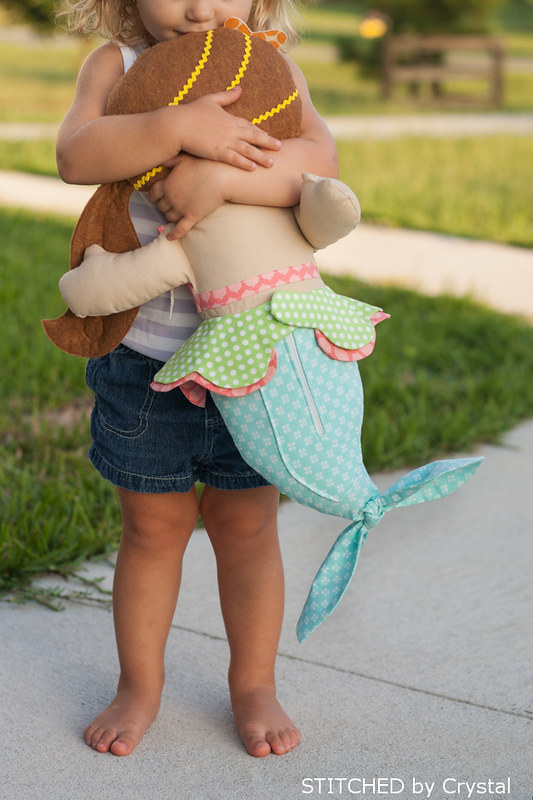
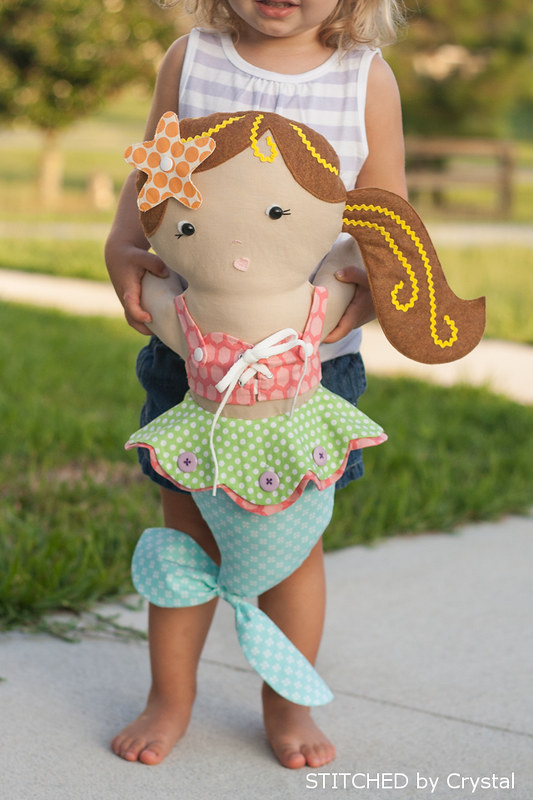
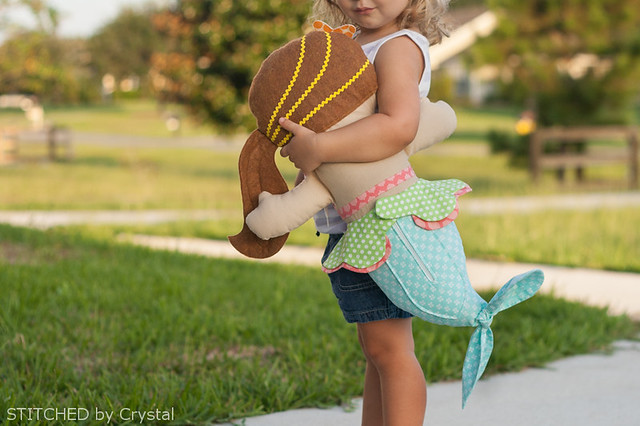
And a bonus....my daughter loves her too!


Marissa measures 22" tall and she's got snaps, buttons, velcro, a zipper, and a tie to help your little one improve their fine motor skills while they play.  


Sewing this mermaid was such a fun change from all the clothing I have been sewing lately.  She has lots of pieces, so she takes a bit of time to make, I had mine done in a little over three hours.  


Looking for a doll like this for a boy? Check out her shop! She has SeaBiscuit the seahorse and Iggy the penguin too!


Want to sew up one of these adorable dolls too? Ruby Jean's Closet is going to give one lucky winner all three of the fine motor skills dolls! To enter, just fill out the rafflecopter below!


a Rafflecopter giveaway

Oct 15, 2014

The Rowan Tee

I recently had the opportunity to test a pattern for Laura of Titchy Threads.  This was my first time working with her and she is great.  And she has some really great patterns, like her Small Fry Skinnies I made a while back.  Those jeans actually still fit Em and they get worn pretty frequently ( you will see them again in the pictures below)! Her newest pattern is a basic tee, the Rowan Tee, with some really fun options.


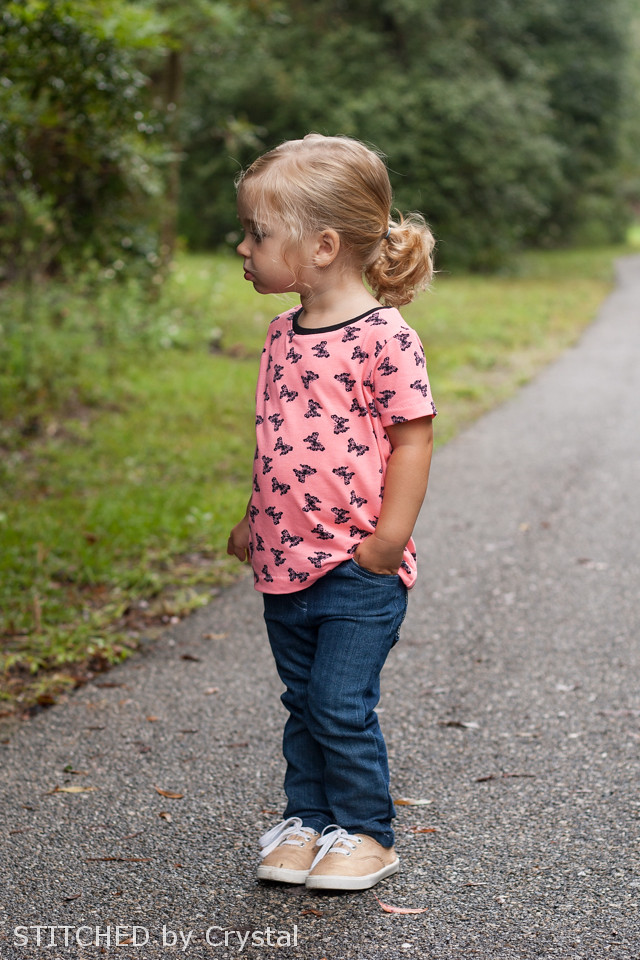
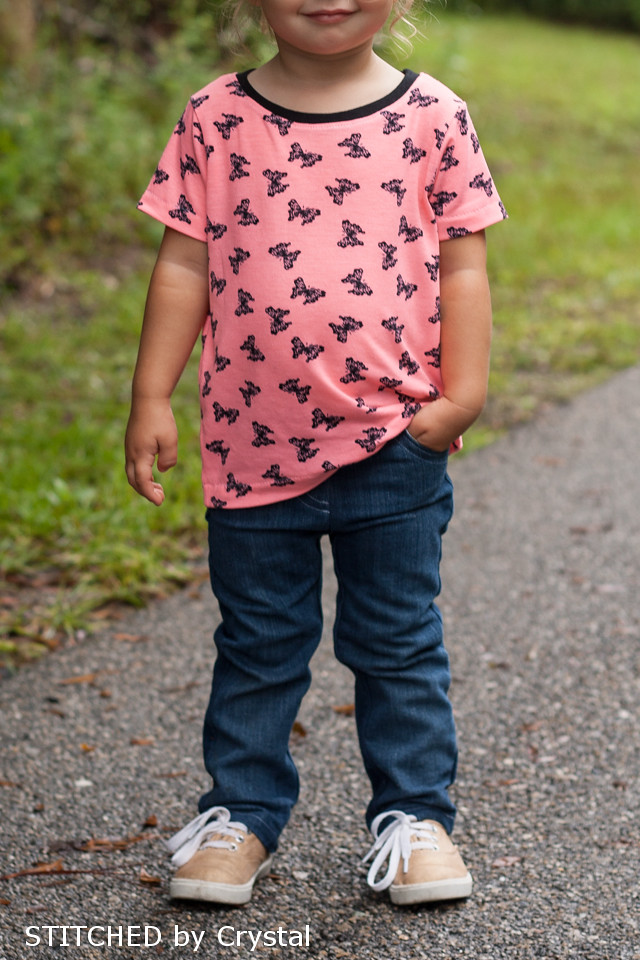
I made two Rowan tee's.  The first one is just a basic tee.  I picked up this adorable butterfly knit on super clearance at JoAnn's.  It is really soft and pretty thin, I love it for this tee!


The tee's fit is perfect, it is slightly slimmer than some tee's and it looks great on Em.  I also made one for A and the fit is great on him too.  I love patterns that I can use for both my kids!


The shirt pairs perfectly with her Small Fry Skinnies and the shoes I painted gold!


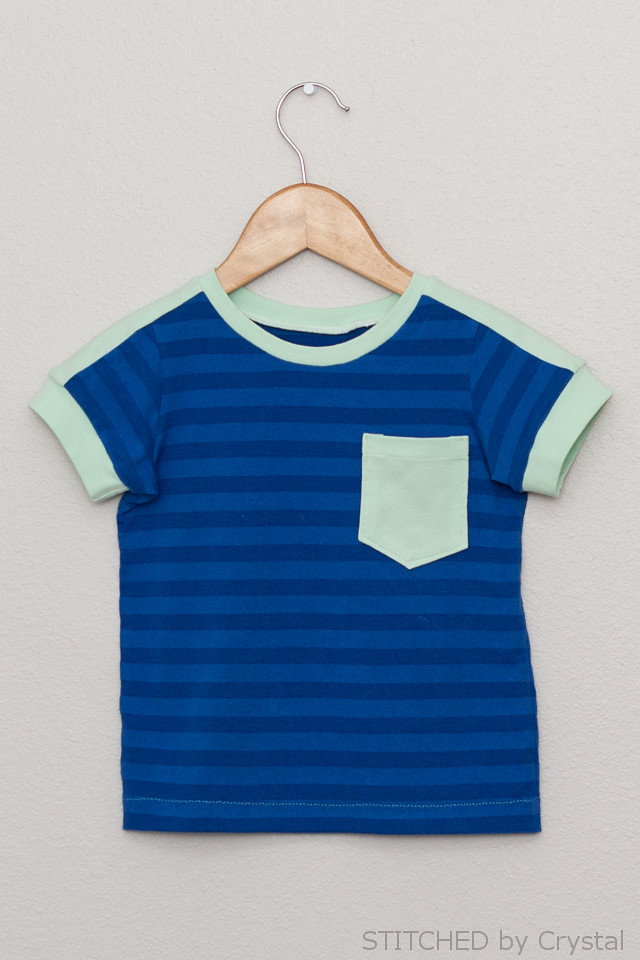
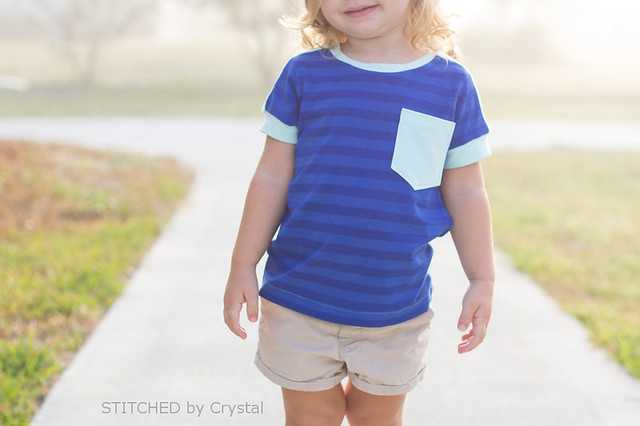
What really sets this tee apart from other basic tee patterns is all the options. This pattern has two pocket options, a chest pocket and a kangaroo pocket, two sleeve lengths, a hood option, optional hem cuffs for the sleeves and waist, and contrast sleeve stripes that you can add just to the shoulders or to the full length of the sleeve.  


On this shirt, I added the chest pocket, full length sleeve stripes and sleeve hem bands.  Em chose the fabrics for this one, both are from Girl Charlee. I think she's got some great fabric pairing instincts, she must get that from her mom ;)


This pattern s a quick easy sew that is really fun to make.  And the end result is awesome!  She wore this shirt the other day and got a ton of compliments from strangers. 


The Rowan tee will be available this week from Titchy Threads.  You will be able to find it in her shop.  

Oct 6, 2014

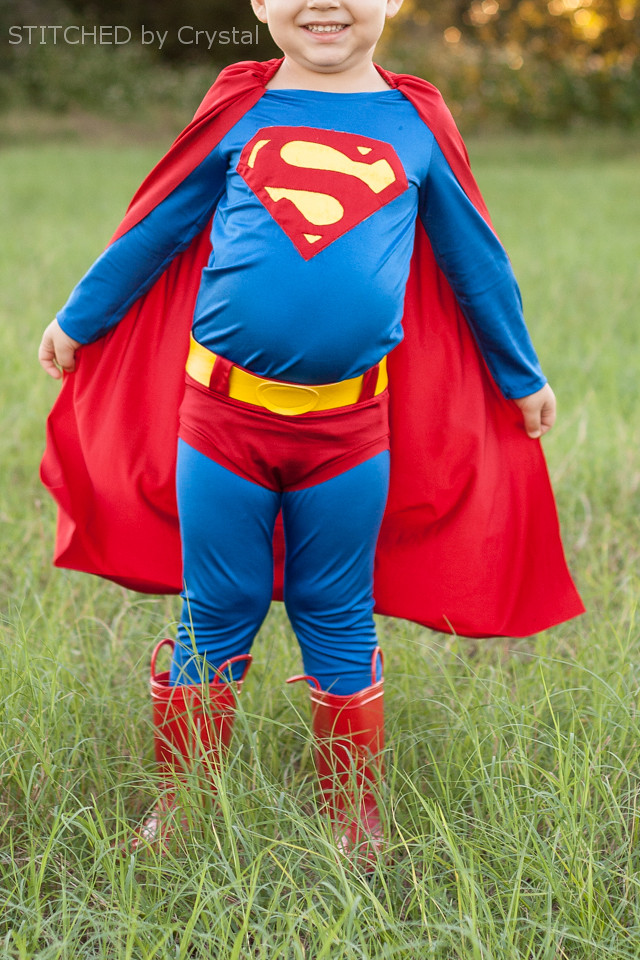
Superman Costume

Halloween sewing is my very favorite!  And I am so excited to share A's costume with you today!  He gets really into picking out his costume, last year he HAD to be a fireman, and this year he was 100% set on Superman.  I really have a lot of fun putting his costumes together, but the best part is seeing how excited he gets about them!


Superman Costume

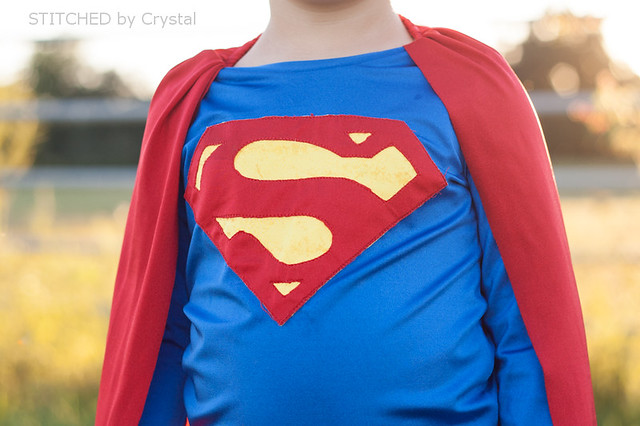
I used three patterns from Jocole Patterns to create this look, the Classic Knit Tee, Basic Knit Leggings, and Basic Brief Bottoms (yep…my son is wearing girls leggings and underwear patterns, but don’t tell him because he is three and hates anything for girls!)  


Superman Costume

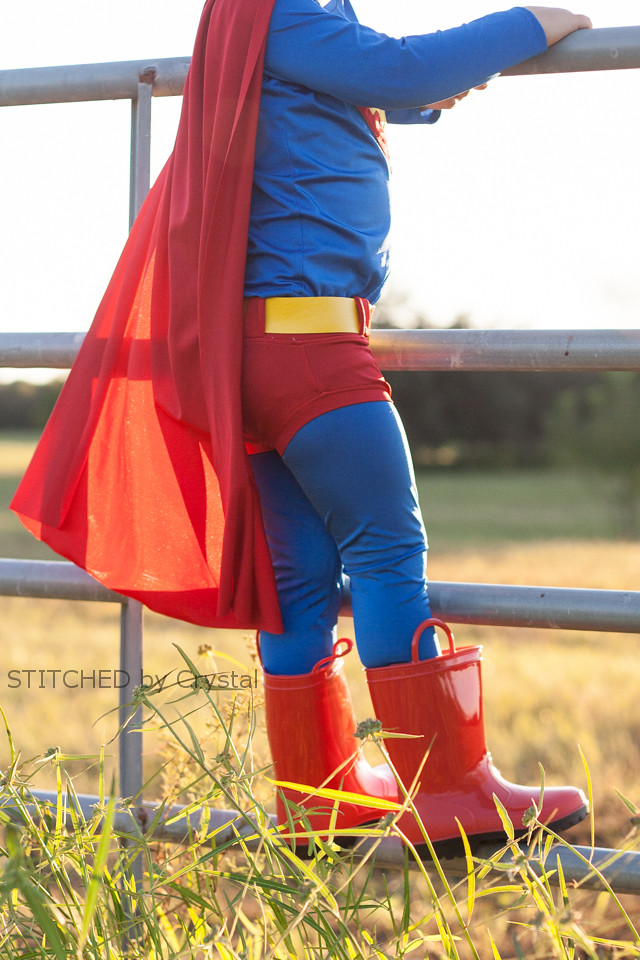
I am sharing more details on A's costume and a tutorial on making the "S" applique over at Pattern Revolution today.  And I will be sharing a few more details including how I made the belt and cape here soon!


Superman Costume

Superman Costume

LinkWithin

Related Posts Plugin for WordPress, Blogger...
I love reading all of your comments! Please make sure your blogger profile is linked to your email, so I can respond to your questions via email, otherwise I won't be able to email you back!

Please feel free to email me(stitchedbycrystal@gmail.com).

Thank you so much for reading! I If you like what you have seen here make sure become a follower of my blog so you can catch all my updates!!