
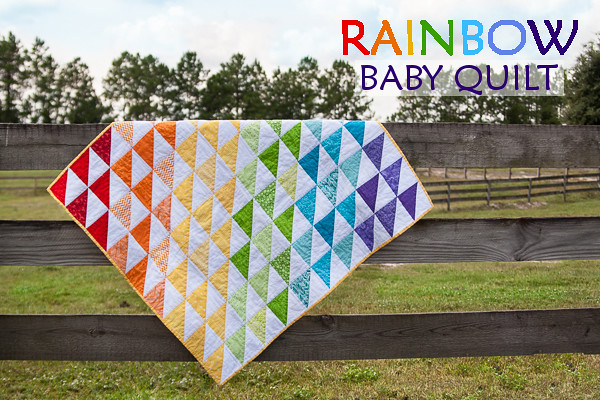
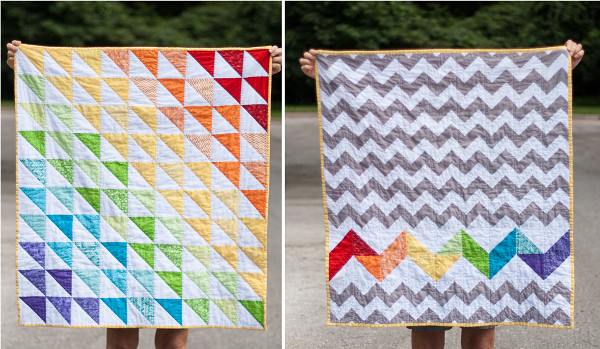
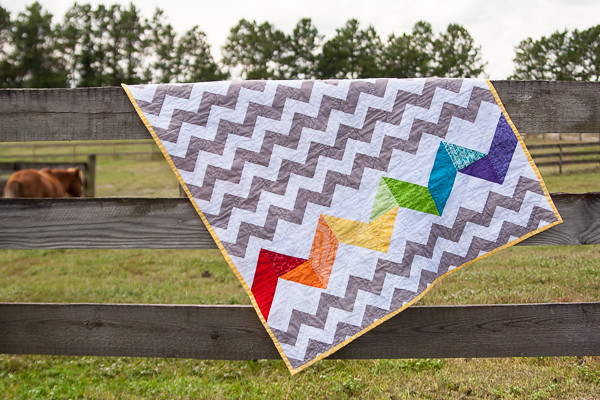
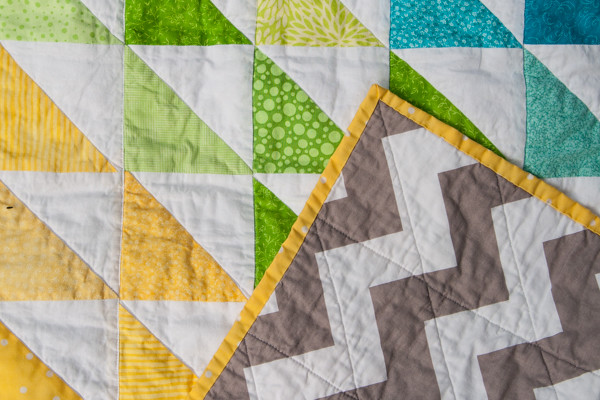
I LOVE how this quilt turned out! It may be my favorite of all the quilts I have made! The rainbow colors on the front are so cheerful and could work for either a boy or a girl. I chose a grey chevron for the back which is a bit unexpected with all the color on the front, and used some leftover squares from the front to make a rainbow chevron for the back.
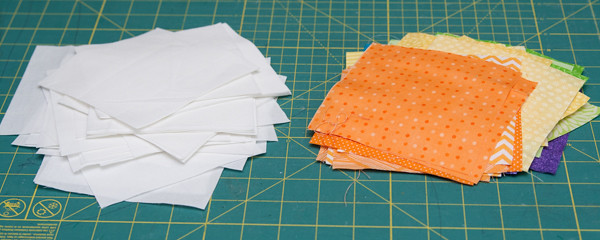
For the front of the quilt and the chevron on the back you
will need some 5” x 5” squares. The
easiest way to cut squares of fabric is with a rotary cutter, a self healing
mat, and a quilting square. The number
of squares of each color you will need is listed below:
White:
56
Red: 5
Orange:
9
Yellow:
14
Green:
14
Blue: 9
Purple:
5
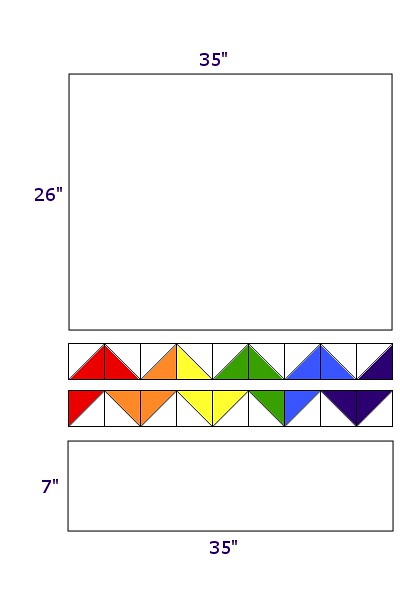
You will also need two rectangle for the back, one that is
35” x 7” and one that is 35” x 26”, and a piece of quilt batting about 36” x
40”.
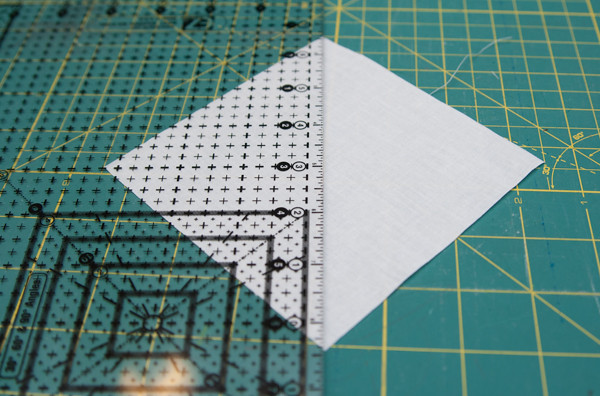
Once you have all your squares cut, draw a diagonal line
across all of your white squares.
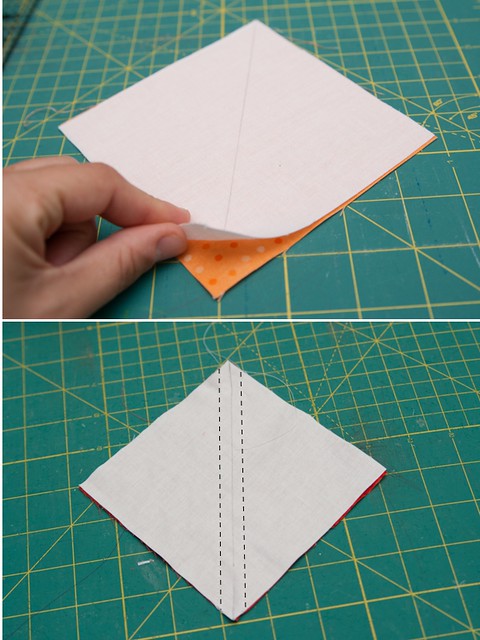
Lay one white square on top of a color square with right
sides together. Sew on both sides of the
line you drew, ¼” from the line. Repeat
with all your squares.
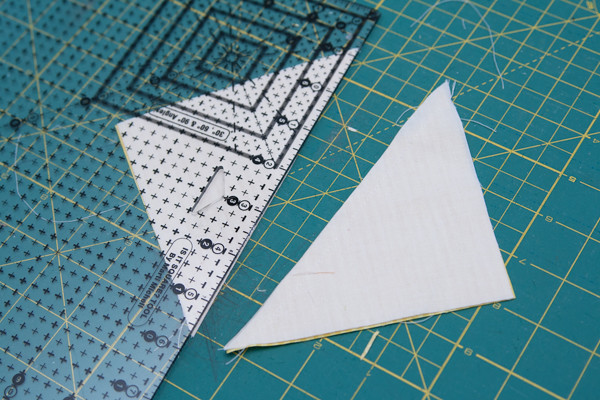
Cut along the line between the 2 seams so you end up with 2
squares.
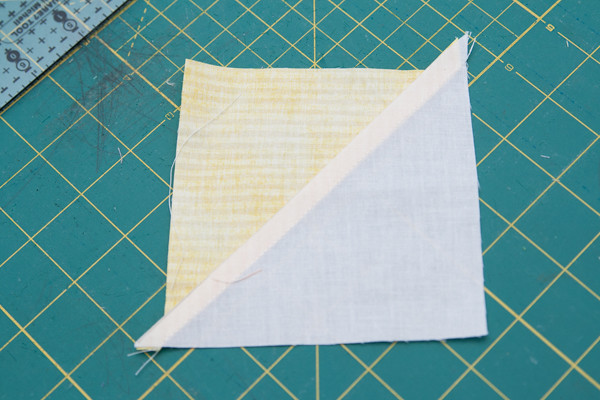
Press the seam away from the white side. Repeat with all the
squares.
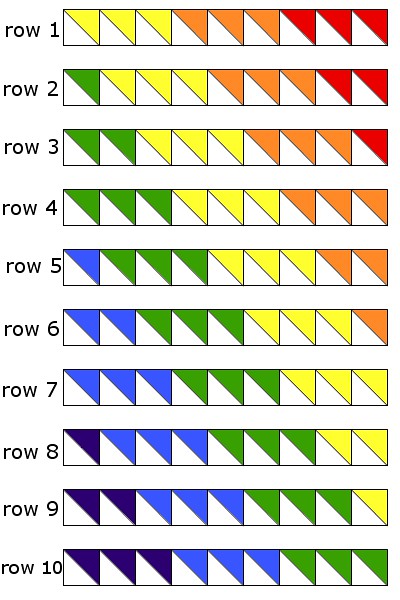
Next you will sew the squares into 10 rows of 9 squares. To sew the squares together, place 2 squares
right sides together with the color side of one square lined up with the white
side of the other. Sew along the side;
continue adding squares until all nine are sewn in a row. Press the seams open. Refer to the drawing below for the color
order of each row.
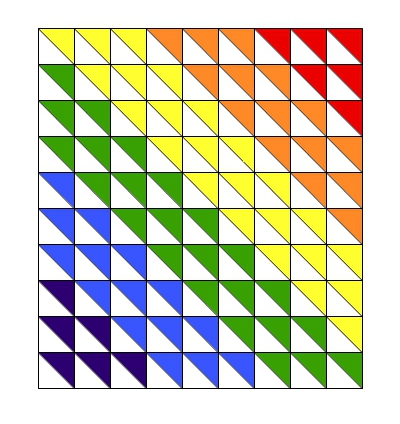
Once you have all the squares sewn into rows, sew the rows
together. Press the seams to one side.
Take the remaining squares and line them up to create the
chevron pattern using three squares of each color. Sew them into two rows like the ones shown in
the drawing below. Then sew the two rows
together. Sew your large rectangles for
the back on either side of the chevron.
Next you will sandwich the batting between the 2 quilt
layers. I like to use a basting spray
to hold everything in place while I quilt. You can find basting sprays in the
quilting section of any fabric store.
Lay your quilt top out face down on the floor. Spray the back of it with a basting
spray. Spread the quilt batting over the
quilt top. Spray more quilt basting spray
on the batting then spread the quilt back face up over the batting.
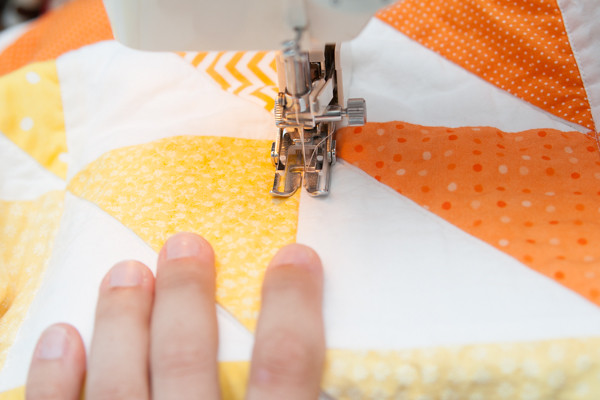
Quilt all three layers together by sewing straight lines
along the vertical and diagonal seams of the quilt. I find that a walking foot is really helpful
for this step, it helps move all the fabric under your sewing machine
foot.
Find more tips on quilting HERE
Find more tips on quilting HERE
After you finish quilting, bind the edges of the quilt. I used a double fold binding that is machine
sewn to the front and hand stitched to the back. You can find more tips on quilt binding HERE.
This comment has been removed by the author.
ReplyDeleteHow do you know how much material of each color to buy? for the rainbow baby quilt?
ReplyDeleteI know you left this comment 7 years ago but a half yard of every color will give you plenty and you'll have left overs. the white get a full yard. good luck
DeleteHi I am new to the world of sewing and have just finished some very simple projects. I plan to make this quilt, and had a quick question, are all seam 1/4"? I am used to 5/8" (but that has been on apparel patterns) I just wanted to make sure before I started.
ReplyDeleteThanks,
Subha
yes, all seams in quilting are 1/4 inch
DeleteThanks so much for sharing this tutorial -- your simple step-by-step directions are very clear, and make this look doable and fun! I put this on my to-make-for-Christmas-gifts list!
ReplyDeleteGretta Hewson
San Marcos Auto Accident Attorneys
나누미-안전놀이터 안전공원 스포츠토토사이트 메이저사이트 추천 국내 최고의 안전놀이터는 다릅니다 메이저 안전 공원에서 확실하게 먹튀검증 사이트를 소개합니다 여러분들의 편안한 안식처 바로 나누미입니다 토토사이트는 당연히 배팅사이트의 메이저사이트를 경험하셔야만 합니다 토토 사이트.
ReplyDelete안전놀이터 | 토토사이트, 놀이터추천, 토토사이트추천, 안전넷, 사설토토추천, 토토 안전공원, 사이트추천, 메이저놀이터 등 보증사이트를 제공합니다. 이제 여러분들은 신세계를 경험하실것입니다 안전놀이터.
ReplyDeleteIn this section of our casino guide, we’ll teach you everything you need to know in order to enjoy playing casino games on the web. It includes a collection of useful articles explaining what online casinos https://thaicasinomaxi.com/casinos/ivip9/ have to offer and how they work. These articles cover the bonuses and rewards you can benefit from online, and there’s also some advice for choosing where to play. There is also a handy online casino FAQ.
ReplyDeleteOnline gambling is perhaps one of the most interesting topics to discuss in a modern context because they are completely ivip9 สมัคร fluid and dynamic, changing on a regular basis to suit the needs and whims of their customers often before the customers even realize they have them.
ReplyDelete도박은 항상 소득원이 아니라 오락으로 여겨져야 하지만, https://yesbet88.name/ 그렇다고 해서 힘들게 번 돈을 버려야 한다는 의미는 아닙니다.
ReplyDeleteแม้ว่าจะไม่ค่อยมีใครรู้เกี่ยวกับต้นกำเนิดของเกมคาสิโนออนไลน์มากนัก https://k9winplay.org/ แต่ก็สามารถพูดได้อย่างแน่นอนว่ามันเกิดขึ้นก่อนปี 2000 ซึ่งตรงกันข้ามกับความเชื่อที่นิยมของคนจำนวนมากที่มีส่วนเกี่ยวข้องในตอนนี้
ReplyDeleteSuch an eye-catching quilt it is. If you are looking for DIY or crafting kits, you can check here some of the best craft kit wholesale over here.
ReplyDeleteJust in time! This resource is what I am needing right now. Thank you for sharing. https://www.dagwoodsvacservices.ca/
ReplyDeleteA Rainbow Baby Quilt is a deeply meaningful heirloom, crafted to celebrate the arrival of a baby born after a previous pregnancy loss. Each colorful arc in the rainbow symbolizes hope, healing, and the joyful light that follows a storm of grief. For parents navigating this journey, every decision is made with care, much like how an investor might use a comprehensive crypto profit calculator to plan for a secure future. These quilts are not just bedding; they are tangible expressions of love and resilience. The vibrant fabrics are carefully chosen and stitched together to create a comforting embrace. They serve as a beautiful reminder of a family's strength and the precious nature of this new life, making them a cherished keepsake for generations to come.
ReplyDeleteStep into luxury and unbeatable comfort with the Mackage Puffer Jacket . Its standout design, bold contours, and superior insulation make it the ultimate statement piece for those who refuse to blend in.
ReplyDelete